MikeLTour61
-
Posts
100 -
Joined
-
Last visited
-
Days Won
7
Content Type
Profiles
Forums
Events
Gallery
Everything posted by MikeLTour61
-
I think this will be the last update for this thread. I just wanted to thank everyone for helping out this novice boatbuilder... Happy Days is a better boat because of it. After using the boat a few times, I realized that it had some bad characteristics in the ride department. My boat, when loaded with three people - 2 sitting on the drivers seat and one on the front of the console - had a hard time getting out of the hole and up on plane. It eventually made it but it was slow. Once on step, it porpoised and pounded if the boat was moving above 24 mph. It was also hard to maintain one speed as the boat wanted to plow or fly across the water... there was no middle ground - I was always tweaking the throttle. I'm not one to use band-aids to cover up issues but I found something that might help fellow Marissa owners. Not wanting to spend $500+ for trim tabs, I bought a set of Smart Tabs for about $130.00. These are spring-loaded trim tab-looking devices that mount on the transom. They made a huge improvement in all the problem areas mentioned above. I was amazed. If your Marrissa has any of the bad habits that I mention above, you might want to consider the Smart Tabs: http://nauticusinc.com/smart_tabsSX_automatic_trim_tabs.htm
-
Thanks for the kind words everyone. I don't have any underway pictures because all my picture-takers were on board. Sorry about that. I'll post some performance numbers after the engine is broken in. As of now, it planes at about 4100 RPM and that's where I like to run it. Haven't really run wide open yet. I'll be running mainly on Hartwell and Keowee, Chick.
-
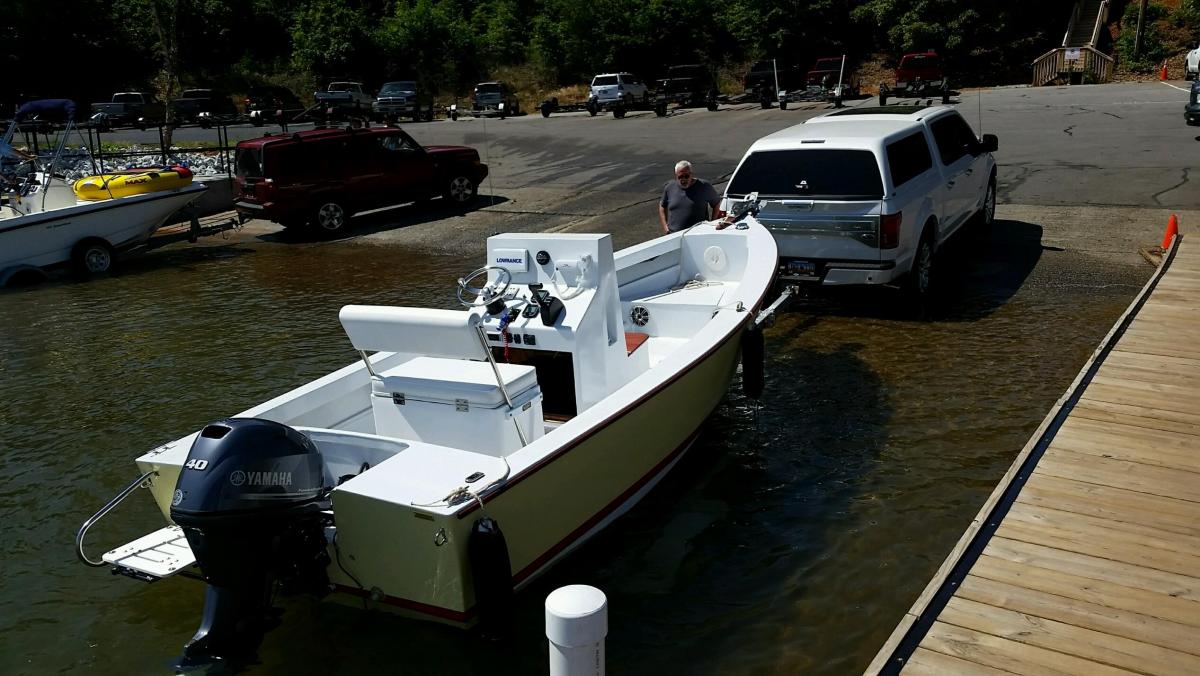
So it's been quite a while since my last post. I have reduced my to-do list to a few items and went out in the boat twice last weekend. I'm still getting to know the boat and the best way to run but it sure was fun to finally get out there. Here are some pictures of the launching:


-
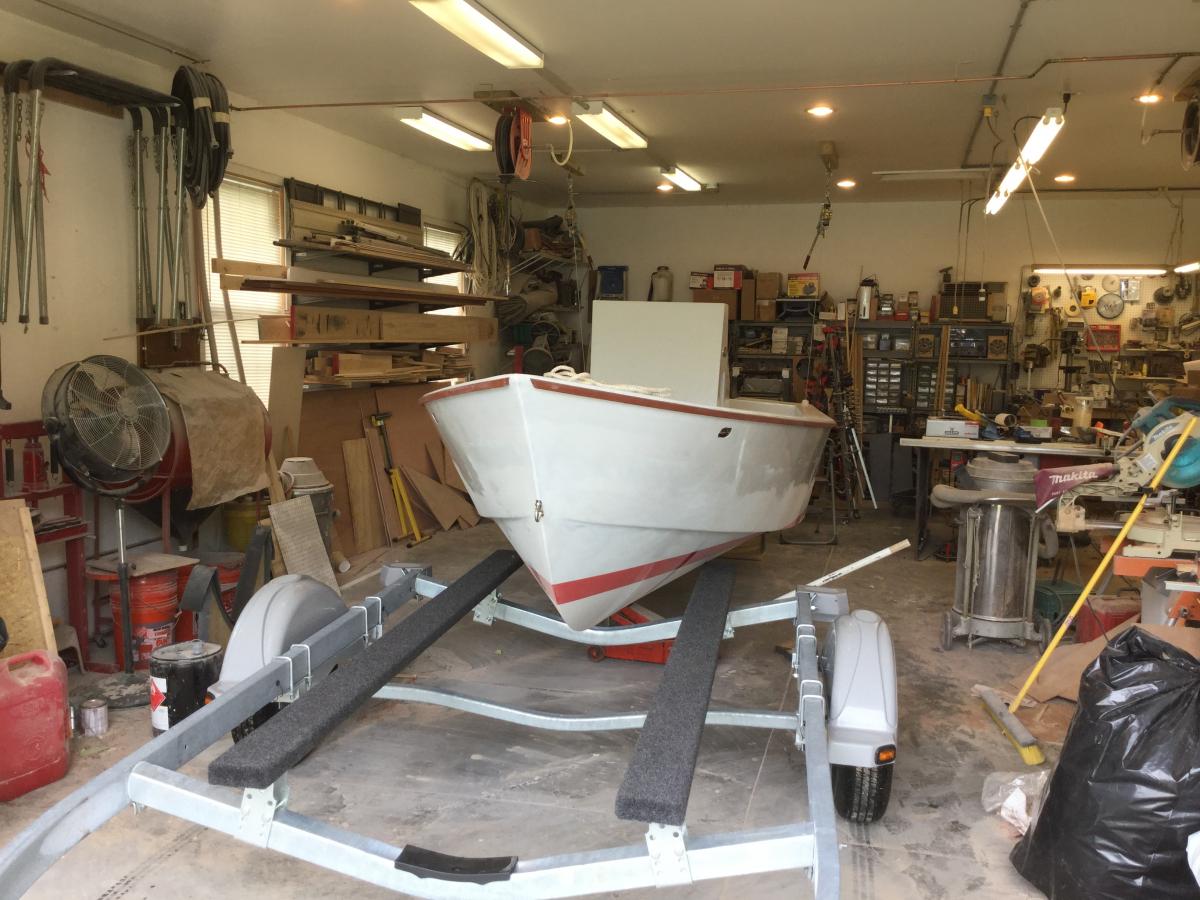
Thanks Dale. Latest update: I'm pretty much done with the wiring with the exception of the engine harness. I still need to set up the steering but I need the motor installed to do that. I got the boat on the trailer and the hull painted over the weekend. Did lots of other stuff too. The boat is now ready for the engine and I'm hoping to get it installed this week. Photos:


-
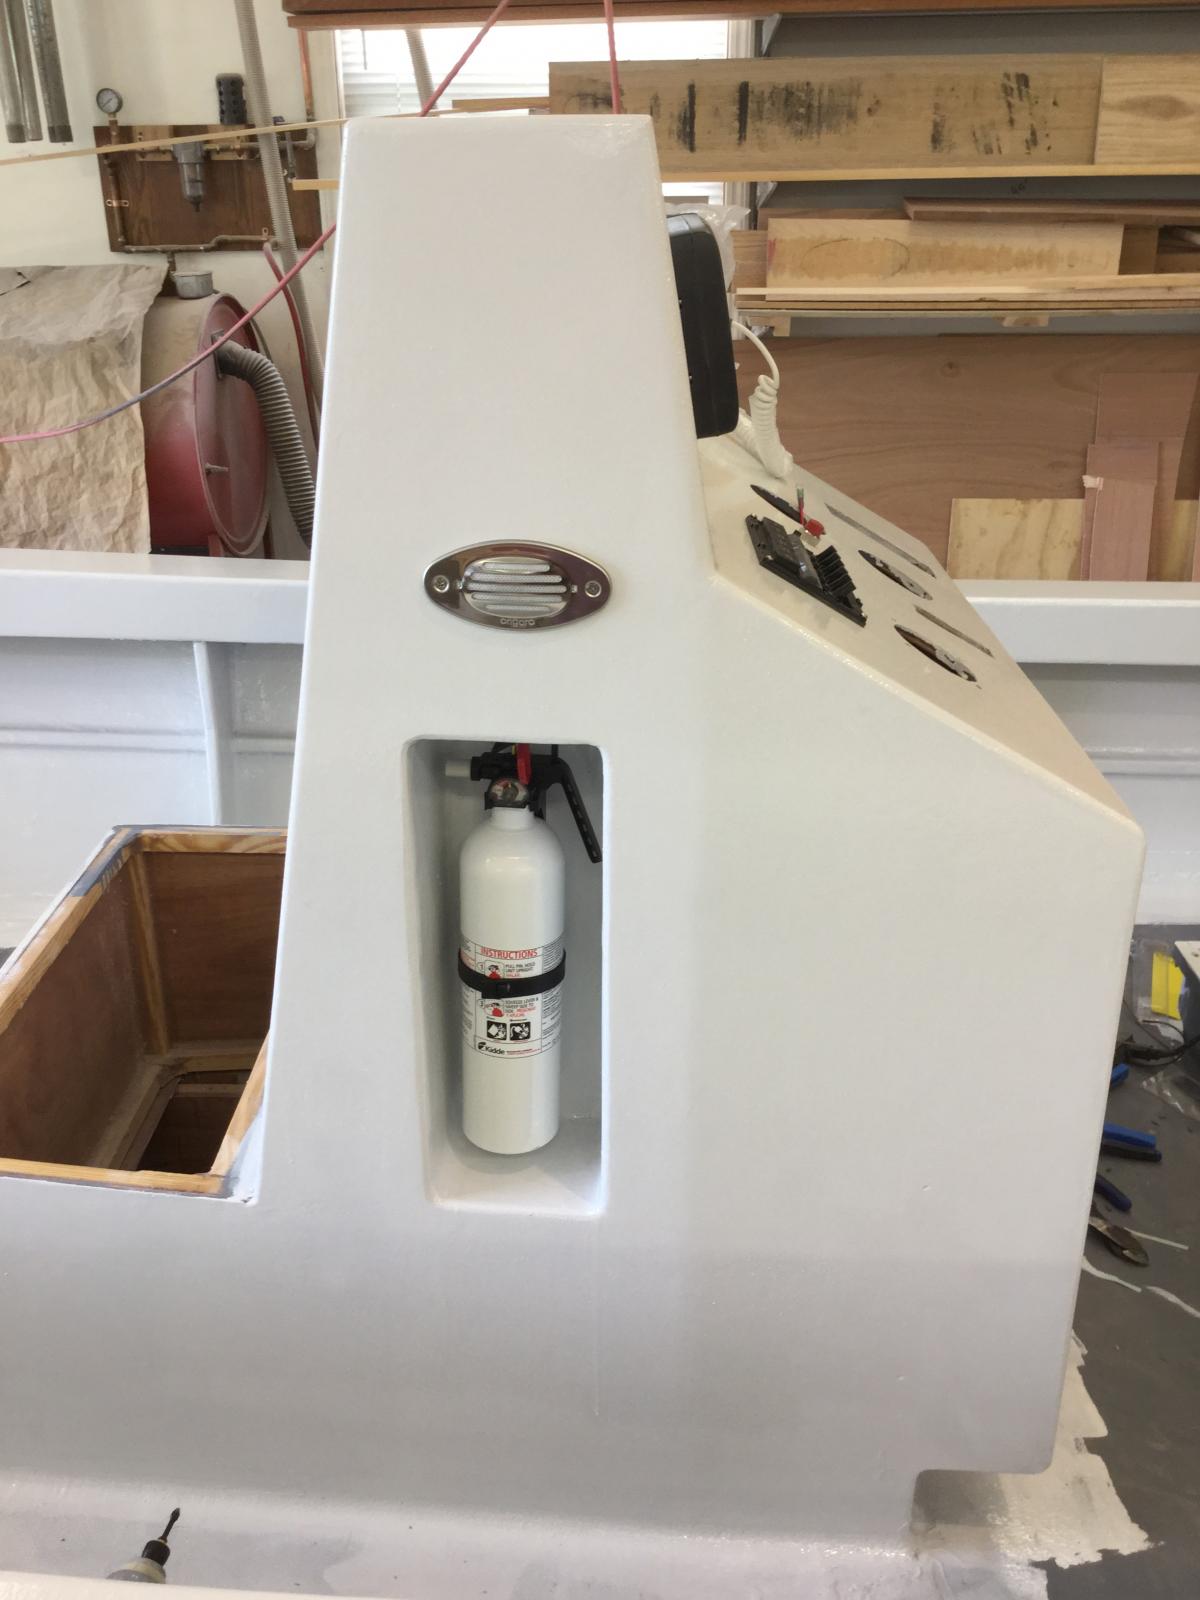
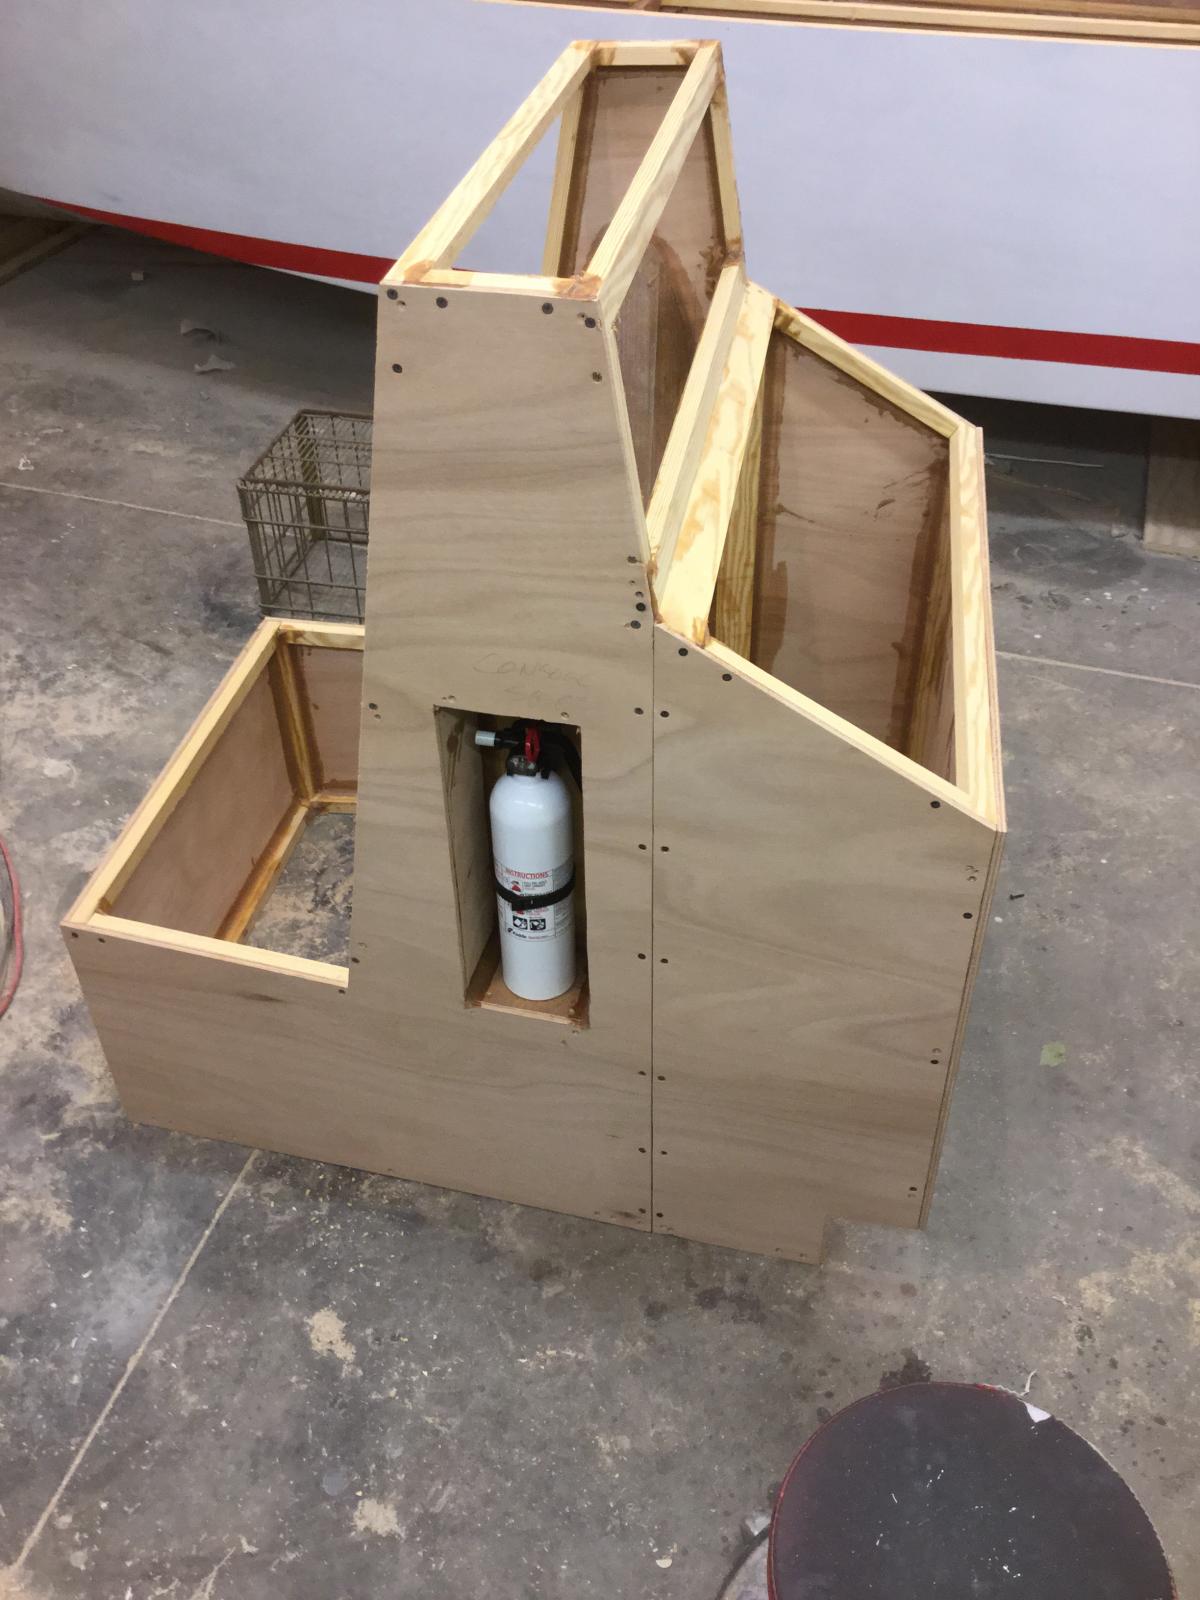
Thanks Miyot. I can't take credit for the toe kick, I just built the boat from the kit that I bought from Graham. I mostly stuck to the plan and when I modified something, I was very careful. The fire extinguisher box was my idea and I think it was a good one.
-
Another update... not too much to show since a lot of the work is electrical. I got the cockpit painted except for the sole which will get non-skid. The side decks are finished too.


-
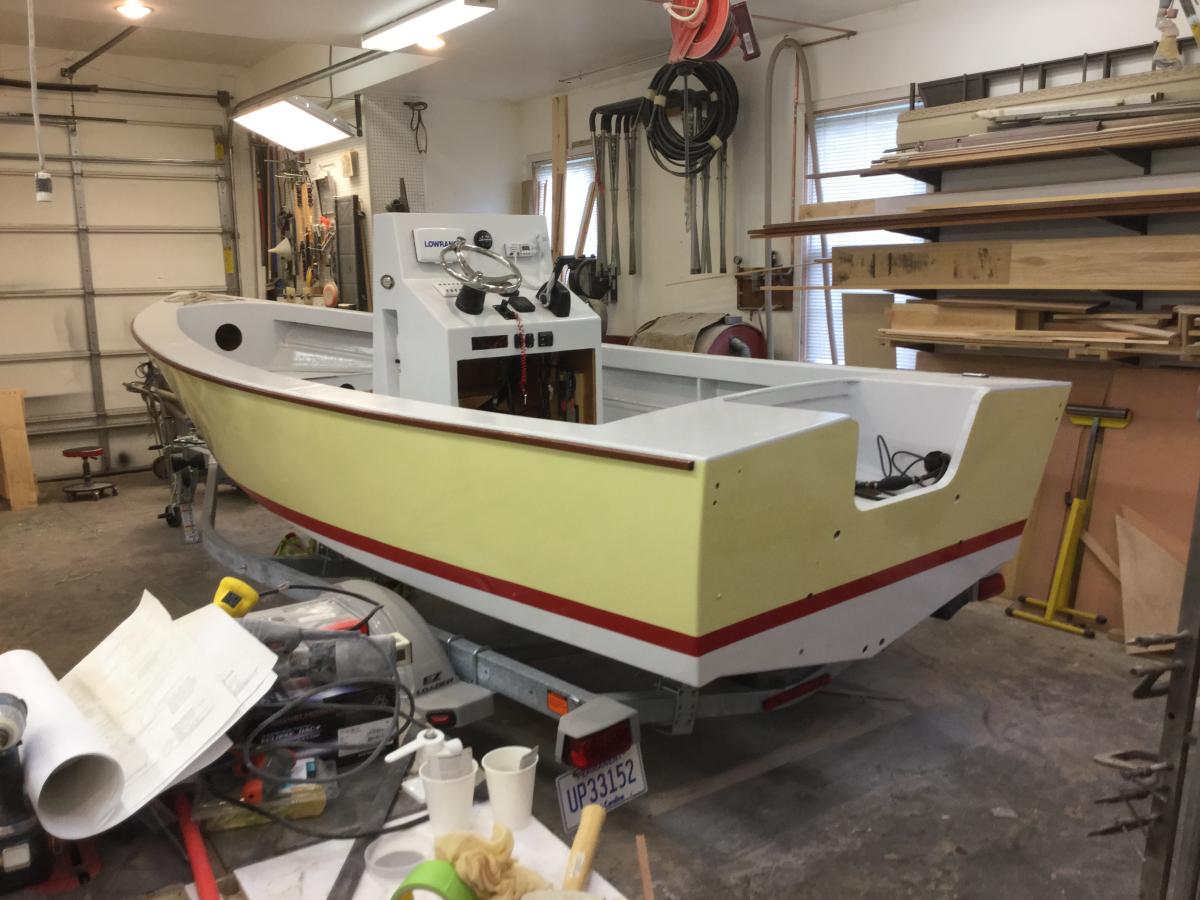
Latest update: The console is completed and installed. All the large-gauge wire has been run to the switch, main fuse and buss bars. I went with 4 ga. since per my dealer's suggestion. I also ran the engine harness, and steering tubing through the chase. I got the rub rails made and installed. I originally planed and tried to use white oak but it was very hard to bend around the bow curve. Mahogany is softer and seems to bend slightly better so that's what I used. I'll install SS rub rail next winter... I want to go boating now! I'll also make the doors for the console and aft lockers when it's cold out. Since these areas will be closed, I'm not painting them. I got the first coat of primer on all but the cockpit sole and swim platform. I have one more piece to make and install before painting the sole - the seat support. Here's a few pictures:


-
Thanks Graham! Makes sense.
-
I was planning on putting the battery in the starboard side aft locker. You don't happen to know the size of the wire used do you?
-
Thanks for the info Russell! I'm starting work on the electrical system and I'm wondering what size cable the 40 hp Yamaha starter will need. I read in a couple of places where where 4 AWG will suffice but I don't think that's correct... seems small. Thanks, in advance
-
Thanks for your comments! I thought about doing a dual console with this boat but decided against it since this is the first boat I have built and I didn't have any boatbuilding experience when I started. I think a dual console would work well with this boat except the bow might be a little high... not sure about that yet.
-
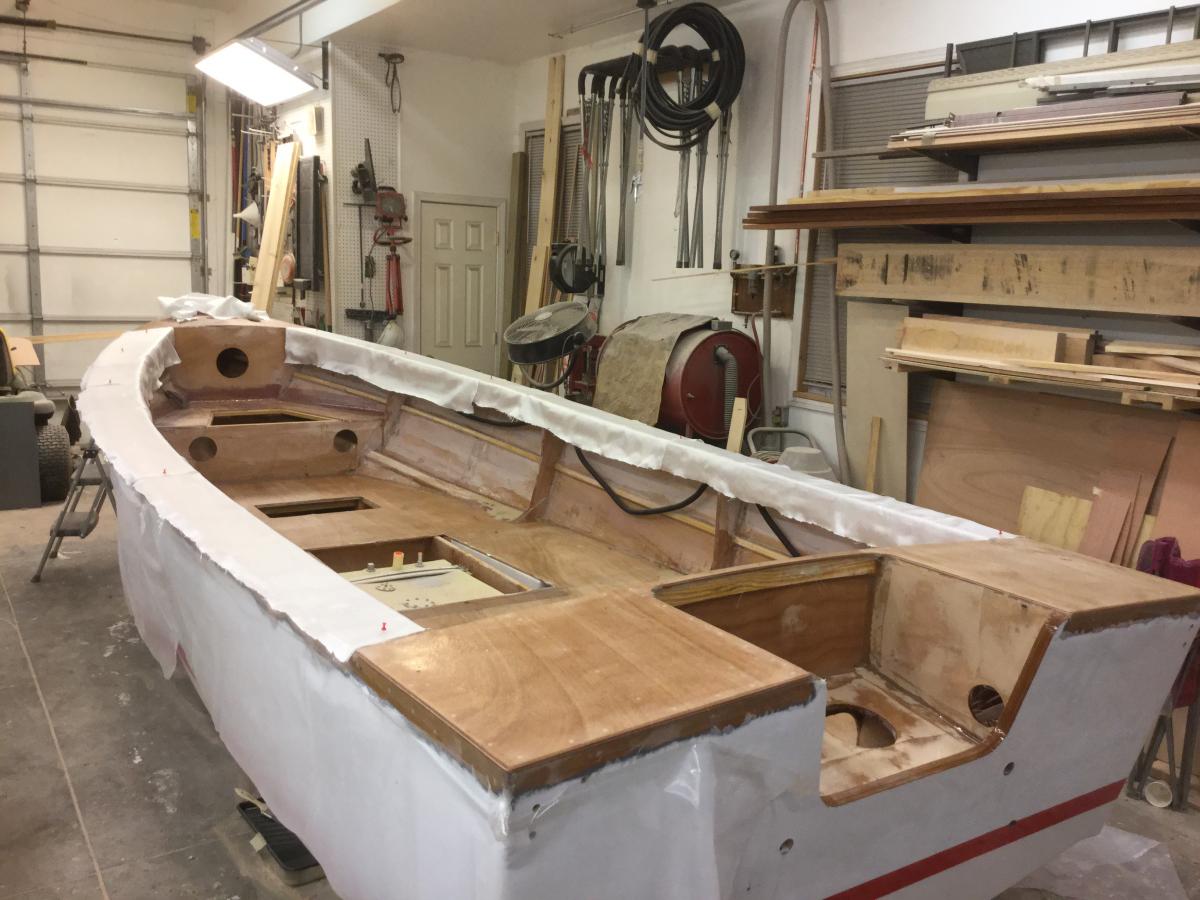
It's been a while since my last update but I've been making good progress. Cockpit deck has been glassed. Fore, side and aft decks have been installed and glassed. As I mentioned earlier, I had to re-make the foredeck pieces due to the angle of my stem being a little low. So far the glassed areas that are still accessible have only one or two coats of epoxy on them. I'll be having an epoxy party one of these days... maybe get some help. Things would go a lot quicker if I didn't have to stop and mix a batch every 15 minutes I got some 5/4 white oak to use on for the rub rails but at 1" it's very hard to bend. Even at 3/4 x 1 it's pretty bad. I don't want to steam bend so I think I'll end up laminating the bendy parts like I did on the inwhale. Center console progressing very well. I have most of the holes cut for the components I'll be installing. I'm using 4 oz. glass on it instead of the 10 oz. I think it will be fine since there's not really any flexing or stress in that area. I'll use 10 oz. tape on the console to deck fillet though. I think I'll hold off on the mahogany dash until next winter. I want to get out and enjoy it this summer and don't want to rush it. It will also give me a chance to decide if I like the dashboard layout. It's really starting to look like a boat, I think. I still have lots to do but I'll bet we'll be boating by July 4th.... Labor day at the latest.


-
You've built a beautiful boat, that's for sure! How does she go? What horsepower is the engine? If you have pictures of the construction, I'd like to see those too. Mike
-
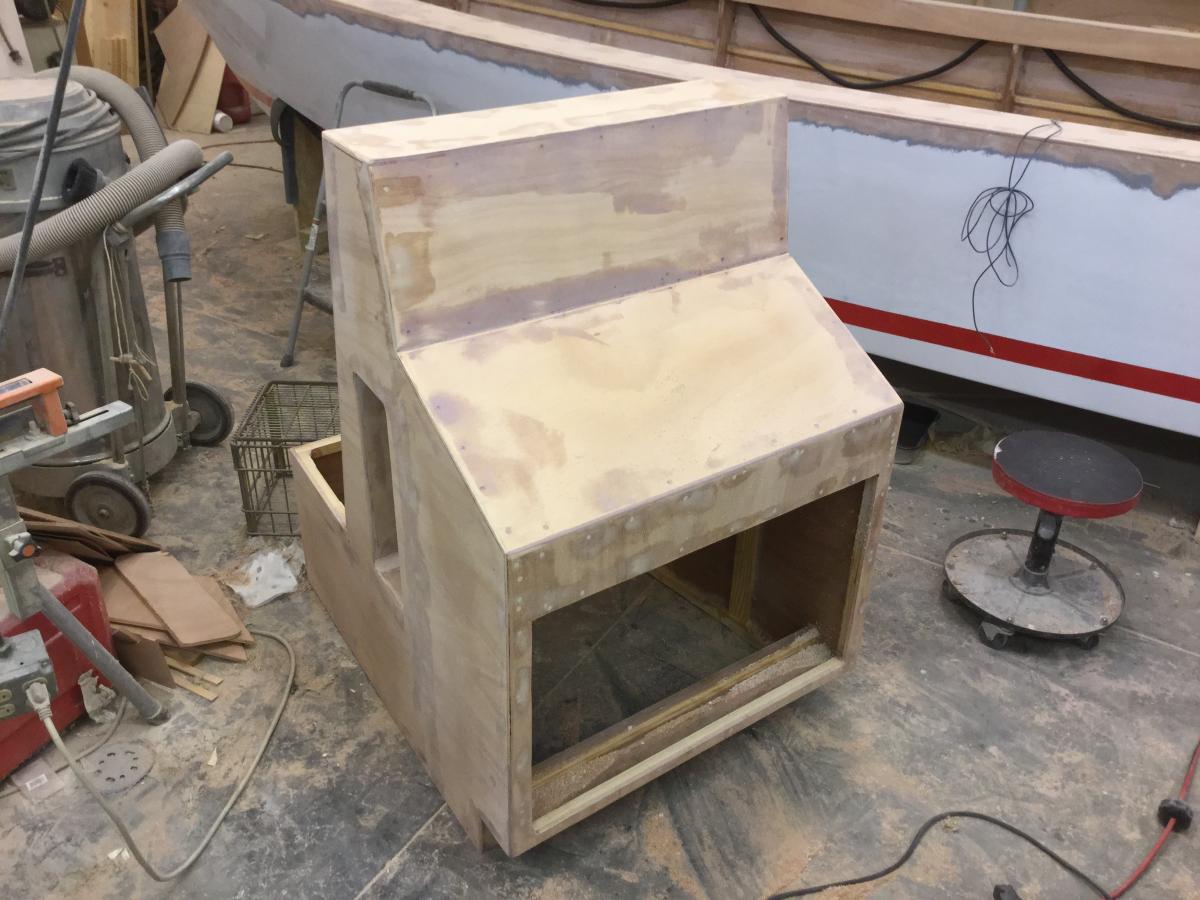
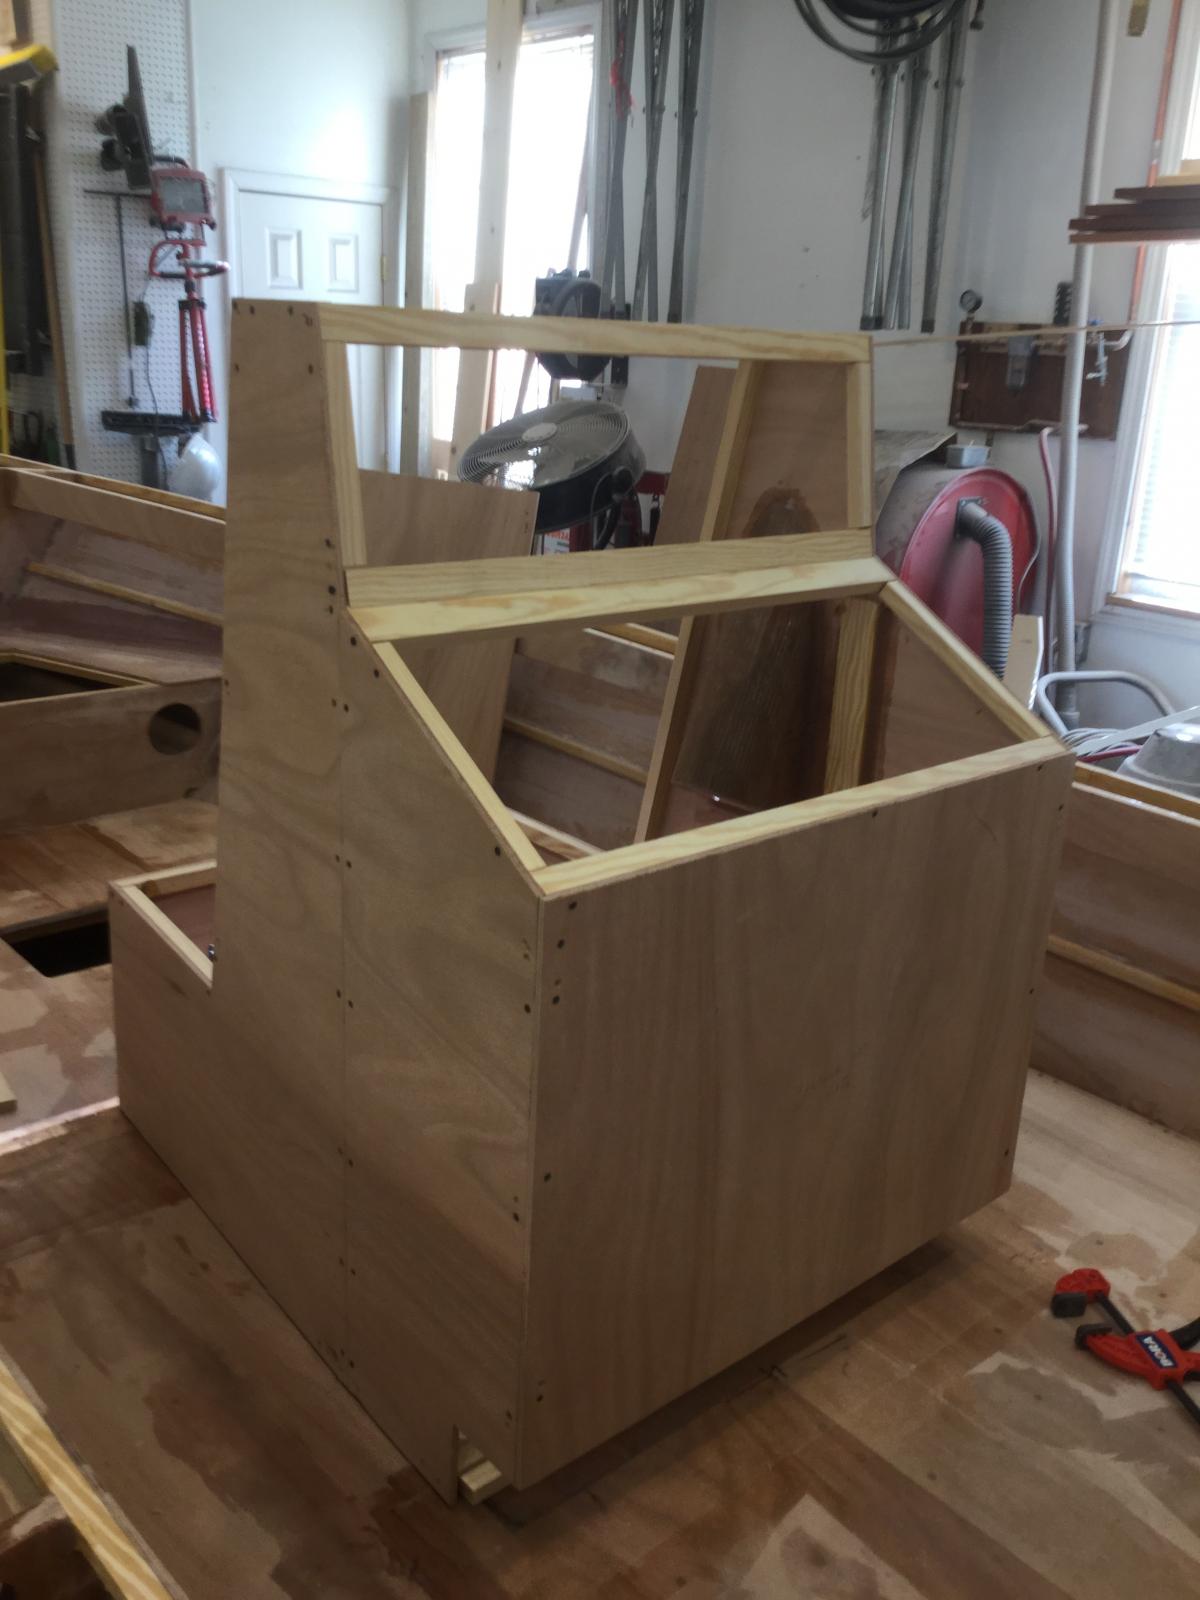
Got a few things done over the weekend, mostly on the center console. Finally placed it in the boat to verify it will fit, etc.. pulled it back out to finish work on it. I think I'll complete console glassing and fairing with it out of the boat since it's pretty tight with it installed. I replaced the temporary framing of the console with the permanent yellow pine frame. I put a fire extinguisher box on the side of the port side of the console. I don't know where most people are putting them but I like mine to be very handy. I finally installed the aft decks installed and got the undersides of the side decks epoxied. I'll install those this week, I think. I've decided to put the battery, charger and switch in the port aft locker. Having the battery sitting inches above my gas tank and inches below the fuel filler makes me nervous. I would have liked to put it on the starboard side but the fuel filter will be there too. I want to make maintenance as easy as possible so the port side seemed like the best spot. Russell's boat has what looks like mahogany installed on his dash, instrument panel, front seat and side deck steps. I like the look so I went out and got 30 b.f. of some real nice stuff. That should be plenty to do what I want with some left over. I'm not sure if I'll replace the plywood dash with 3/4" thick solid mahogany or if I should mill the mahogany down to 1/2" and have the 3/8" ply underneath. I can't go thinner than 1/2" on the mahogany because I plan to use 1/4" dowels for joining the separate boards. Russell, if you're listening, do you have any thoughts? Did you fill the grain prior to finishing? It looks nice and shiny.


-
Thanks Lotus!
-

Marissa (eco 18) went to Europe !! photos of build
MikeLTour61 replied to Lotus's topic in B & B Yachts Forum
Lotus, Chick brought up a good point about the design of the fuel filler being inside the boat (standard design). Since you built your own console and made lots of other modifications, I was wondering where you put your fuel filler and vent. -
I thought it was strange that the fuel fill was inside the boat but that's the design. I had thought about moving it out to the gunwale while I was thinking about making her a dual-console instead of a cc but I just don't have the experience necessary to go off the reservation. I know one thing, I'll be paying attention at the gas pump, that's for sure! Hopefully, with the 40 hp Yamaha, I'll only have to fill up a couple of times/season. I don't see the gas filler on Lotus' boat. I wonder where he put it.... I'll ask.
-
Mid-week update: I got fuel filler shape installed in the console last night. I think this is a significant step because as far as I know, that's the last thing to do before installing the console in the boat. That's my plan this weekend... permanently install the console. I also plan to get the aft, side and foredecks installed. I have to make a new foredeck since my Marrissa is a little longer than it's supposed to be (due to my inexperience) and that length is all forward of frame 1 A couple of pics:


-
Thanks for including me in your group Chick. I wish I had more time so I could get more involved. Between work and life, I don't have too much time left over. It would be great to have you down to check out my build sometime. Just let me know when you and the Dons are ready. Lotus, I would have thought you'd be too busy fishing to write any more. Thanks for all your input and help. Enjoy Piranha and the beautiful area you get to boat in! Mike
-
Latest update: Cockpit sole is installed. The console was too short or the hole in the sole was too big.. either way, Graham saw it coming and it's now fixed. Unfortunately, I think my hopes to have the fuel tank removable have been dashed. Lots of other stuff going on too. I've been working on the console and will install on the boat within a week or two. I discovered a great deal on a chartplotter at West Marine, of all places. I'm going to pick that up today. I made the shape for the gas filler without too much issue. I'll install in the console tonight and post more pics soon.


-
Marissa (eco 18) went to Europe !! photos of build
MikeLTour61 replied to Lotus's topic in B & B Yachts Forum
Lotus, What a great job you've done on PIRANHA. I was a little skeptical about raising the gunwales but it really looks great. You kept the beautiful sheer line but added safety. Where you boat, you HAVE to be ready for anything and it looks like you are. I love the blue water. You don't see that in the U.S. unless you're about 30 miles offshore and I miss it... especially since I mostly boat in lakes now. -
There's a place in Greenville called Contour South Inc. Foam is all they deal with. I told the guy what I was doing and he got me the right stuff. Address: 603 S Old Piedmont Hwy, Greenville, SC 29611 Phone: (864) 422-0207 I can't recall the exact type of foam it was but it wasn't cheap: 1 piece of 1" and 1 of 2" = $159.00 BUT it's easy to work on the bandsaw and 'fuel-proof' The sheets were 48" by about 115"... something like that. Enough to do the boat with a little left to make floaties or something. About boating with gas in the bilge, yeah, I was VERY lucky! ... and stupid. You're right, gas does not burn, the vapors do. I had vapor detectors in the bilge (Xintex system) and they never went off so I was probably below the LEL. That's not to say there wasn't a pocket of highly flammable fumes somewhere down there. I was very careful not to use any electrical devices that were not ignition protected and ran home with the engine cover open but... yeah, stupid.
-
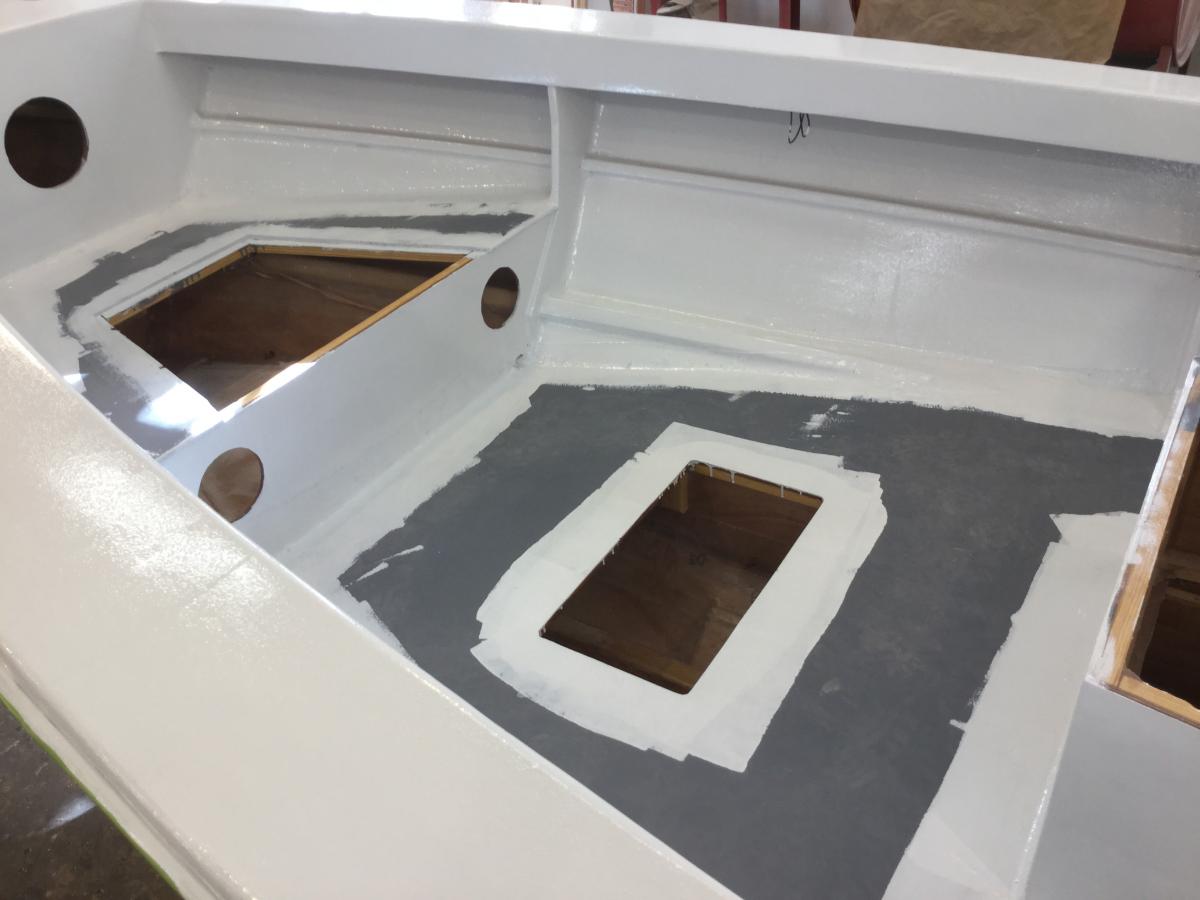
I don't know if my smartness will kick in before my dumbness kills me. Latest updates: Underside of cockpit soles epoxied. Fuel tank installed and secured. This was mounted in such a way to facilitate removal if necessary. All foam glued (I started out using contact cement - It works but I DO NOT recommend it! Use the 3M stuff I mentioned earlier) Foam laid out on soles, ready for gluing. 1/4" wedges installed to prevent pooling in cockpit corners per Graham's instructions Getting ready to cut ANOTHER deck plate to access the lower swim platform fastener when it is installed. I should have planned this better. Also included is a picture of myself... sort of. Life's been rough on me.


-
Thanks Russell. Too bad about the pink stuff. It's good that you epoxied the edges but what's really good is that we're using plastic tanks. They're pretty much impervious to anything except chafing and ice picks Thanks for the advice to use the plastic fuel line. I would have thought rubber that was special for ethanol would be better but I guess not. I know that special rubber hose is a about $5 to $7 per foot so plastic surely would be cheaper. I had an aluminum tank fail on my last boat, which I thought couldn't happen - rotted right through! I started out with a full tank (65 gallons) one day and started smelling gas after a while but couldn't find any problems. A little while later I had about 30 gallons of gas mixed in with whatever water, etc. was in the bilge. That was the first time I ever considered calling PON-PON from my own boat... and hopefully the last. Instead, I threw caution to the wind, turned on the bilge pump and blower and hauled a55 back to port. Stupid... I know, I know. That leak is the reason I'm being so cautious about the fuel and flotation systems. When I'm on the water it seems I'll do anything before asking for help. I'm not one to ask for directions either
-
I was in the Navy for 10 years and they preach "NEVER give up the ship!" Of course, boating in a lake or inshore is a lot different than being 1000 miles East of Bermuda. I hope to never need any of the safety devices that I own and I hope that the training and studying takes over if I do. ALL my boats get the USCG Auxiliary sticker or I don't go out. Back to the fun stuff... I finally found something that sticks reliably to the foam and the epoxy on the underside of the sole. 3M makes this super strong spray adhesive "90" and it sticks like crazy. It's especially for this type of foam and they sell it at Home Depot. Within a couple of hours I had all the foam carved up, stuck together and ready to go. I didn't soak the glued seam in gas. If the $#1t hits the fan, I'm not looking to save the boat, just have something to hang on to until the USCG arrives (hopefully). I'll post the exciting pictures of my foam carving soon. Thanks to everyone for your input and help. I wouldn't want to try and do this without all the experience you guys bring to the table! Mike