PadrePoint
-
Posts
809 -
Joined
-
Last visited
-
Days Won
64
Content Type
Profiles
Forums
Events
Gallery
Everything posted by PadrePoint
-
My phone cranked this out… no prompting.
-

Core Sound 15 #162 — Building the “Norma T”
PadrePoint replied to PadrePoint's topic in B & B Yachts Forum
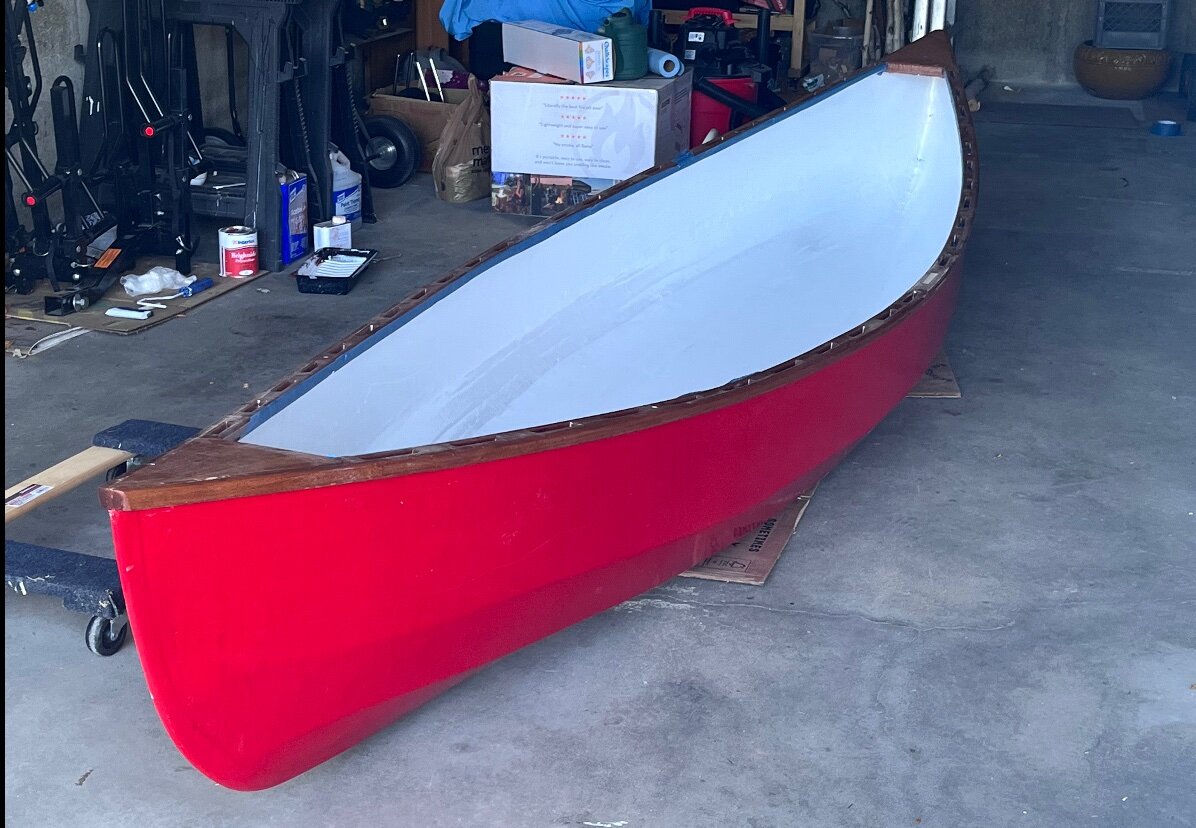
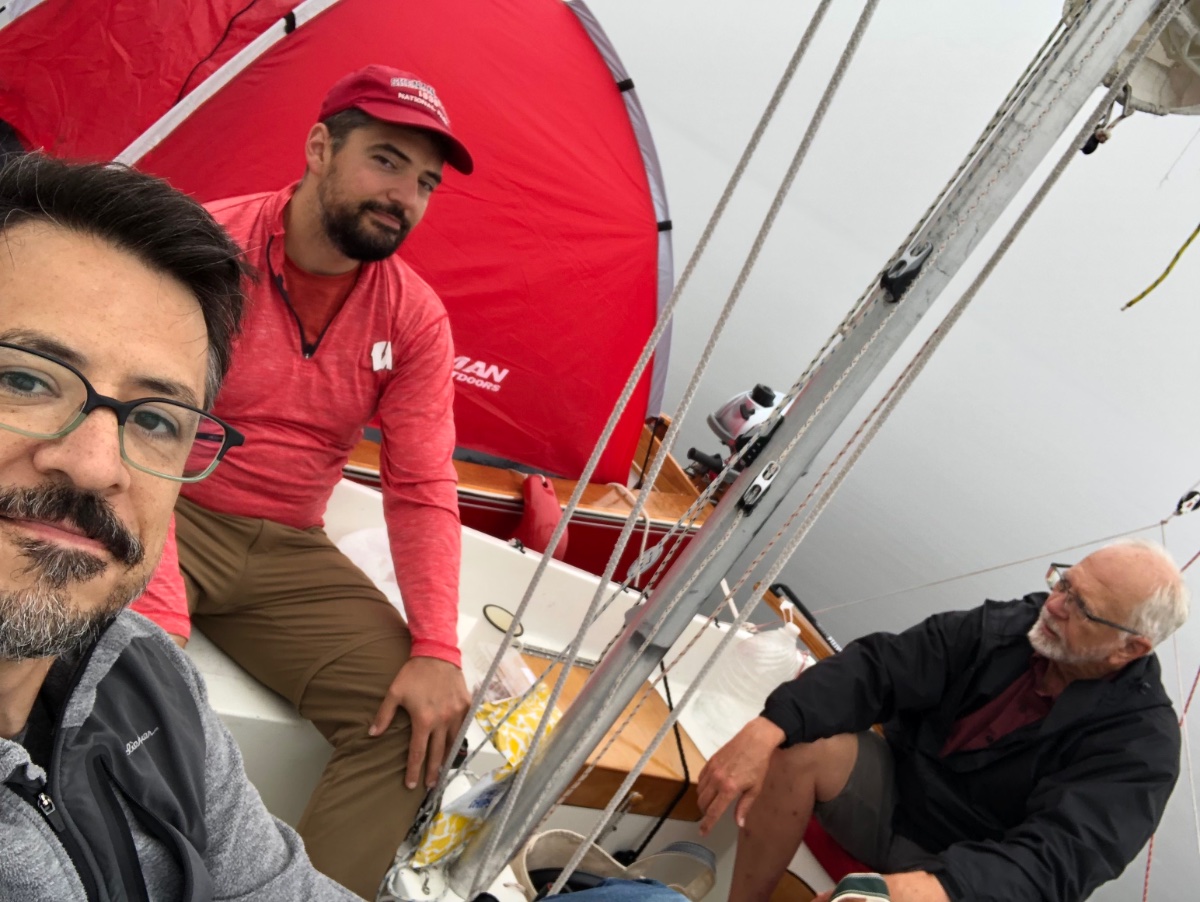
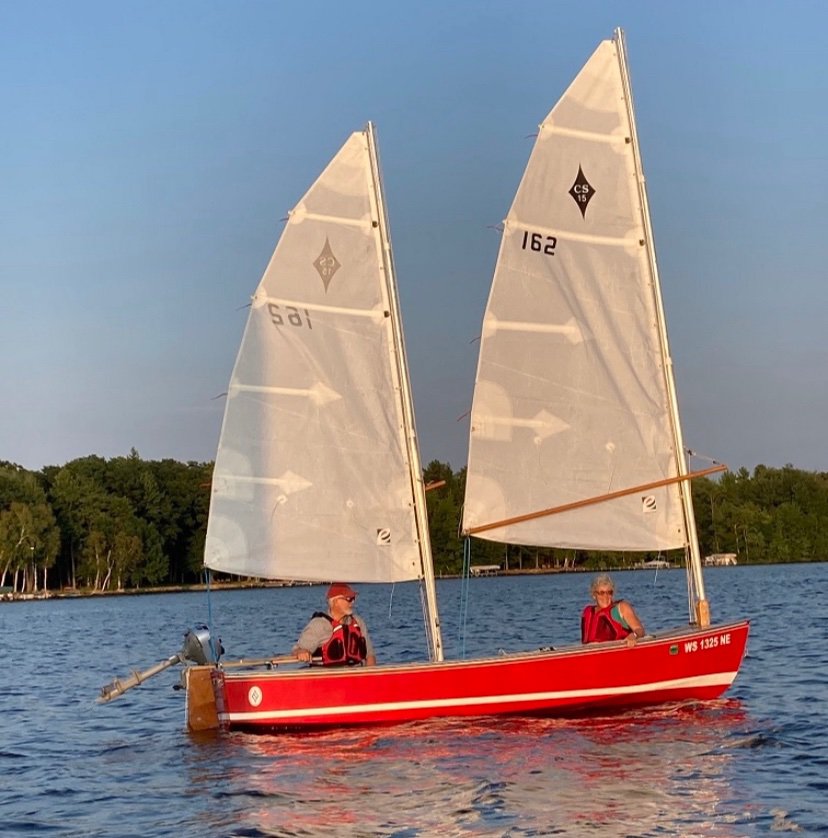
Norma T and Joe are getting a new “grand-canoe” made by my son and painted with the same red and white Interlux Brightsides that I used for both of my recent boat-builds. It was fun to supply him with some of the materials and paint for his build. My younger son started his 17’ plywood canoe last year, building it from plans. The epoxy he used is extra resin (and wood dust) I got from B&B for my ski-boat build and the glass material is from what I had left over from my high school build: an 11’ ski-boat that I built in 1968. My dad (Joe) got a full roll of fiberglass from somewhere and I’ve held onto it since then, waiting to build the ski-boat that I finally completed this summer. I think of it as a “partner” to Norma T, my Core Sound 15 that is named for my mom. I then named the ski-boat for my dad: Joe. (My kids and grand kids thus have a grandparent legacy and memory in these two boats.) Last weekend, I gave my son the white paint I was going to use next spring on Norma T‘s interior (intending to put another layer on the seats and to cover some blemishes occurring for various reasons.). He just finished painting the inside of his canoe today. He’s been hand-caning the seats and will install them along with the thwarts. (I like the look; I’m rather partial to the colors, what can I say?) Do you s’pose he’ll add a white stripe? And just because I’m proud of the woodworking of both my sons, this is a shot from a couple weeks ago of the canoe my older son recently completed and this weekend the paddles that he has hand-carved. Yep, that’s a cribbage board on one paddle . All this stuff went to Minnesota’s Boundary Waters in September. This is a shot my two sons the morning after camping overnight on the lake using both of the sailboats. I’m writing this post while watching the Green Bay Packers trail behind the Detroit Lions, putting off the last part of my “third boat build”, new butcher block counters in the kitchen. (Sort of a trade to my wife for giving me her garage space to build my boats .) All I need to do is take the old sink and countertops out and put the new ones in place. Easy Peasy, right? . Maybe I can think of another distraction when the game finishes.


-
I’ve done that with my CS15 and the mizzen thwart served as a nice seat for rowing.
-
2022 Messabout: as produced by my phone (I know, the music is rather dramatic. ) And, I had the little video below pop up on my phone a few days ago. It is from some of my photos and video clips of our Family Camp this summer. We brought my two new red boats, our four kayaks (two were new kid-sized kayaks), my son’s cedar strip canoe, some floaties, and my daughter’s inflatable paddle board out to the Lake DuBay beach. The red boats are Norma T (my CS15 built in 2020) and Joe (my Glen-L Stiletto design built in 2021-22 from plans that I bought in 1984… no, it isn’t a B&B design BUT I bought the wood for it from B&B.) This was the first time we tried skiing behind Joe… and my boys had not been on a waterski for maybe 15 years or so. Success!! The grandkids tried out being pulled behind the ski-boat in our large Mega-tube and they couldn’t get enough of it. I thought it is funny that the main photo for the video is B&B’s canoe seat sitting in the sand. I built it from the plans I downloaded from the B&B website. We actually use it in the back of the ski boat when more than two are in the boat. Family Camp was my family’s introduction to Joe. As the grandkids get older, it’s going to provide a lot of boating fun. We placed Bruce — the red mast float — atop Norma T‘s mizzen mast for the first time, having the whole family around. That’s my brother’s name (he died some years ago, so it’s a fun reminder to add to my parent’s names on my two red boats: Norma T and Joe.)
-
-
-
https://photos.app.goo.gl/Bmei1HsL3MUXrFPG7
-
I’m not sure I’ve seen an “easy solution” to make a tent for the Core Sound. I’ll be interested see people’s efforts. I started working on the project… the best I could come up with for my Core Sound 15 (Norma T) is: Kind of a “mixed review” but I shall work with the set up some more. This is a thread I made: https://messing-about.com/forums/topic/12937-making-a-tent-for-a-sailboat/

-
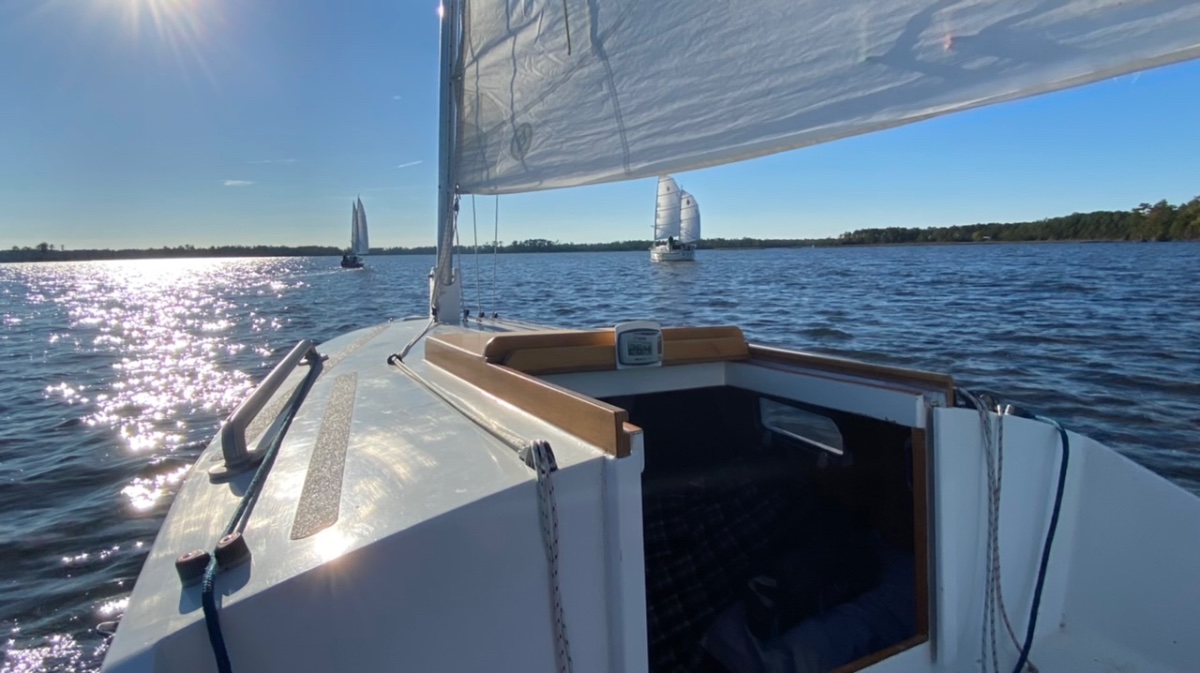
I enjoyed watching the 16 footer dancing around the big boats. See you tomorrow. Feel free to try out my CS17 mk3 — Avocet. Some shots today with 4 of us sailing around. Jay’s newly built Matthew Flinders, JC’s FIRST sail in a Core Sound 17 he just bought, Amos’ Core Sound 20 mk3… we were out about 3-4 hours.


-
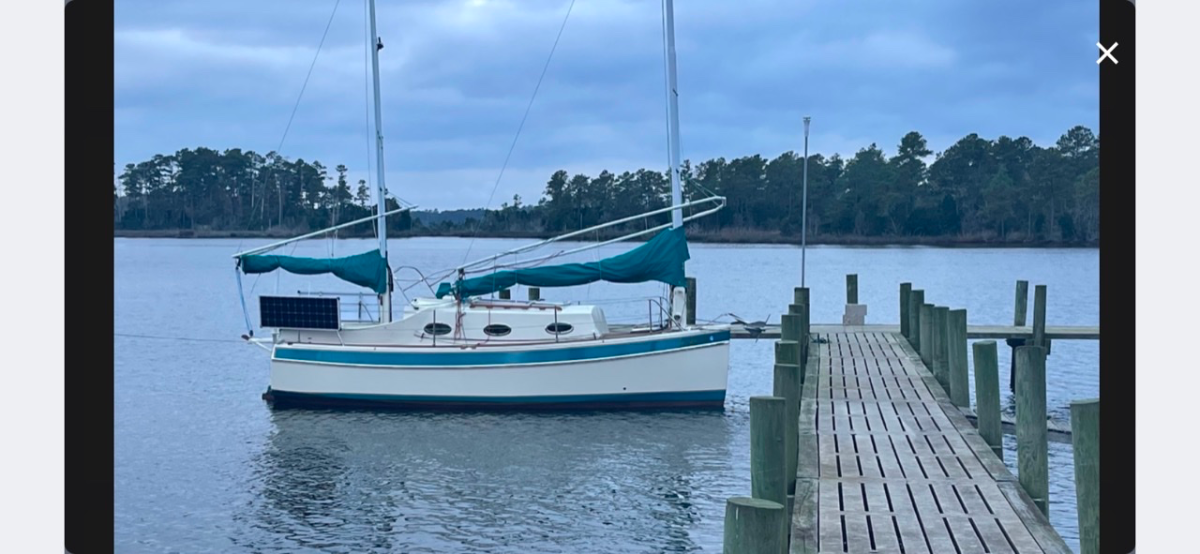
Yup, locked and loaded for a morning start tomorrow… via Columbus, Ohio. Information tidbit… this van has brought to my home in Wisconsin three boats from the B&B workshop… well, at least the wood and pieces for three boats. And, my van brought home this already-built boat last year. I wonder what it will bring next. Good times indeed.

-
I plan to be there from Thursday (afternoon?) and leaving at some point on Monday. I have more flexibility this year. I could possibly do this.
-
Excellent!!
-
Just because I leave for the 2022 Messabout next week, here are three videos I put together on last year’s event: (I’m not a good video maker but they kinda illustrate elements of the friendly get together.) https://youtu.be/PTsDgBOloAM https://youtu.be/rqev3Fri_bI https://youtu.be/5fJr3POM0no Southwest Wisconsin woke up to snow on the ground today. Thought I should check forecasts for this year’s Messabout weekend. Nice!!

-
And One More Video Waiting for Sleep to Take Over Some interesting comments about half way about Roger Barnes
-
A Couple Australia Boys Were at it Again Another nicely done video I watched this summer (Gira Gira and his CS17 is one of the boats). This video popped up on my YouTube feed this evening. I’ll watch it again when I head to bed. It’s about 30 minutes
-
Apostle Islands — Lake Superior (Wisconsin) I watched this video this summer. Some years ago, my younger son and I took a three-day sailboat training class on a 35’ boat from Superior Charters: https://www.superiorcharters.com/sailing-courses/bareboat-sailor-certification-course/ We sailed in some of the areas explored in the video below. I enjoyed seeing the sights and listening to the commentary. Since we covered a lot of water over the three days many of the places are familiar. For instance, our overnight was on Stockton Island on the other side of the little isthmus. Once, our instructor, a friendly older gentleman with lots of years of sailing, gave my son and me a question sort of like: “Why do I know that when we get to this certain point that the winds and waves will shift and we’ll need to make (some kind of) adjustments in the sail controls?” We wondered about it and ventured some responses. I LOVED his answer and frequently use it when my son and I are together… “Because I’m Captain Dave!“ That was exactly the right answer. The three-day course allowed us to rent up to a 35’ sailboat at Superior Charters but I just couldn’t make myself pay what is needed for a charter. I will have to watch this and other Great Lakes videos a few times to bolster my courage to sail in the Apostle Islands area some time with Avocet. The video is about an hour long. Enjoy.
-
John (Gira Gira), It was fun to see your name pop up at the end of the video. I thought I’d seen your CS17 before and I know we’ve chatted a couple times on the forum. Makes the world a little bit smaller.
-
This is the video Paul shared in a CS17 thread last week: I then found the Part Two video of the cruise:
-
Yes, I’ve Gotten Into my New Sailing Hobby Through Videos I really enjoyed some videos recently shared in the B&B Forum. Perhaps a thread specific to that focus would be enjoyable to others as well. Feel free to post some links. I look forward to seeing what people come up with. ____________________________________________ A bit of my own background (if you feel like reading it.) When I retired in January 2020 and started thinking about buying a sailboat, and quickly turning to the interest in BUILDING one, I began searching the web and watching a few videos I found on small sailboats. When I somehow stumbled upon B&B Yacht Designs and bought and received plans for the Bay River Skiff, I found that I simply had no idea how to use the plans, nor did I understand the stitch and glue approaches with plywood. My boat-building experience was back in junior high (8’ Glen-L 3-point hydroplane — in which the step by step directions started with an 8 foot piece of plywood as the base for the whole structure) My next boat build was in high school (a Glen-L 11’ runabout — in which the boat was built upside down on a building form by adding frames, keel/stem/transom, chines, and sheer logs upon which plywood was fit and attached.) But what in the heck is that stitch and glue thing described in my Bay River Skiff plans? Well, NOW I get it, but only because of searching around for videos, especially ones made by Alan Stewart and others on building B&B boats. I explored the Core Sound designs and quickly stumbled onto the video series Alan produced about building a Core Sound 15. Now THAT I understand… and I can make the steps happen. I loved the idea of a pre-cut B&B kit, especially one that had EVERYTHING. I quickly decided to order it, picking it up from the shop in my van at the end of April. I stress again: because of viewing (plenty of times) Alan’s video series and a bunch of other similar videos, I was able to successfully build and launch the CS15 in less than 3 months. (Because of the COVID shut down I needed to wait until late September for sails.) By the way, in making the Alan-Videos link above, I went to B&B’s web site for the Core Sound 15… and lo and behold, there I am… half way down the page. I made a little (very amateurish) video about how I get my boat ready for sailing, trying to exemplify some of the simplicity of the Core Sound system and some of the little things I came up with. I guess it got picked up for the CS15 website page: https://bandbyachtdesigns.com/cs15 Once I finished the CS15 build my attention turned to looking for actual sailing videos. Among the many I stumbled into, I really appreciated Graham (the Designer) suggesting (maybe he made the comment to Don Silsbe) to look for Dinghy Cruising Association videos by Roger Barnes. My two boys had suggested to me their interests in someday camping on or with a sailboat, and maybe it could be done with my new boat, which is what the DCA is about. Those suggestions got me looking for camp-cruising videos and I’ve found a lot of them. I haven’t received the latest DCA journal yet, but I understand that Don Silsbe submitted an article about our Dinghy Cruising adventure this summer using Avocet on Traverse Bay, Michigan. Tonight, I was watching a video by an Australian fellow who makes some great sail-camping videos with his friends. This one is entitled: Dinghy Cruising: What They Pay and Why? While watching it (I like to stream to my TV from my phone… a large screen enhances things) I found myself wondering whether I should start a thread like this one to share this video. Nah… no B&B boats… maybe not. THEN ALL OF A SUDDEN this pops up: Yes… Paul… I know that guy… and his Core Sound 17!! Sure, I’ll start a new thread in which people might share sailboat videos that they find interesting. When I was building my CS15 I had all kinds of questions about the rigging and how things worked on B&B type boats. I asked Paul whether he would be willing to give me a tour of his CS17; he graciously invited me to his house to see his boat. It was a great way to gain some of the clarity I was looking for, and I picked up a bunch of great ideas for my own build. So, here’s the video that I watched tonight:


-
Nice video. I love the water colors. Good find. Here is Part Two:
-
Only because this thread got me doing a very quick search to better understand a few things mentioned I stumbled on an interesting looking article… so I’m posting a link to it: https://www.sailmagazine.com/.amp/cruising/getting-more-use-from-kedge-anchors
-
ROAD TRIP!!!???
-
We used a highly recommended oil type finish on the butcher block tops we bought from IKEA for our previous house. We liked how they came out but found that metal stuff could stain the surface, such as leaving a ring from opening a can (turning it in place.) I’m hoping that epoxy gives sufficient hardness. I have liked the topcoat varnish result when it’s cured (so far.) I know there are lots of alternatives and recommended best countertop finishes. It is a challenge to sort through them. I needed to choose something so I did. I figure that adding another “something” down the road could be done, if needed... maybe even just sanding and adding another coat or spot of the same varnish could do the trick for a repair. Thanks.
-
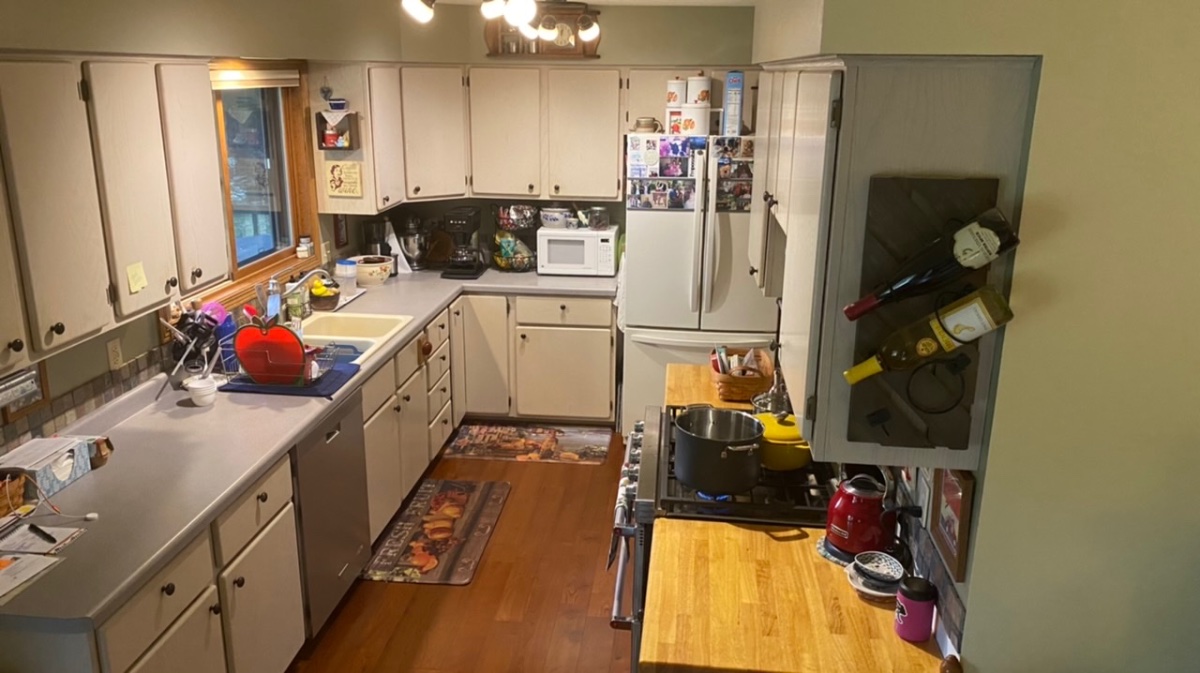
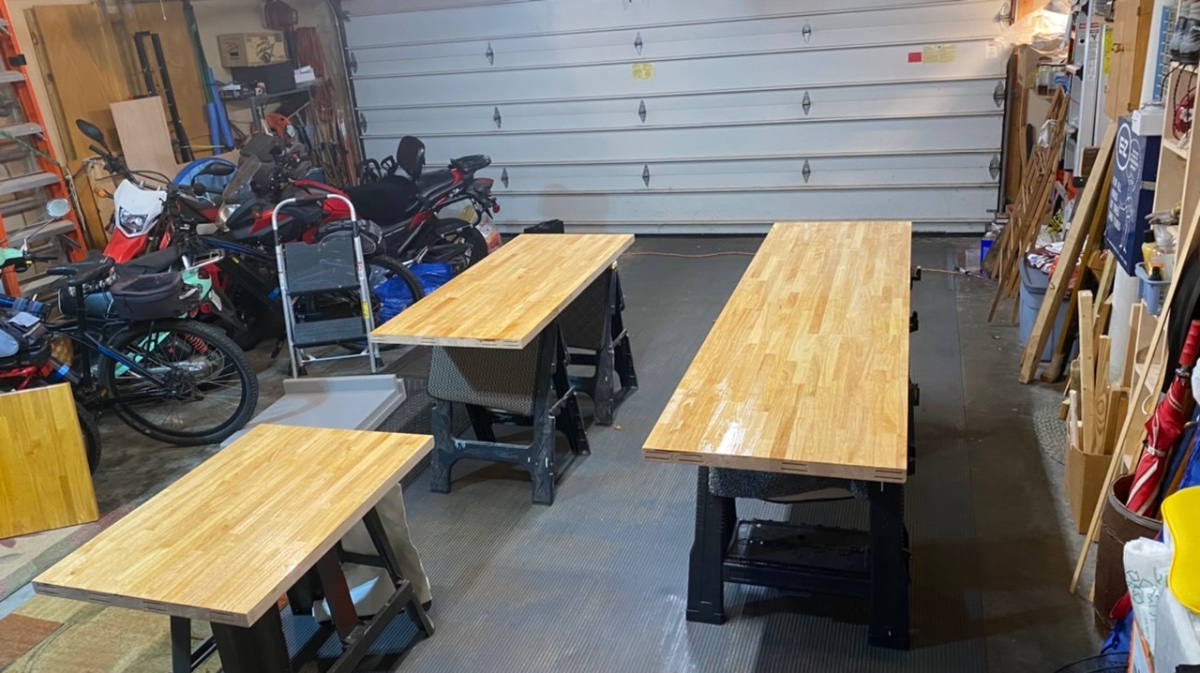
As usual Ken, excellent looking workmanship. Lula is elegantly beautiful. I hope you are enjoying significant satisfaction and pride in having built her. Lula looks like an EXCELLENT representation of the design and quality of B&B’s Lapwing kit. It might be fun for you to get it into some boat festivals or shows. Too bad it can’t be just tucked into your suitcase when (if) you fly east to a B&B Messabout. Thanks for writing about your varnishing experiences. I still need to get some varnish onto the epoxied solid-wood parts of Joe, my ski boat… and to attempt a better final coat on the decking. The boat will never be to your level of craftsmanship… but, I must admit that it often attracts some attention and inquiry from folks on the water or at a boat landing. It is fun to hear, “You built that?” (All one needs to do is to take a close look to realize that, yes, it’s homemade. ) But, seen on the water or from a little distance… I think it looks pretty good, and it isn’t a design one sees around here. I can feel some pride responding, “Yep, built it from plans… I wanted to build it since high school… and, with my four kids on their own and my retirement, it was time.” I think I’m done with building boats (well, maybe… the SR20, that might become part of B&B’s line at some point, has really caught my attention.) My wife offered me a deal if I decide to build another boat at home: I can do it if I arrange for someone to come in every day that I work in the garage to clean and dust the entire house. Hmmm… I have to think about how to pull that off. But, I’m almost ready to varnish my wife’s new “butcher-block” kitchen countertops, sort of the third of my boat-building projects. I’m happy with the two small sections I installed except for that FINAL varnish coat, which still has brush strokes and those dang little “bumps” of dust that appear an hour or so after application. (I put some finishing wax on the wood but I might strip it off and try for another coat of varnish… if I get better a result from finishing the next three pieces.) The grey is what I’m now working to replace… My wife and I like how the varnished wood countertops add color and contrast to the kitchen. I tried applying epoxy to the large sections of countertop yesterday with a different approach than I’ve used before: pouring a line of epoxy down the middle of the wood, spreading it thinly and evenly on the whole surface with a wide plastering knife, rolling over the surface in both directions with a short nap paint roller, then going over it with a couple light brush strokes (single strokes from end to end, yes, by walking along the long side… I am trying to avoid to start/stop brush marks.) With two coats of epoxy applied in this approach I’m liking how it has yielded a really smooth surface. (Kinda wish I’d thought to try this approach two boats ago.) (Yes, yesterday’s work still has some dust bumps.) I’ll try the same approach with coats of varnish to see if I get closer to the result I’d like. I think coats of varnish will deepen and darken this epoxied wood more toward what I’m looking for (the two pieces above)… and perhaps I will try some buffing on a final varnish coat to see if it takes care of any “dust bumps.” (If I screw that up with buffing I can always add more varnish.) It’s fair to say that my two boat-building projects made me willing to take on this project and this approach to finishing. As I suggest to my wife: I know that building our boats was kind of messy… but I NEEDED to do the projects so I could finally give you new kitchen countertops. Think of what I could give you if I build another boat? I’m not sure if my argument works.


-
Core Sound 15 #162 — Building the “Norma T”
PadrePoint replied to PadrePoint's topic in B & B Yachts Forum
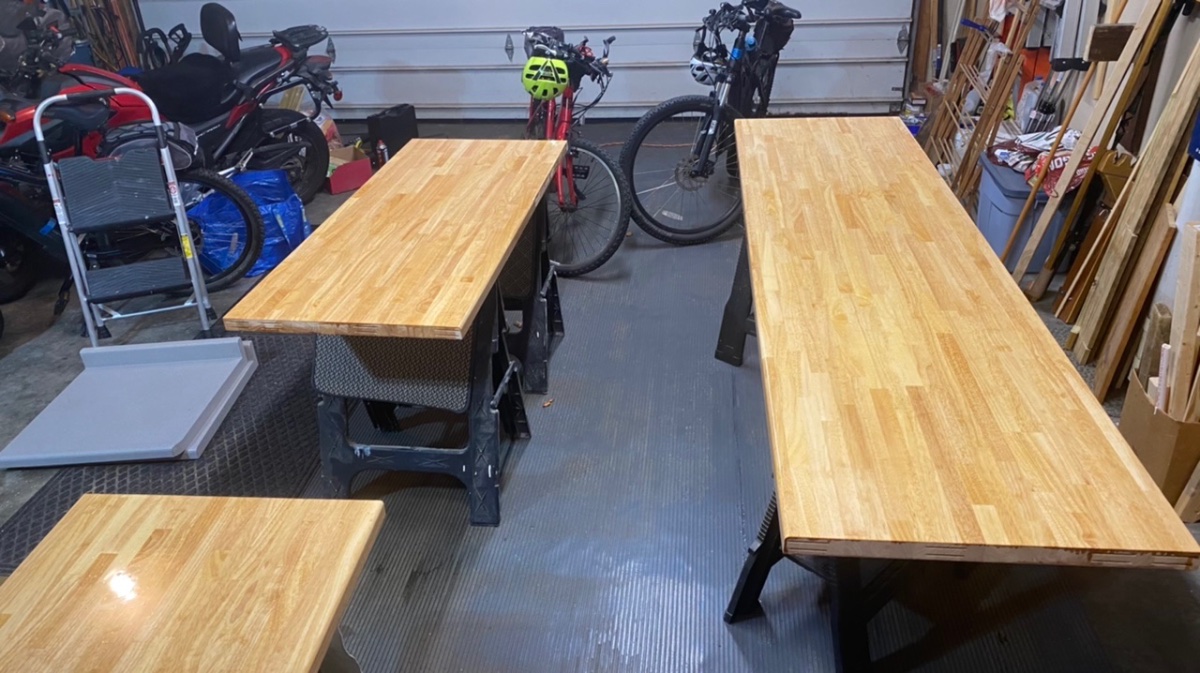
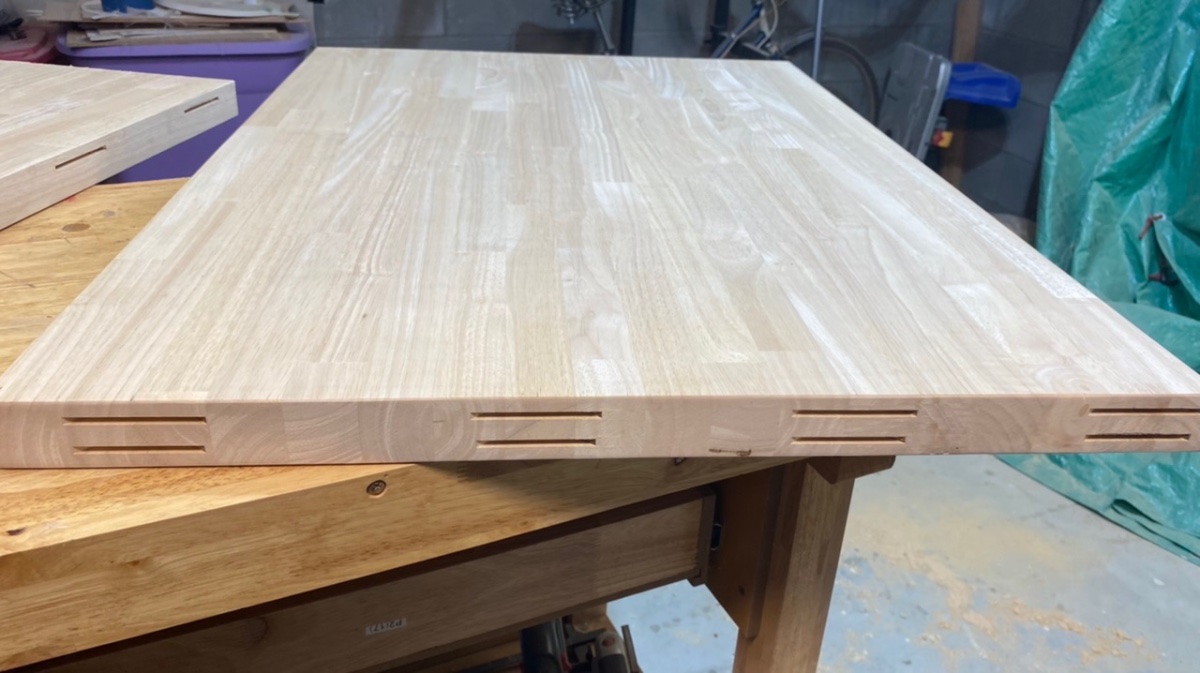
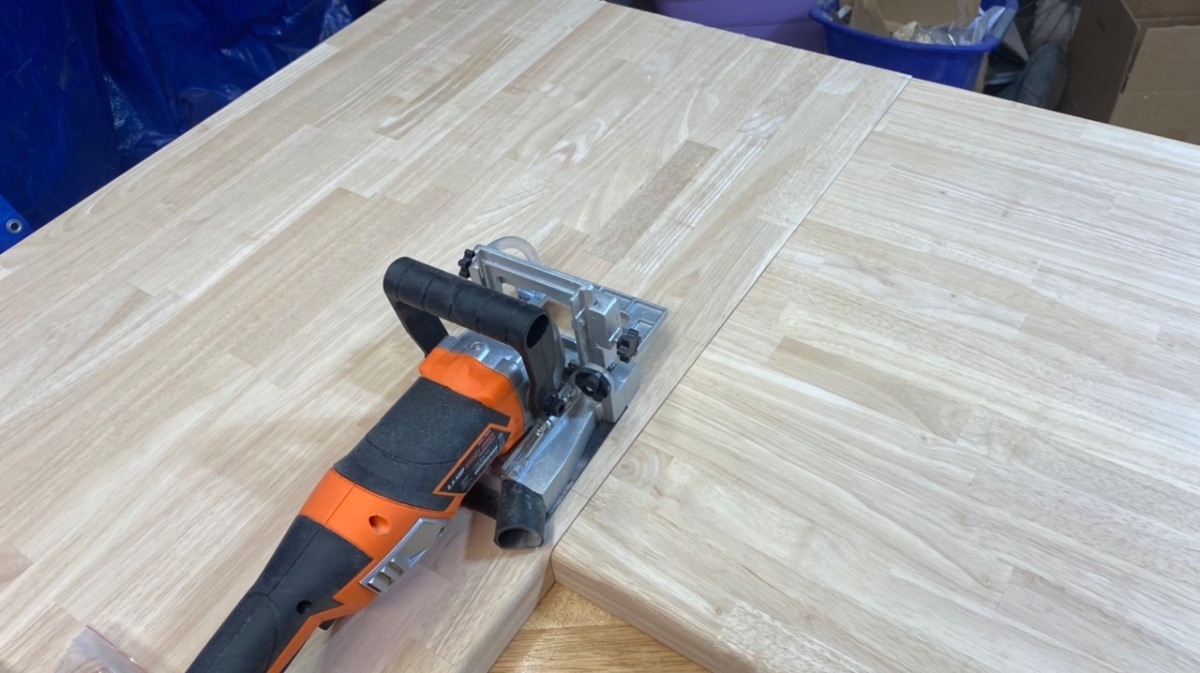
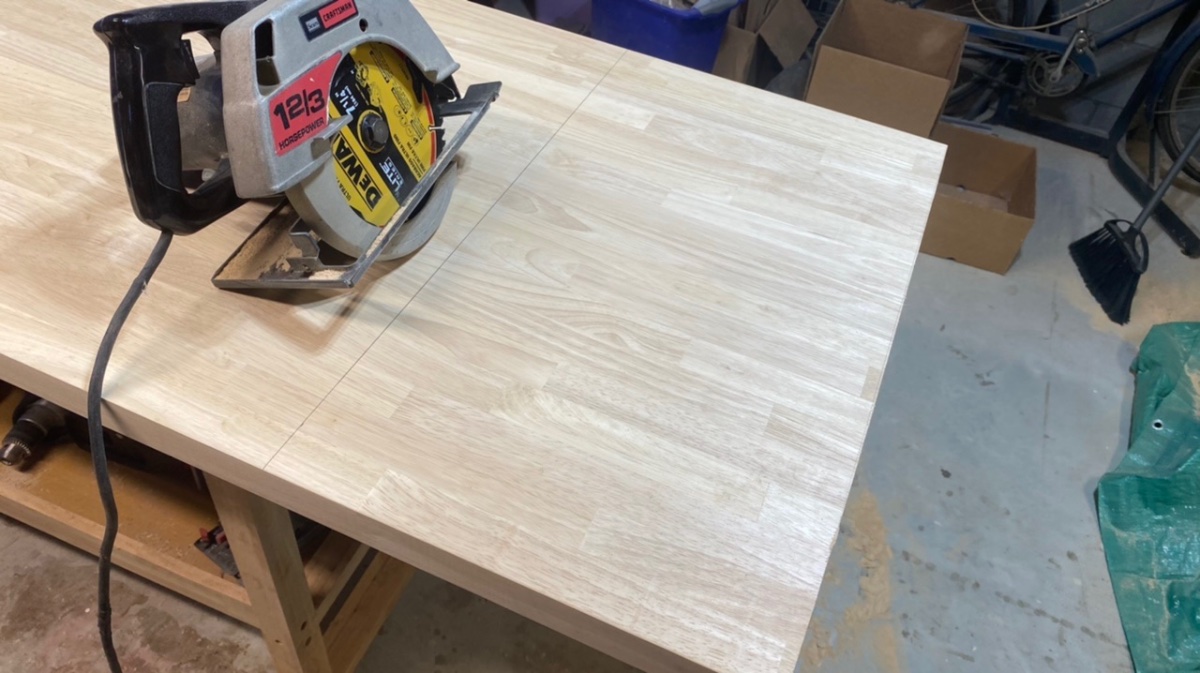
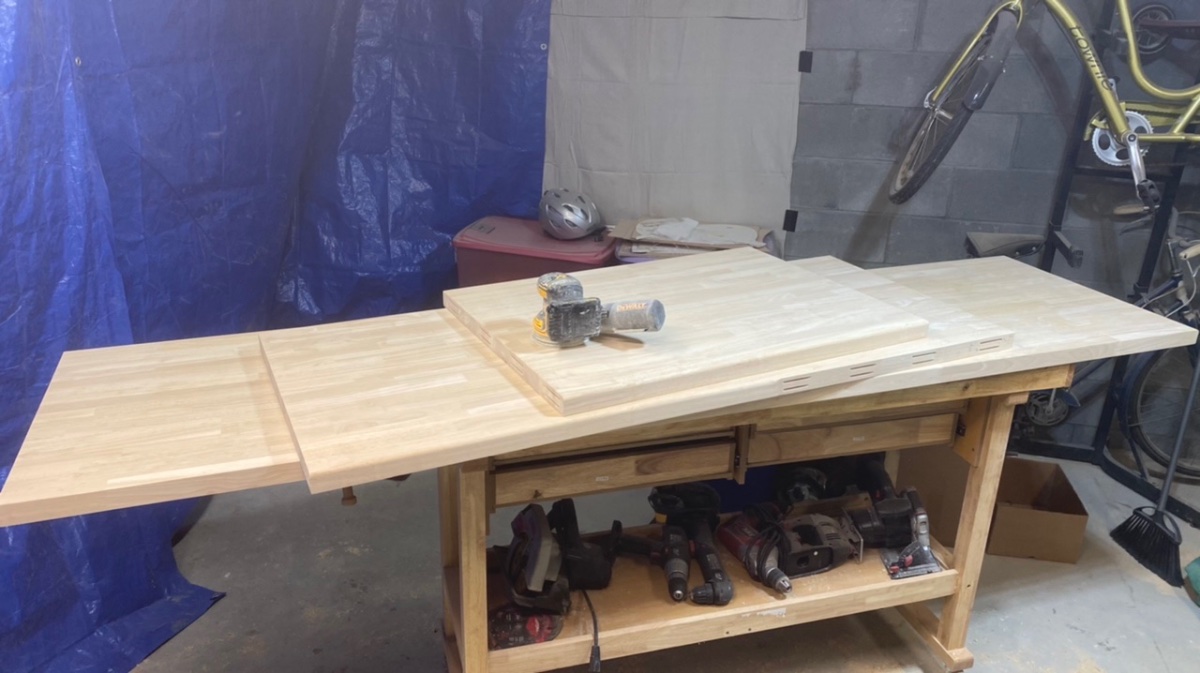
New Countertops Project for Norma T’s “Galley” In 2020 I built Norma T from a B& B kit in the garage space normally used for my wife’s car. That meant her car stood outside for the 3-4 month duration of the build. I then decided to build a second boat from plans the next year, a 15’ ski boat (I wanted to build it since high school.) That project meant 6 months of 2021 in which my wife’s car had to endure the spring and summer elements… as do both my car and the van ALL YEAR! This year, I again filled the garage with hull construction and sanding dust while my wife’s car was outside during the spring and summer so I could complete the ski-boat project. In time, I got a cover for the ski boat and began its outdoor yard storage. My wife’s car happily returned to its customary garage place. It even looks a little like it’s grinning. “Twin” boats… fraternal, not identical. Both have the same colors, lengths, gunwales, trim, trailers, new Hondas, and are named after my parents: Joe and Norma T. Now, a bit of background from last Christmas… my wife offered me a suggestion for another boat project when I finished my second boat build… since I’m so enjoying the wood-building projects (and, I s’pose, in light of her car’s sacrifice of garage space). “Don’t you think it would be really fun to put brand new wood countertops into the galley?” “But Norma T is an open cockpit day-sailor and it doesn’t HAVE a galley.” “Well… now follow me on this… when we take it sailing, especially with the family, we always have a meal on board that is prepared in the galley… well at least in the house kitchen. So, you can clearly see that placing new countertops in the kitchen is REALLY a project that benefits Norma T. And, Lowes now has butcher block countertop slabs that would be EASY for you to finish and install… Mr. Fancy Woodworker.” Hmmmm. So in early January I bought three of the unfinished 88” countertop slabs… beautiful hardwood, I must say… nicely made… and heavy. Ya think a sheet of marine plywood costs something. That’s nothing compared to the countertops. I kept them in the basement unopened until I gathered enough gumption and confidence to start the project a couple weeks ago. I began by doing just the two small sections for either side of the stove, rounding the edges and applying many layers of epoxy and varnish. I had NO idea how to actually install the newly finished countertops until I removed the old ones to see what was there. I figured it out, though I wasn’t quite satisfied with the final coats of varnish… still had some brush lines and little bumps from dust that appeared hours after that final coat was applied. Gotta try something a bit different for the larger pieces. But, I like how they look. I’ll make backsplash pieces later (for the white space under the tiles that my wife had installed some years ago)… when I figure out what to make them with. That little overhang on the end will have a hinged lift-up section with a brace to provide more counter space when needed… and maybe a small grandkids “table” when the whole family sitting at our table for a meal. OK, the first phase of the “boat-galley” project is done. Onward to the big sections, which includes the new sink, faucet, disposal, dishwasher, and bringing in a plumber for all the hookups and drains. I’ve spent a LOT of time trying to figure out how I’ll do all this. Like in my boat-building work, I think and think… on how I’ll do something… but at some point I just have to start working with my hands… which is often when the best ideas form on HOW to do something. First, cut the pieces to size with the new fine-tooth blade I bought for my trusty old saw. The edges were rounded with the router I bought for the ski-boat… projects provide great reasons to buy tools. I recently bought a biscuit cutter for the two countertop joints. (That idea was recent… I think it will be a handy tool to have.) I cut matching slots and tried out the biscuits to see how a joint would come together. NEAT system. The pieces are ready for final sanding, epoxy and varnish. This all took about three hours on Sunday after which I got some beer and pizza for the Packers game. They won… barely… with a field goal in the final second of overtime. Sheeze. Today, I donned the ol’ “poxy-pants” to start applying the coats to the underside first. (Once I finish this final “boat” project a LOT of poxy-stained shirts and t-shirts, my poxy-pants, and shoes will get thrown out.) I tried a different approach today, pouring epoxy onto the slab, spreading it thinly with a wide plaster knife, rolling a foam roller over all of it, and then carefully running a brush over it… like in roll-and-tip painting. I think it is coming out much better than my method of just brushing on the epoxy. We’ll see how things then go with varnish coats; I have some different things I will try. Feel free to offer ideas how to make final varnish coats as free as possible from residual brush lines. (Note that my wife’s car is outside yet again ; she volunteered to move it out so I could have the garage space for finishing work.)