PadrePoint
-
Posts
809 -
Joined
-
Last visited
-
Days Won
64
Content Type
Profiles
Forums
Events
Gallery
Everything posted by PadrePoint
-

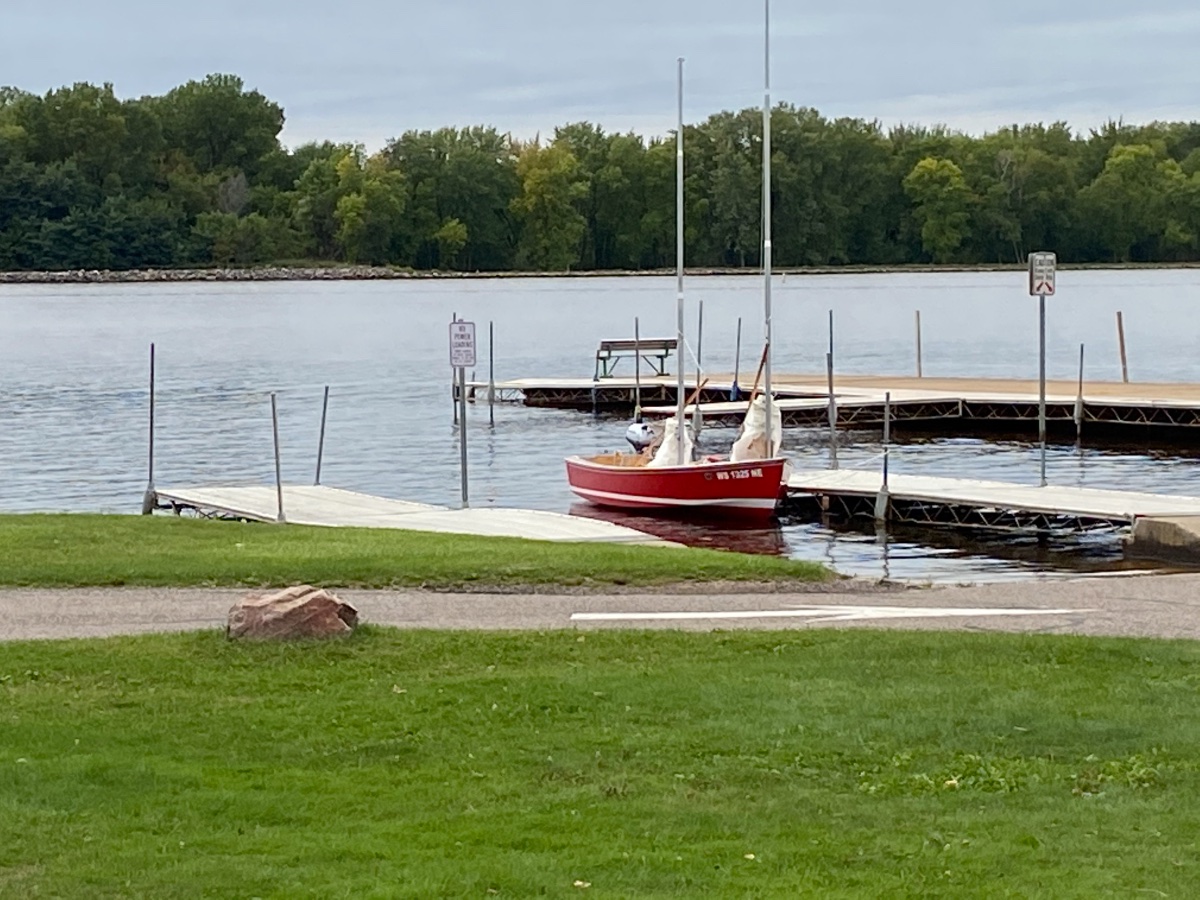
Spindrift 10, #1329 -- "Seabiscuit" . .
PadrePoint replied to Pete McCrary's topic in B & B Yachts Forum
Very clever, Pete. I think this would give a lot of security to the mast staying in place in an unfortunate situation. I’m currently installing a step in the forward thwart of my CS15 (without a mast tube) I thought about the issue a bit since the mizzen mast could be placed there as a means to help manage a high wind, and would the downhaul be enough to keep things tied together? Your idea could easily be included. My current thought is to add a hitch pin through the mast somewhere beneath the thwart and the mast could still turn. Your approach of adding a collar (maybe without the flat spot since there isn’t a bulkhead) would make things work more smoothly than just a pin, I think. Hmmm.... ?. Maybe a hitch pin THROUGH a fiberglass collar... I just made a thin three inch one yesterday to serve as inserts to the thwart and step holes (after I cut it in two.) I could easily make another thicker one as a collar. Or, maybe a nut embedded in a fiberglass collar to take a set screw. I’m writing this as my ideas keep morphing around... ??. Another edit/thought: tightening a set screw would be easier than finding holes in which to insert a hitch pin. One of these thoughts might become my actual approach. Thanks. Plus, The Wheezer just glued in the mast step on her Spindrift 10 build. Again, we could add your innovation (if she wants to.)
-
Captain Tim, That’s EXACTLY what my brain was looking for. I guess it’s a “thing.” I think I will try to find this in a plumbing department. (My wife’s thought... she often comes up with the simple and workable fix. ?) Thanks. ?
-
Of course I had some operator error... I was trying new stuff... including a standing position, which felt awkward... but I started to feel some what could make it work for maneuvering... until about the 10th stroke when “boop”... out it came and gone was the insert. Hmmm.... Hirilonde, your cord/toggle description is exactly one of the approaches I conceived (using a “drain stopper” above trying to describe my idea) and I’ll likely try that... thanks. The washer/pin approach I’m trying might work well with a transom oarlock for sculling. (If the cord idea doesn’t work I could always break out my guitar and try using a CHORD. ?) Thanks for your ideas everyone. Kind of a silly question, but oarlocks almost always include the little hole on the bottom, and I didn’t discover any real solutions as to how it could be utilized. ?
-
I reamed out a washer to slip onto the bottom. I can pick up a smaller hitch pin tomorrow. Might this work? Is there a better kind of pin?

-
Last year, I tried using oars in my new Core Sound 15. I was doing some experimentation with rowing positions and accidentally lifted one oar out of the socket. The white nylon insert also came out of the socket and plopped into the water, disappearing. Well , THAT didn’t go well. What can keep me from losing another insert? I notice a little hole in the bottom of the oarlock. How might I make use of that hole to prevent the oar from popping out or at least to prevent the insert from becoming lost in the water? Ideas?

-
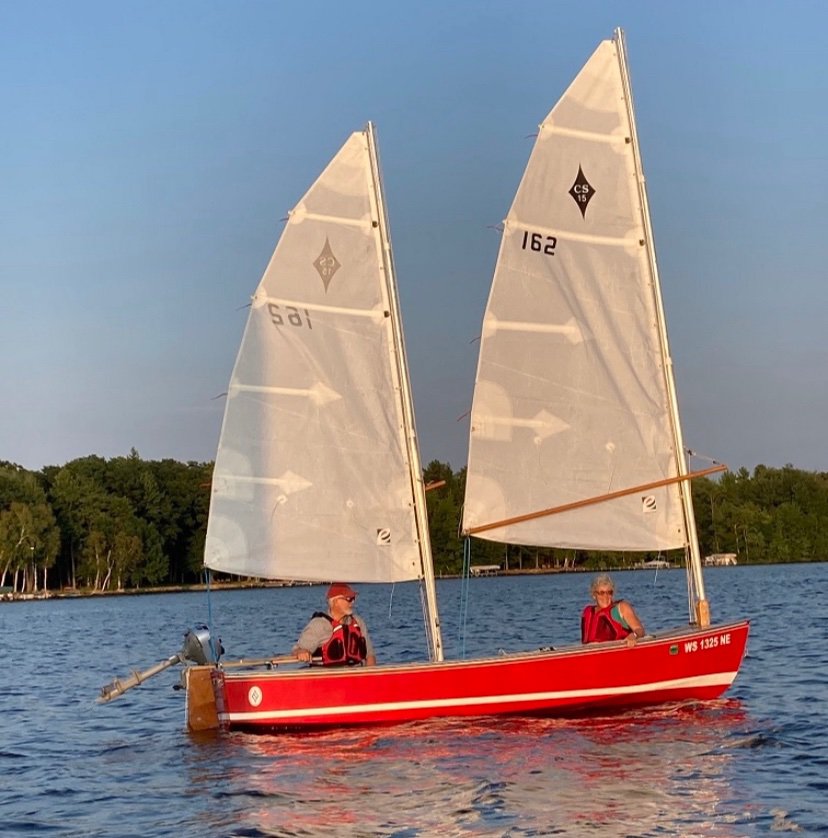
Core Sound 15 #162 — Building the “Norma T”
PadrePoint replied to PadrePoint's topic in B & B Yachts Forum
It was as a nice sunny day today so I wheeled the ski-boat outside so the newly painted inside could get some sun (to assist in its curing.) Since I had just picked up my sailboat from winter storage, I thought I’d introduce them: “Norma T (CS15 built in 2020), meet Joe (15 foot yet-to-be-finished ski boat)!” ? Today was my first day to start adding a few features to Norma T that could let my sons and me try overnight dinghy cruising. My first task is to finish the forward mizzen step. I decided to not make a full mast tube, but I’ll add a two-inch insert into the hole in the thwart and a one inch insert into the step that I’ll install onto the keel batten. Instead of strips of plastic over the mast, I taped on a series of 1inch strips of fiberglass. (The plastic strips wouldn’t pull out when I made the mizzen mast tube, and I think fiberglass strips will not tear like the plastic did.) I then put on a layer of plastic over the strips. I wrapped 3 inch fiberglass tape around the plastic until it came to about 2.75 inches, the inside diameter of the two holes (thwart and step.) Tomorrow, I’ll remove this it from the mizzen mast and cut it to length to serve as hole inserts. While writing this post, an Amazon package arrive with a side mount oar lock. My plan is to mounting it to the top of the transom to try out one-oar sculling. (It’s favored by some, including Roger Barnes of Dinghy Cruising Association.)


-
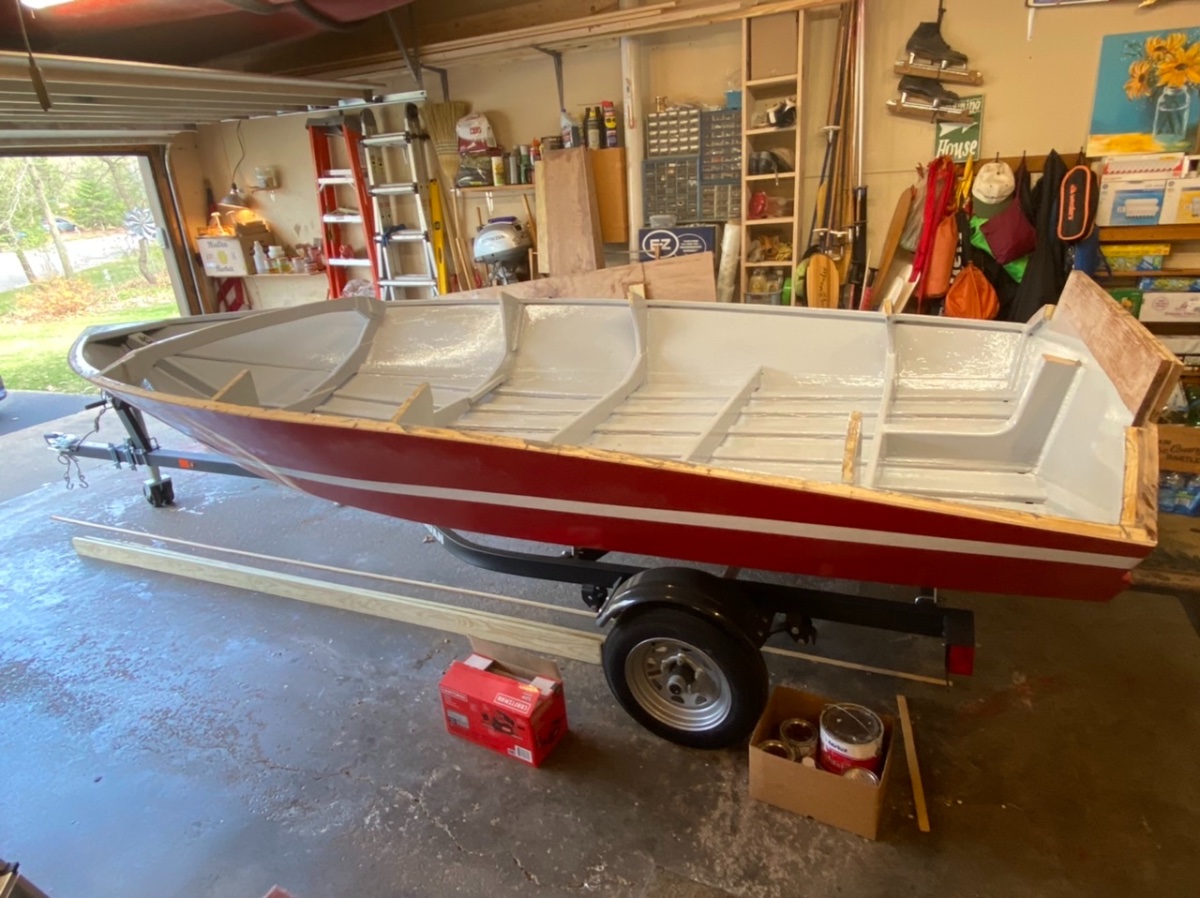
A Nice Sunny Day The white paint inside the hull is having a harder time drying and curing. With it being a nice day I wheeled it out of the garage to sit in the sunshine. Since I just picked up my CS15 sailboat from winter storage I thought I should “introduce” them... “Norma T, this is Joe, the not-finished-yet ski boat.” ? (It is actually the same red color on both boats.) I also added a first coat of epoxy to the main floorboards.


-
Spindrift 10 Build (by a 9th Grade Girl)
PadrePoint replied to PadrePoint's topic in B & B Yachts Forum
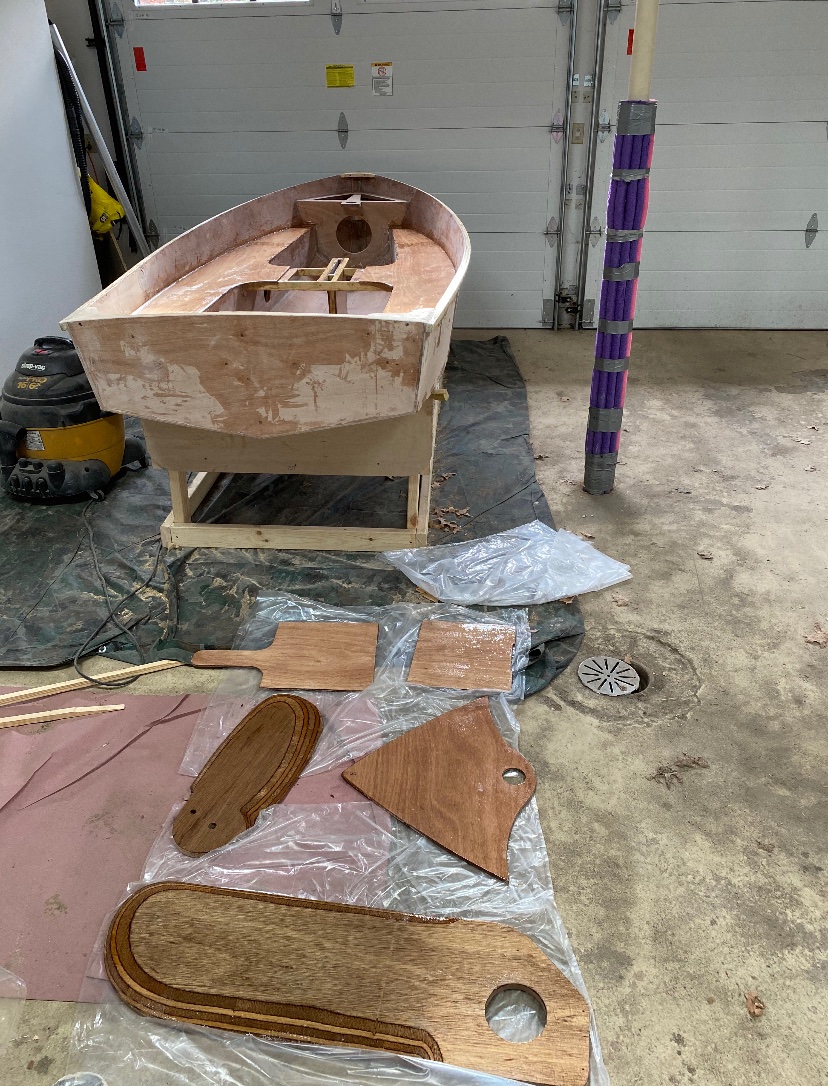
The Wheezer and I flipped the boat today. Being 10 feet the two of us easily did the task. And, it set right down onto the building form. The bottom work begins. She has 3 coats of epoxy on the whole inside and on one side of the rudder, dagger board, middle seat tops and front deck. I’ll be cutting the boom soon. The only wood parts yet untouched are the rudder assembly.


-
I got a coat of Interlux Britesides white on the hull’s inside... one coat over the two coats of Interlux’s primer. After an hour or so a number of areas have this wrinkly texture develop, like the primer is swelling up a bit from the new paint. I don’t recall encountering this yet using the same paint and primer on the hull’s bottom and on my sailboat. The surface looks like it has been sitting out in the weather for a few years. I am trusting that some sanding between the next couple coats of paint will take care of the issue. Besides, the floorboards and decking will cover nearly everything I just painted. I consider painting the inside like this to be an “extra.” I’m kinda wearying of this phase in building the boat... three coats of epoxy, followed by three coats so far of primer/paint, and still on the way: at least a couple more coats of paint... before I actually build anything more. Well, I guess that’s not quite true since I DID fashion some floorboards last week. I picked up the Norma T sailboat from winter storage this weekend. ( I built this Core Sound 15 last year.) Joe the ski boat will be looking similar in its painting and finishing scheme. (See the last photo in the previous entry. ?) It’s fun to have both of them in my driveway/garage; some day I will pose them together.


-
Spindrift 10, #1329 -- "Seabiscuit" . .
PadrePoint replied to Pete McCrary's topic in B & B Yachts Forum
Mine is bigger. As a research chemist, my dad always had a pocket slide rule in his shirt pocket (complete with pen and pencil all in a pocket protector.) But, on his desk he had a 2-foot+ slide rule. I inherited it in junior high school when we were introduced to it, and used it in subsequent science classes. It’s somewhere in my house... and I don’t have a photo (to prove its existence.) My mom (Norma T) often told stories about going out to eat with the guys from the lab... the bill would arrive and the slide rules would come out to figure up each person’s portion. ? I suggested that my daughter show it to her chemistry teacher in high school and it created significant excitement in the science department that day. All the teachers were called in... they broke out the six foot classroom slide rule and spent time telling their classes about all the virtues of the math tool. ? -
Floorboards are ready for epoxy/paint coats. I installed a bow eye... more heavy duty than needed, but that’s preferred over being too light with not quite sufficient backing. Ok. My approach is a little “overbuilt”... but it “gives me comfort”. ? I was able to help The Wheezer for a few hours today on her Spindrift 10. She has recovered from the ol’ wisdom teeth thing. And, I got a second coat of primer inside, an off white color. Coats of Brightsides white paint are next. Finally, I will go downstate tomorrow to pick up my Core Sound 15 from winter storage. ?


-
Spindrift 10 Build (by a 9th Grade Girl)
PadrePoint replied to PadrePoint's topic in B & B Yachts Forum
A little update: We’ve both had busy lives last week but had a few hours today to further prepare the inside for painting and we installed a few more pieces (breast hook, quarter knees, and mast step. The boat will be flipped soon to begin bottom work. For now, we’ll leave out the center seats (aft and middle) and foredeck (they are fitted and ready for installation.) Those pieces will be left bright with varnish while everything else will be painted.
-
Ditto on thinkin’ and sittin’ to contemplate the next and future steps. It’s part of the fun for me. Today was busywork on my ski-boat but mostly just fiddlin’ around, trying to make some innovative details work. Eventual success but not a lot of visible progress. ?
-
Trivia — some Life happened — I led a funeral service yesterday, the first time I did “work” since retiring in the start of 2020 (a 42 year old dad and family friend.) It kinda knocked the boat-building motivation out of me and the lethargy continues today. But I did get new tires installed on my car this afternoon and that always makes the car’s ride feel nice. ? I think I can finish my floorboard project tomorrow, adding some bracing, and then I’ll begin the task of epoxying and painting them... and can finish painting the inside of the hull (that will take some days... if the motivation/energy comes back “on-line”.) AND!! I will travel downstate on Sunday to get my Core Sound 15 out of its 5-month winter storage!! ?. I have a first project for the sailboat: fashioning raised floorboards for the aft cockpit that can serve as a sleeping platform. With comfortable sleeping available my sons and I will try out some overnight “dinghy cruising” this summer. And, speaking of trivia, the world’s largest trivia contest happens this weekend in my town... the 51st annual event... 500 teams... thousands of people... three days... and the same guy continues to organize it. ?. Check it out and tune in for a while (there is a link on the site for streaming.) It’s a fascinating event. https://www.90fmtrivia.org/

-
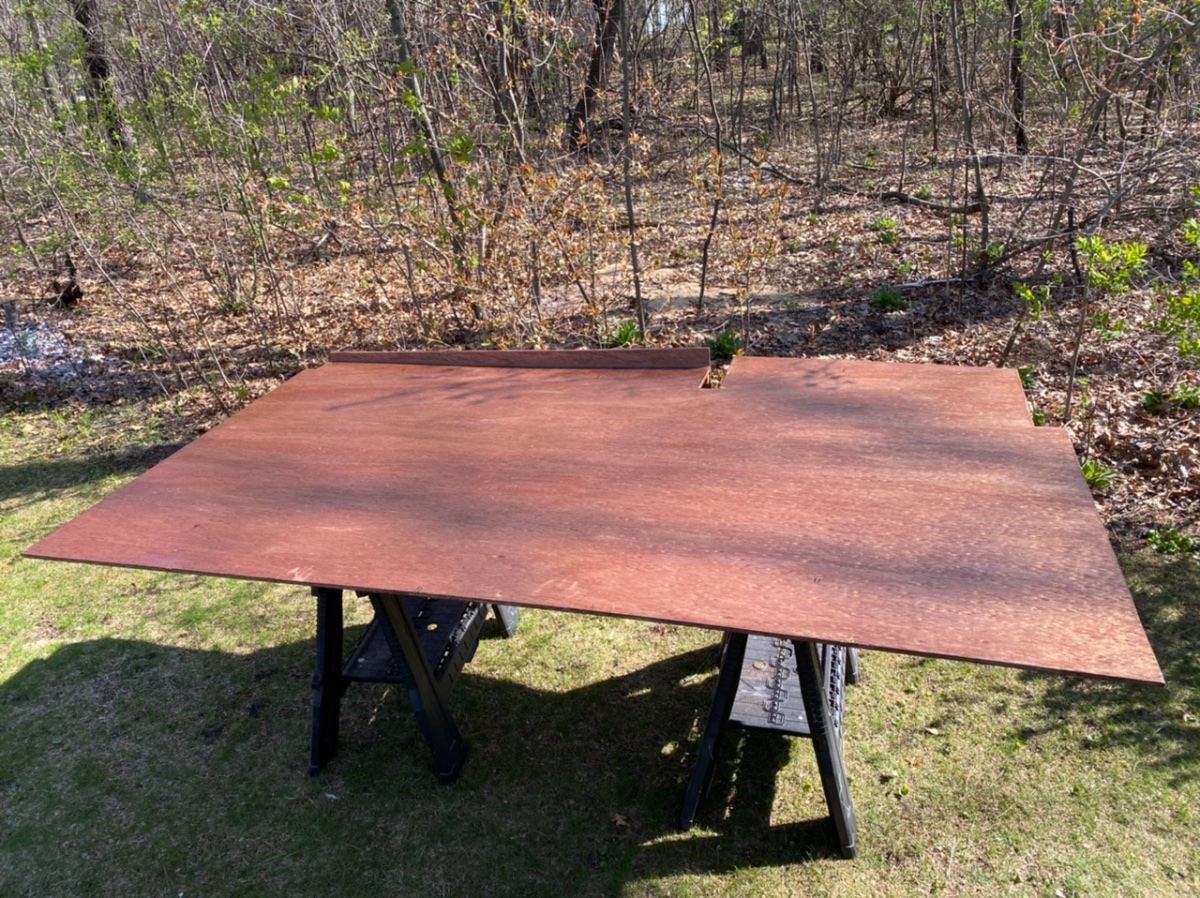
Floorboards I created floorboards between frame 1 (in front of the transom) and frame 5 (the most forward frame at the bottom of the photo.) Aft of frame 1 will be the space where I will place the battery and a couple 6 gallon fuel tanks. (The plans call for a built-in console between the seats for a fuel tank; I decided I wanted an open, possibly flexible cockpit area.) I haven’t figured out yet what I’ll do for seats,) Looking toward the transom... the yellow level on the right illustrates where the carlins/coaming will be and the storage pockets beneath: (The wine box and drill on the left are holding down the floorboard... I became inspired to get myself a glass after I took the photos. ?) The four floorboard pieces will be screwed down to the frames (in the middle and aft area) and to the bottom battens/keel in the front section that will be under the fore deck. I’m wondering about adding some gasket material under the floorboards where they meet the frame/battens, thinking that there could be vibration sounds. The yellow level across the middle sort of simulates where the dash will be placed. There is a little drop to where legs can go. I built some 5 inch deep pockets along the sides to put stuff, like bumpers, lines, towels, etc. (The yellow level simulates the Carlin/coaming line... top decking will go between the level and the outside sheer.) My second, narrow piece of 9mm plywood that I used for the starboard side was a bit too narrow to reach the side planking... it was the biggest piece I had left over. So now, the boat driver has a handy little pocket on the side available. ? I wanted to get floorboards made before I painted the interior, so painting the inside of the hull white is a next step. The floorboards need to be painted with epoxy and primer before they get white paint. Only after the painting is done will I install the carlins and begin fitting the top decks.


-
Making Floorboards That Can Be Raised for a Sleeping Deck
PadrePoint replied to PadrePoint's topic in B & B Yachts Forum
Gira Gira, I think your photos show a great setup and a nice weekend voyage. Thank you. And, congratulations on having a new CS17. My CS15 has just over 5 feet in front of the mizzen mast (I’m 6’ 5”.) If I come up with a system for the aft cockpit area I would feel comfortable in the horizontal position for sleeping. Rails would be the easiest solution and I’d be open to that, but I’m still kicking around some ideas. I’ll get my boat out of winter storage early next week so I can soon get more serious about the task. Right now, ironically, I’ve begun fashioning floorboards for the ski boat I’m building.
-
Good points. Thanks. I will pass it along.
-
Hirilonde, Yep, holes are called for in the plans. But, The Wheezer’s dad is looking at getting a trailer. I think a bow eye could be useful for that. We’ll see what is finally decided. Thanks for the photo of the sheet bridle. I was JUST looking at that in the plans. ?
-
One is bigger than the other... can ya tell which? ? I found a bow eye with a 5.5 inch shank, about twice the length of the other. (The photos on Amazon didn’t make it appear so “heavy-duty”; oh, well.) Since the bow stem is almost 4 inches thick I preferred that the eye shanks go all the way through rather than to cut out a bunch of the stem. I purchased three of the smaller ones from B&B for my boat. I’ll still use two of them in the Joe’s transom for tie-downs and will give the third to The Wheezer for her Spindrift (she lives across the street and is building an S10.)

-
Making Floorboards That Can Be Raised for a Sleeping Deck
PadrePoint replied to PadrePoint's topic in B & B Yachts Forum
Yeah, the Phoenix 3, built from plans, will no doubt be a much more ambitious and challenging build than was my CS15 full kit. Then again, the guy is loving building his canoes out of tongue and groove cedar strips that he cuts and shapes from cast-off eight foot 1x6 cedar boards. Aaiieee. ? He just told me tonight that he’s thinking a LOT about how he can hardly wait to start building his Phoenix 3... even as he’s placing his initial strips into his current build, a 17 foot canoe. Yup, I think he’s got the “bug” even worse than me ?. (I bought him Phoenix 3 PDF plans as a birthday present a couple months ago... kind of “my fault.”) Actually, my son set his mind toward building the Phoenix 3 before I’d even heard of B&B Yachts. And, it was his interest in this sailing/cruising boat that even got me looking around last year at sailboat options, causing me to stumble onto B&B’s website and falling for the Core Sound 15... after also stumbling upon Alan’s CS15 YouTube video series.

-
Making Floorboards That Can Be Raised for a Sleeping Deck
PadrePoint replied to PadrePoint's topic in B & B Yachts Forum
Don, That is right along the lines that my brain has been going to. My boat is still in storage but I’ll be getting it soon. Thank you for showing your approach. The idea of doing some overnight sailing has taken hold of my imagination. I joined into the Dinghy Cruising Association in England (Roger Barnes) to gain access to their journals and forum (great reading... and LOTS of it to explore.) I couldn’t find anything yet about methods to make a sleeping platform. BTW, I purchased Roger Barnes’ book as a gift to my son, who plans to build a Phoenix 3 sailboat. I thought that the proper “dad” thing to do was to read the book first to make sure it was appropriate reading material for my son. ? -
I got on the first coat of primer to the inside surfaces. ?

-
My son — who just began his 4th canoe build — sent me this image. Yes, I’ve had some of these moments (well, not quite as bad, but still deflating when the mistake is realized.). ?? The moment of realization: “What the.....?? How did THAT happen?!” ? Followed by, “Now how am I going to fix this one?” ? I’m back from my camping trip. I spent a couple hours with The Wheezer helping to install the dagger board trunk and seat tops into her Spindrift 10 (she has her own B&B build thread.). I also spent some time sanding the three coats of epoxy inside Joe that I put on before leaving for my trip. I’ll start priming the inside tomorrow. ?

-
Spindrift 10 Build (by a 9th Grade Girl)
PadrePoint replied to PadrePoint's topic in B & B Yachts Forum
I was gone for about 10 days so The Wheezer was on her own. I think that getting herself ready for yesterday’s state swim meet additional to school occupied much of her time. (Ask her how things went.) So, first day back... we got the daggerboard trunk and seat tops installed. It took me a while to recall/figure-out the various steps for an orderly installation of the pieces. (We’ll do the two centerpieces of the seat tops later.) Great progress on a first day. ? -
I think you made a very nice build , excellent looking workmanship. And, I like your innovations. Thanks for posting these photos and videos. Enjoy!