Alan Stewart
-
Posts
701 -
Joined
-
Last visited
-
Days Won
115
Content Type
Profiles
Forums
Events
Gallery
Everything posted by Alan Stewart
-
preparing interior/exterior glassed joints for painting
Alan Stewart replied to acreew's topic in B & B Yachts Forum
Typically on the outside of the hull a "putty" mixture of micro-spheres (white powdery stuff) and epoxy is used to smooth the transition from tape to plywood. This is best done with a large putty knife (about 6" is good) pulled perpendicular to the fiberglass tape with one edge resting on about the middle of the tape. The idea is to fill in a thin wedge of filler that eases the transition into the rest of the hull. Where there is overlapping glass tape the filling is basically the same but it may require more filler over a larger area. Sanding down the highest of the high spots in the fiberglass should be done before using any filler. Note that it is impossible to do this in one step with no pinholes or voids and a second or sometimes even third puttying will need to take place to finish the job. Sanding the micro spheres is very easy. This process can also be done with cabosil or B and B "special blend" but sanding will be more difficult and I wouldn't recommend it. Micro spheres are also much lighter than cabosil. I usually don't worry about the edge being visible on the interior as long as it is smooth and there are no pinholes. -
It looks to me like your gunwale is too tall and is resisting being bent edge-ways. If you were careful lofting out the side panels then I would not be so quick to plane them down or the boat's sheer line won't look right or at least not as it was intended to look. I would estimate your gunwales there look to be about 1/4" x 2.5" hardwood. That's going to have a tough time bending to match the sheer line of the side panels but I think it should do. We usually make gunwales more like 3/4" x 1.5". If ANYTHING I would move the whole gunwale up by the amount you show there (the low spot) and glue it on. Then you can plane down the top of the GUNWALE to match the side panel. My 2 cents. -Alan
-
Laser masts are also 2 piece so there has to be a joint with some amount of play that accounts for some (maybe a few inches) of deflection. In this picture, the position of the joint is obvious to me and there is a very faint "kink" in the curve. Was the mast you tested 2 piece? just curious. Of course, if your just using the mast for it's aluminum you can join the sections permanently.
-
I agree with Scott. I would rather have my tabernacle pin shear load perpendicular to the growth rings. However, with a large epoxy bushing and close tolerances I don't really see an issue either way especially if the tabernacle is fiberglassed all the way around. The tabernacle will bend a little though. For the center piece plain sawn only makes sense. The darker summer grown in the rings is always more dense and stronger than the spring growth. Quarter sawing that piece doesn't take advantage of the denser material in the grain the way that plain sawing would. The centerpiece could probably be made of 3/4 plywood for the CS20, not for the longer tabernacles. A drift pin or long through bolt would be a good backup for the centerpiece but why not just throw some fiberglass across it. Spread the load out a lot more, keep everything sealed up and never worry about it.
-
Thought I would add another link about shaping foils. Over on the Outrigger sailing Canoes site they are mostly into leeboards with constant foils but the idea is still there. http://outriggersailingcanoes.blogspot.com/2013/07/perfect-foils.html Also, I definitely wouldn't worry about 1/8" of rock or twist or whatever it is. That will easily be lost in the shaping process. I would lay it on a flat surface and use a gauge block to draw a centerline all the way around the edge after you cut the blank to the finished profile shape. That will give you a "flat plane" reference line to shape to. Once you start planing, grinding, or belt sanding it will be a good double check that its even both sides.
-
There is another way. Check out these videos. You can use a router and surface bit or just a 1/2" end mill or similar and setup a simple box jig to surface a long wide board. But while you were at it, I might just go ahead and cut the foil into the board with a slightly more elaborate jig with the foil section shaped into the jig. http://www.youtube.com/watch?v=ZxOsFTaRu_M http://www.youtube.com/watch?v=qqhQutXvyDM -Alan
-
When we built out 20 this is how we did it. Assuming the boat is nice and level. Port and starboard alignment I would say is probably the least critical but also the easiest to measure. We clamped in some "dummy" stub masts in the tabernacle maybe 3 or 4 feet long. I think we just used some nice straight 1x3 (anything straight really). With the aft tabernacle on the princess you almost wouldn't need much extension on it since it's already quite tall to clear the cabin. On the 20 we just slid the 1x3 through the thwart and stepped it into the mast step. On the tabernacle, we just clamped it to the inside face of the tabernacle to extend the inside lines. The alignment process, set the final position of the main tabernacle and mizzen mast step at the same time. We were in a basement so we couldn't measure up very high so we could only get a rake measurement over about 4 feet which really is plenty. if you make some accurate 3 degree wedges and hold them up as spacers then you can just use a level that you trust to get your rake. As PAR said we used some trigonometry to get a double check of our rake but I can't remember if we actually used a plumb bob. Getting them plumb port to starboard is just a matter of plumbing one and then sighting two straight references parallel as seen from the bow or stern. I think we did this one entirely by eye just like when you square a boat up bow to stern by putting rules across the sheer. If you have a 4' rule to sight its pretty easy to get them exactly parallel with some careful eyeballing. I would spend some time on that one because it looks the worst if your off a little bit. All the others could be out by a long way and be pretty hard to notice but that one will be seen every time you step the masts. If you have bad eyes, DONT WORRY. Just take a bunch of steady pictures of the two straight edges very close to one another from the bow or stern and then just pull them up on a computer and ZOOM IN to measure the difference as close as you want. Ok, now for the twisting. I think that one is fairly easy. If you make 2 boards that fit snugly into the top of the tabernacles and you clamp them in horizontal so that they are pointed at one another then you can sight down them from the bow and should immediately see if they collide. Just tweak the tabernacles little by little until you can sight the edges of the boards in line with the outside edges of tabernacles. DON"T FORGET that the top of the mast is going to be NARROWER and the mast won't be as tight a fit as the board either. We used some thin UHMW plastic washers on the inside of our tabernacle on either side of the bolt. Anyway, that's how i'd do it. Hope that helps.
-
Here is the video of the test performed at the Messabout last weekend. The CS-20 MK2 proved herself to have positive stability in a knockdown. Skip to ~2:00 in the video to get to the exciting bit. Details:The boat was water ballasted and the centerboard was fully raised due to the shallow water beside the dock. In a real capsize, you would probably have the sails up but also probably have the weighted centerboard down so we felt these two canceled each other out well enough. At 90 degrees there was approximately 5lbs of positive force at the tip of mizzen mast. After she flipped herself back upright there was approximately 4 inches of water in the self draining cockpit from my point of view. She floated high and level on her side and the water was well away from the cabin door. There were a few cups of water in the starboard lockers that went 1/2 underwater but she was also held on her side for longer than in a "normal capsize". http://www.youtube.com/watch?v=5zUbj8M178Q&feature=youtu.be Also, If anyone knows how to embed videos into IP. Board put the video up here so we don't have to leave the page. I spent way too long trying to figure it out.
-
Graham and I were kicking CAD models around of a S12 with a small flush deck cabin and split rig (of course). It is tricky but doable and frankly, i think it would be awesome. The beam could also be brought out a bit for added stability. The idea would be to have a sit in cockpit with forward and side widows so that one could drive in a reefed condition from inside the cabin when the weather is crap. It also needs to have a good rowing position. 4mm plywood throughout, little split rig. We'll just work up the details in our spare time. (if we had any) -Alan
-
Got some pictures and updates up on my blog. http://sailnaway.blogspot.com Enjoy!
-
mjshp, I think you'll find the mohair rollers soak up a lot of epoxy. You could probably load up a 1/4 mohair roller with epoxy and coat the entire bottom without reloading the roller if you tried. We use very thin about 1/8" disposable foam rollers for our coating followed up with a foam brush to tip off the little air bubbles. We use these... http://www.amazon.com/Wooster-Brush-R730-9-8-Inch-Roller/dp/B00125NQT4/ref=sr_1_4?ie=UTF8&qid=1368754783&sr=8-4&keywords=foam+paint+roller at the shop but we buy them in bulk so they are pretty cheap and we cut them in half to make 4.5" rollers out of them unless the job has a lot of big flat surface area. Also, since you got that much texture, i think everyone here is assuming that you were "hot recoating" i.e. putting on coat 2 and 3 within a 24hr window of the previous coat to avoid sanding. Just wanted to make sure that was the case, otherwise you could have issues with the later coats bonding to the previous if they were not sanded. -Alan
-
You have a great barrier coat there. The texture is just amplification of the underlying texture. Sanding will be the only way to smooth it. and sand it you should and then paint it. Sanding between coats will keep it flat on the outside so your last coat of epoxy is nice and smooth. Personally i think 1 coat epoxy sanded and then another coat is enough to seal the wood if you plan to use a good primer and topcoat.
-
Cheap Throwaway Brushes for Epoxy
Alan Stewart replied to John Kinnane's topic in B & B Yachts Forum
I use brushes for glass taping and at the shop we have brushes that have lasted for many weeks of work. With a new brush I tug hard at the bristles to remove any loose ones. Then just deal with the ones that fall out in the first use (make sure you get epoxy all over the brush and deep into the bristles. Clean brush in acetone and let dry/kick. Next day, swipe through the bristles with a wire brush if it's a little stiff and it will become perfect and soft again and no more bristles will come out. Continue to use until you either forget to clean it or it gets worn out. A diligent user could build a whole boat with one brush. -
B&BY Presentation at Marine Mart Apr 27 in Washington NC
Alan Stewart replied to ricknriver's topic in B & B Yachts Forum
Great day for a boatshow.

-
B&BY Presentation at Marine Mart Apr 27 in Washington NC
Alan Stewart replied to ricknriver's topic in B & B Yachts Forum
Rick, Planning to be there as well with my core sound 17 `Southbound` if there is room. Thanks -Alan -
Taylor and I are still up for it in our core sound 17 but it is looking wet. We plan to launch from Beaufort Sat. morning and sail out to Lookout and camp Sat. night and return Sunday. We will go if people go or not if they don't. We'll just go with the flow. My dad Paul has rebuilt the mast on his CS 20 Dawn Patrol but his sailing partner had to cancel last minute on him. He was not really wanting to go solo unless the weather improved. Anyone able to help him sail his boat out there and camp? I'm sure he would love to have another hand on the boat. He will have a 2hp outboard so worst case, she can be motored through the tough spots...it is a cruise right . Graham...how many can we fit on YOUR boat! hahaha -Alan
-
I've been working on my video editing but my friend Marty (Saltyfrog) from the watertribe who was doing some great PR stuff this year and collecting everyone's media beat me to it. Marty is no stranger to B & B and has a custom Graham Byrnes designed stitch and glue racing kayak. Here are the links to the videos he has put out so far. Be sure to watch the one about Dog's Life (aka Paul Kral) to see what the conditions on day 1 were like for a smaller boat. YIKES! Penguin Man is an engineer for Hobie and designed the Mirage Drive. He usually races with his wife but was solo this year. He makes it look easy. SOS and DWSB Penguin Man (hobie Tandem Island) Dog's Life (hobie Adventure Island) I am still working on my videos but will probably just put up the video in a more raw form. -Alan
-
Alan here, I'm working on the rest of the trip report. Glad someone is reading it! Tom, I wouldn't think about CF tape for you CS20 Mk2, I agree with Joe that being diligent with epoxy use i.e. not using more than necessary is the best plan for keeping the weight in check. Dnjost, I know that a friend of Phil Garlands made the CB for him but I didn't ask or look to see if it was a NACA profile. I assume that the rudder was but also not 100 percent sure. I do know that they used all the parts from the stock kit for the rudder so laminated plywood for the blade and cheeks nothing high tech, just good craftsmanship. Their trailing edge was mighty sharp.
-
I think i would have just glued the gunwale on with the #10 screws. If you dry-fitted the screws before gluing the holes would have been soaked in epoxy and when you screwed them in you'd be done! I've had so so many drywall screws snap off on me that I would be afraid to do it this way and if you remove the drywall screws too soon you risk breaking the glue joint too late, the screw. I think an example of fasteners that should be "bedded in epoxy" are any of those that are used to install hardware (drill, install, remove, drill bigger, fill, drill, install). But certainly if can't hurt to encapsulate your encapsulated screw. My 2¢ -Alan
-
My blades are 5-3/4" wide and 24" overall. 17" to where they start to narrow down to the shaft. I also measured my oarlocks at 85 inches forward from the aft corners of the transom. I would have had them farther forward but my control line cleats and coaming breakwaters were already installed. I made some riser blocks out of some scrap pvc decking board but they are too narrow and the deck flexes a bit. Need to add good sized hardwood backing block.
-
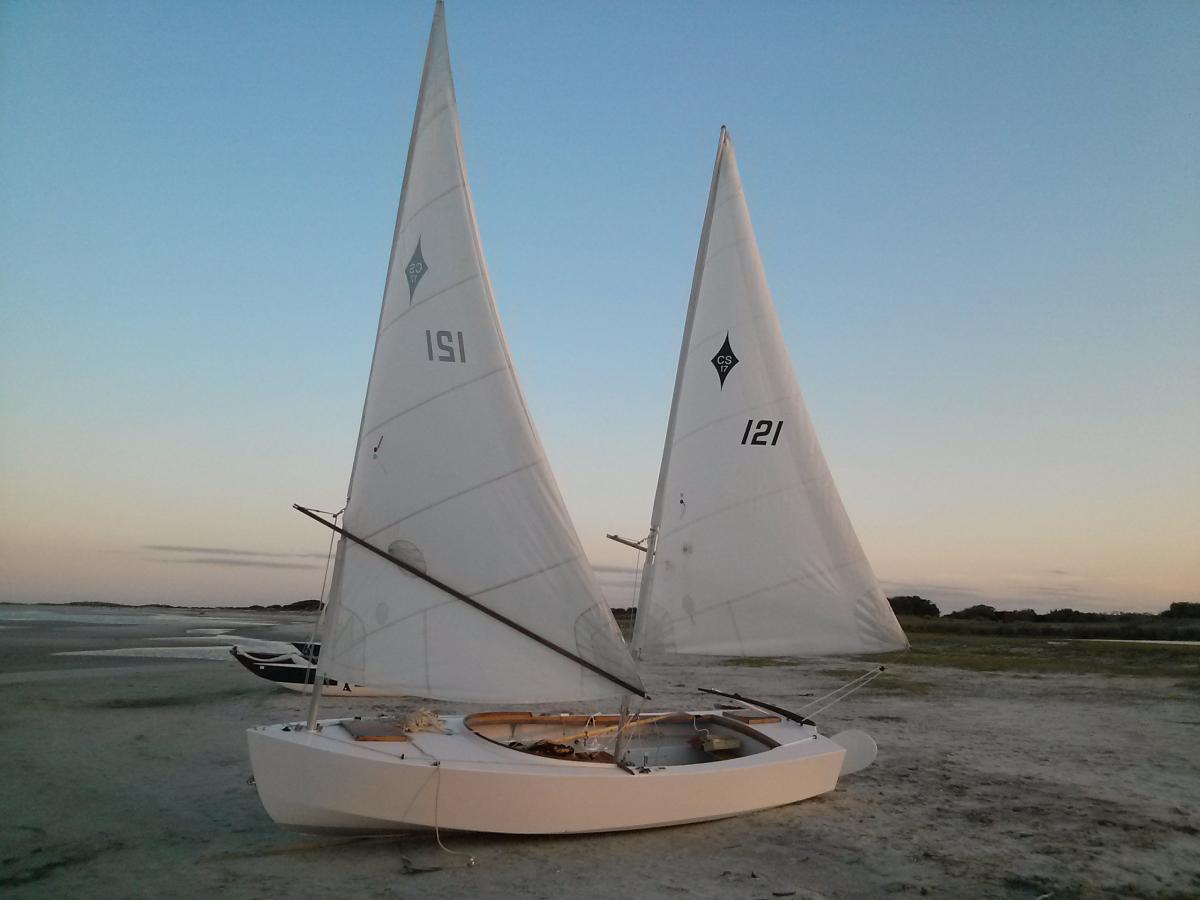
Got some questions about my Oars on my 17 so here are some pictures of them. I based them off of Grahams Oars for the Southern Skimmer EC22. They are 9'6" long and the blades are 6mm okume. The shafts are spruce 2x4 laminated into tapered blanks about 2" OD at the handles and rectangular at the blade connection about 1-1/4 by 1-3/4 with the wider dimension in the direction of the pull if that makes sense. Also there are fiberglass rovings running on either side of the shaft on the backside of the blade that extend about 18" up the shaft wrapping around so they are on both sides of the shaft to stiffen and strengthen the connection. The ends of the shafts were cut on the bandsaw to a curve to receive the blades. The front side of the blades were glassed while the oars were tied together with a spacer block at the tips to induce some bend in the blade after the blades were glued to the shafts. Oarlocks are a bit ahead of the front edge of the thwart and rowing is done on a bench seat that goes over the cb trunk. I like it this way because i can row without taking the the mizzen mast out if i need to and it frees up the cockpit so one person can steer and one can row and it distributes crew weight more evenly. I like that setup best. I also found the mizzen to be a convenient thing to put my foot against to brace while rowing. Without a brace for your feet you can't row with your lower body like you should.
-
Hey Dave, My 2 cents.... I think positioning the snotter attachment location should be pretty straightforward. I would (once the tracks are on) raise the sails and just play with some locations by lashing a line around the mast and track between sail lugs.. You can adjust and play with that location with the sails up and sprit hung in the comfort of your yard or something until your happy with leech and foot tension. I agree that it's not too critical. You want to be able to reach the snotter easily while standing which i don't think will be a problem. Doing it this way will also reveal how much the sprit will hang below the actual attachment point on the mast due to the angles and load on the line and such and is a function of how much of the sprit extends forward of the mast. When reefed, it will hang lower. If your masts will rotate then great. If not then you need to address the issue of increasing snotter tension when easing sheets which can damage snotter fasteners if the snotter is not relieved when easing sheet on a non rotating mast. That problem can be solved by using a loop of line that attaches to eyelets on either side of the track and runs around the front of the mast and to which the snotter purchase is hooked allowing the snotter purchase to "rotate" around the mast as if the mast were rotating. This is also IMO a great way to do it even if your masts do rotate because it distributes the load of the snotter onto two eyelets whose rivets will always be in shear (in a rotating mast). Finally, I would not consider a track on the front of the mast. IMO that goes very much against what you are striving for. Light weight and simplicity. The Sprit rig is so simple. If you really think you may need to adjust leech or foot tension this can always be achieved by raising or lowering the sail i.e. cracking off on the halyard and re-tensioning the downhaul or vice versa. I don't think reefed sprit angle will be a problem. never has been on any sprit boat i've sailed. New masts sound cool
-
Paint it and go sailing. but use 2 part so you can do more of the latter.


-
I second the suggestions to use a 2 part. i painted my 17 with devoe devthane 389 sold by pettit. you can get it in white and i sucessfully tinted it with black evercoat colorant from west marine (did NOT test any other colors) and with graphite powder to get grey and white. i did all my reducing with awlgrips brushing reducer (0031 i think). if you use graphite powder make sure you mix well and use a filter to get the chunks out before you try to roll or spray it but i didnt have any problems. i did all priming with awlgrip 545 over epoxy sanded to 80 grit and whiped clean with denatured alcohol. I rolled and brushed the inside and sprayed the outside. only thing i dont like about the devoe us the mix ratio 9:1. alexseal is a nice 2:1 and you can get colors but i was going a durable economic finish an i was really happy with the result. I'm not sure a primer is really necessary If you don't like sanding And your not too fussed about a perfect finish. i dont believe that the topcoat will stick any better to epoxy primer sanded to 80 grit than to well cured epoxy sanded to 80 grit. in fact i didnt bother to prime my rudder or ruddder cheeks and they came out great. my 2 cents
-
The first coat on okume always dries rough in my experience. I suggest a first coat as a sealer and then sand it smooth with 80 grit. The second and third coats will go on very smooth and glossy. Even though the bare wood feels smooth The hairy fibers stand up and cause the roughness In the first coat. You can minimize the roughness by sanding the bare wood down to say 220 grit and then you might be able to do all 3 coats like you want. To minimize out gassing make Sure the temperature doesn't go up mid coating. Once the first coat has tacked up out gassing shouldn't really be a problem But blush could be as mentioned above.