Jknight611
-
Posts
561 -
Joined
-
Last visited
-
Days Won
70
Content Type
Profiles
Forums
Events
Gallery
Everything posted by Jknight611
-
Hi Joe, dat green thing is the base plate on da foot of the rudder, trying to control the higher water pressure from slipping over the bottom of the rudder. Fixed rudder so it might make it more efficient. It may turn out to be just something to stand on when I do my walking on water act.
-
Didja see the “Big Pour” Alan posted on Facebook when we poured Mathew’s keel? I gathered every used wheel weight within a 50 mile radius of Tylertown! An 1800 lb keel is like moving an armadillo.
-
Many thanks for the link to the video. We are nearing that point, and a video is worth 1000 words. I think we will glass the deck before tackling the hull, to get the glassing mojo warmed up. Currently finishing making drawers and some storage ideas for the laserett, and the ever glamorous rebuilding the head pump. Graham and I discussed an end plate for the rudder so I layed up a 1 inch thick fiberglass foot for the rudder with the intent controlling the hi an lo pressure water flow, like the current trend of winglets on airplanes. Cabin top is nearing complete, insulated deck and cabin “should “ help with condensation. I keep delaying applying primer in the cabin, want to make durn sure all my ducks are in order before I start that phase.


-

Core Sound 20 Mk 3 -- #4 "Chessie" . .
Jknight611 replied to Pete McCrary's topic in B & B Yachts Forum
Pete, the owner’s manual is an excellent idea! A home built boat is a unique creation, and a document that will help another sailor will be a huge help to the uninitiated. Do you plan to “publish “ here? I am a huge believer on R&D (research & duplicate) . -
Core Sound 20 Mk. 3 #22 - Essex Fells, NJ
Jknight611 replied to NowWeTryItMyWay's topic in B & B Yachts Forum
I guess there is 2 schools of thought, I think it makes it easier to find things inside, easier to wipe it out (easier to see the grit an stuff). The other thought is you can easily see what is going on under the epoxy coating. I painted everything under deck on my CS20.3 with Sherwin Williams Tile Clad, 2 part epoxy. On the current build I am painting but using Total Boat BilgeCoat. -
I bet I am not to first to have “problems “ holding light fiberglass cloth up while you fit and apply the epoxy, I was glassing the ice box today and it is kinda hard to reach (didn’t think to do this before I installed the foam box). It came to me to try basting tape, I have a heavy sewing machine and basting tape is something I use a lot of. Well, a little strip of 3/8 basting tape holds the dry glass in place perfectly while you fiddle around getting it “just right”. After you apply epoxy I couldn’t find evidence of the tape through the laminate. Sure made it easier messing with the light glass. I may try using this technique when we glass the hull.
-
Core Sound 20 Mk. 3 #22 - Essex Fells, NJ
Jknight611 replied to NowWeTryItMyWay's topic in B & B Yachts Forum
Your boat is looking really nice, you are in the fun phase. The spring sticks are a good idea, I on the other hand, with a bit of Neanderthal technology, just shot sheetrock screws. When I was nearly finished I had a friend that is rabid on metal detecting sniff the boat looking for errant screws. -
Looks great Mark, you will be sanding in mo time! It does slow down when the temperatures drop, but I find my ambitions diminished it 105F too! Epoxy sure cures quick tho
-
And a very happy New Year to all! Here is a picture of the cabin before the foam insulation. The inner skin is maybe 3/16 inch and it was easily formed over the fore/aft building jig, yea the one that knocks my head. Simply filet an tape to the equally thin side inner skins. The 3/4 inch SYP is just formed over the fore/aft building jig on the cnc drawn lines on the top side of the inner skins. I then installed a 3/4 inch blocking (thickness of the insulation) on the outboard sides of the overhead panel and sidewall intersection for a landing spot for the outer top and side skins. If you notice the blocking just aft of the top hatch that is where the forward cabin knees tie into the overhead. There is some 3/4 blocking on the side walls to carry the deck house top loads to the deck carlins. I plan to epoxy the foam to the inner skin when I install the top skin, kinda bond the entire skin and insulation assembly at one whack. The cabin top is at a stopping point till the foredeck is installed, and that is dependent on a bunch of seemingly minor stuff in the head and main tabernacle, because the cabin front sits on the foredeck. So chickens or eggs.... The location of the main sheet......errrrr probably not on the cabin top, might be a little far forward on the wishbone sprit weldment. I will be building the tabernacles soon, I want to extend the tabernacles so we have access to the cabin with the masts lowered, so with the mizzen tabernacle a little taller, possibly a block on the mizzenmast tabernacle up high with the sheet following down the tabernacle to a block/cleat arrangement at the base if the tabernacle and bridge deck. If I find I need to control mainsail twist I may make a twinger arrangement in place of a main sheet traveler. A taller tabernacle might make a good support for the aft tube support on the dodger too! Time will tell.

-
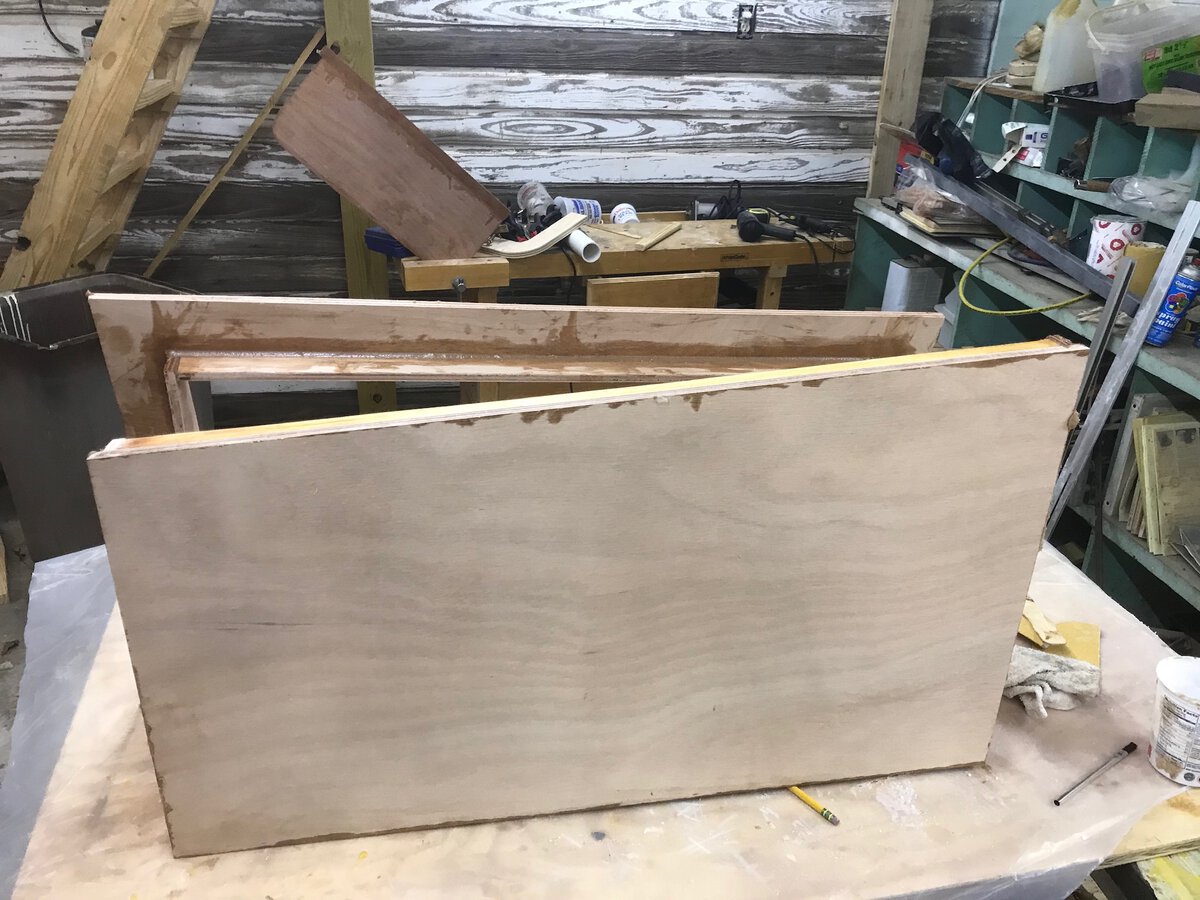
Well, the cabin is coming together, the insulation is in place an looking good. I am in a quandary on the hatch on the cabin top, originally I wanted a butterfly hatch simulated, I mean it would look like a butterfly hatch when closed and open similarly to a regular hatch, but after visualizing the cabin I am leaning towards a “store bought “ hatch. One of the funs in boat building is you have choices! My remedial hatch frame is completed, and the one I built backwards sure looks good, other than being...... well who hasn’t built 2 lefts an no rights. Glassed the rudders ( a big un an a little un). The core is Airex PXC is super strong, light, rigid, waterproof, chemical proof, nuclear weapon resistant and the absolute work of the devil! I sanded the mill marks and rounded some areas....... I will be scratching for a week! Never imagined it was that nasty to work with.

-
Steve, fortunately there is/was only one rather large tapered hatch on the port side, we plan to go offshore some and I wanted as few openings in the cockpit as reasonable. We took a wave one night in our Orion, completely filled the cockpit, made a believer of me!
-
No, but I have considered a sun room instead of a quarter berth! The huge laserett is on the port side, building some shelving in there to prevent the “toss it in the bottom “ syndrome.
-
If anyone wants to build a Mathew Flinders, I have an extra starboard hatch ring....... The port cockpit seat is the only hatch we will have in the cockpit, and it is tapered more narrow in the stern. I set up last night to build the hatch and ring, taking care to get them correct, the only thing I can imagine is a neighbor slipped in and swapped them! Oh well, not the first project to have too many parts for one side and not enough for the other side!


-
Ya know building a boat, sometimes the obvious isn’t so obvious. When I started building Matt, I had a small container of sheetrock screws, needed more, I bought more......if ya do this, be certain, no very certain you buy screws with the same head pattern. Dragging my feet, the deck panels are prepared, the carlins and inwales are ready to accept the deck. This next week I am building drawer boxes and other fiddly stuff waiting on the ah ha moment when I realize what ever won’t fit now with the cabin top or deck installed!

-
Where I live, that much Sneaux would have schools closed for a week !
-
Hi Steve, your boat looks great, sorry you couldn’t make the Messabout, hope to see it and you at next year. The pump is a Johnson Pump F4B-11 Ski Boat Ultra Ballast Pump. It has worked fine for 4 years now. I put the inlet in the centerboard trunk, and it has worked good, except when you pinstripe with the centerboard, mud gets in the tank and it is a PIA to clean the tank out. It is terribly noisy if you mount it directly to a bulkhead, turns the boat into a sounding rod, I used some Lord brand rubber mounts on my second iteration, better. I used pvc on Southern Express, but if I were doing it again I think the PEX would flow better. A perfect time to use the ballast pump as a cockpit wash down pump and water ballon filler with a simple 3 way valve.
-
Nice job! The gasket on the centerboard slot looks like a good idea, if just as a mud squeegy. My water intake on my CS20.3 for my ballast pump is in the centerboard trunk, it seems to work well till I just barely tapped the centerboard into that famous gray sticky clay, must have gathered a pound or so of mud which promptly glued my centerboard in the up position and filled my ballast tank with some really foul smelling sticky mud.
-
Thanks Don, it was so “Restrained” it was only going where we wanted it to! A neighbor has cattle and a big JD tractor with a round bale spike on a front end loader, unloading will be easier but for the next few days it is resting comfortably in the trailer.
-
Going to be equally interesting to get it out!
-
Bones, invalid address Jay jknight611@earthlink?net
-
Well, another Messabout is in the books, so many heartfelt thanks to Joe an Sally, Graham, Allen, Nate and everyone that got in on “THE BIG POUR”. Heading home tomorrow with a perfectly poured lead keel for Matt, plus a full trailer of next build items. Everyone here knows it but B&B go way beyond!! now, back home and my regularly scheduled sanding. Jay
-
Seaya there!
-
About time to update the Mather Flinders build. It has been an easy build so far, a lot of the build is done from the floor, not climbing in and out of the boat. The kit is incredibly accurate, I have used a block plane to fit a few panels but generally it all fits perfectly. The interior panels all have their first 2 coats of epoxy, and I have a date with my sanders after this year’s Messabout for another coat rolled on. Most of the cleats, carlins, and inwales are either installed or are ready to install. All the “horizontal “ surfaces are laying in place but not glued yet. All the plumbing is roughed in and conduit is dry fit for wiring stuff. Picking up a bunch if stuff at this year’s Messabout but there is enough stuff installed to get a feel of the cabin size, and it is “just right”. Just realized some of the photos are several weeks of “progress “ back, hope to be at the 2020 Messabout!


-
Hi all, we traditionally sail our CS20.3 before and after the Messabout but this year..... she will be resting beside her big sister, (brother?) while we solicit B&B expertise pouring the lead keel for Mathew Flinders. probably should resurrect the Flinders thread with some fresh pictures.
-
Build of CS20MK3 HULL # 24 by Mark Rendelman
Jknight611 replied to Mark Rendelman hull 24's topic in B & B Yachts Forum
Gravel in the buckets looks like it works good, I filled a bunch of food grade buckets with fancy O ring lids with water, and you know what happened. 10 buckets, one failure. 5 gallons is a lot of water!