

Don Silsbe
-
Posts
2,248 -
Joined
-
Last visited
-
Days Won
152
Content Type
Profiles
Forums
Events
Gallery
Posts posted by Don Silsbe
-
-
I just got off the phone with Austin, at Sadler's Creek State Park. He know's we're coming, and has answered my questions. The answers are all pretty much the same-- yes, come on down! Yes, you can anchor out overnight in a bay. It'll only cost you $2 daily for your vehicle. You may park your empty trailer and tow vehicle at the boat launch. If that isn't your desired location, you can park it over by us campers, as long as you don't block the road. If you are coming in for the day (only), drive directly to the Day Use Area. You'll find a large parking lot at the south end of this area, which is adjacent to a fine "beach" (of Carolina red clay/sand). Starting around 10:00 or so, we'll be beaching our boats there. Unfortunately, the boat launch is way over on the other side of the park. But that only means that you start off your day with a small boat ride. DON'T TRY TO CROSS BETWEEN THE ISLAND AND THE PARK! It gets mighty shallow in there-- knee-deep, depending on lake levels. I will be camped at site #55, Loop #3. This loop has the best boat-friendly shoreline of all the Loops. The shoreline of the camping loops on the eastern side of the park are full of nasty rocks! Anyway, I am looking forward to seeing y'all at our First Annual Messabout. The first photo shows my first mate inspecting the "beach" I've called Messabout Beach. The second is a typical waterfront campsite in Loop #3. (This is not my camping rig.) When approaching from the water, our campsite will display a large green and white flag. When approaching from land, look for the medium brown Ram pick-up truck (and yellow BRS15, unless she's in the water). Late Saturday afternoon, we'll go over to a local BBQ. Since they close at 8:30, and often sell out, I suggest starting in that direction around 5:00. Please stop by and say "hey!"
N.B. This messabout is not affiliated with B and B Yacht Designs. We're simply a bunch of guys down here in the Appalachian Foothills who build boats and like to get together on occasion.
Thrillsbe
(AKA Don Silsbe, Local Honey BRS15)


-
-
It's a shame you can't make it, Jay. Chick's right, though. Let's plan something!
-
Finally, my centerboard system works like a champ. There are a pair of cheek blocks mounted on the underside of the forward thwart. That positions the pennant to run close and parallel to the trunk. There's also a fairlead stop that the blue ball contacts, to prevent the centerboard from rotating forward (I hope) in grounding situations discussed on this forum. Then, it's a simple two-stage cascade system terminating in a V-cleat on the underside of the center thwart. I see that I have a run of varnish to clean up on the c/b trunk!

-
The mainsheet system is much simpler. It uses the same snotter arrangement, which I did not give you a photo of before. Three blocks are attached to eyestraps using soft shackles. With the eyestraps mounted underneath the seat, it keeps the seat clear for rowing or fishing. These lead to Graham's standard fairlead-clamcleat system. All of this comes off the boat for fishing or boatride mode. The only obtrusive piece of hardware is the Ronstan RF58, which is removable, too, since it is attached with machine screws and T-nuts. The sheets are all New England Ropes' Buzz Line. The snotters are Sta-Set, in traditional snotter green.


-
A few months back, I promised you photos of my sheeting systems. Here they are, starting with the mizzen. First of all, you should know that my design priorities are:
- Simplicity
- Ease of rigging up
- Cleanliness-- in fishing mode, I don't want dangling blocks & loose lines flopping around.
- Economy
I also reserve the right to opt out on any one of these, if I want; which I have.
The mizzen is attached to the transom with a removable bridle. That's a Lanyard Knot (diamond) in the center of the Dinghy Control Line. I didn't need to use DCL, but I had a short piece of yellow, so rule #1 kicked in. All the blocks are attached using soft shackles-- they stay attached to the sheet. I wanted all my sheet cleats to be forward of me, so I broke rule #1 & 4, and went with the system shown. What got clipped from the photo is a Ronstan RF58. The forward (detachable) block on the sprit is held on with another soft shackle, fed through a low-profile eye strap. Since this block has to be fed through the mid-sprit fairlead, I went with a large white nylon ring. I can easily pass the block and shackle through this ring when rigging. The snotter is knotted to the mast, & held in position with another low-profile eyestrap. It leads through a smooth, varnished hole in the end of the sprit, and leads aft to a V-cleat in the middle of the sprit.
NB: I rotated these photos in my file folder, and they still show un-rotated! Grrr.


-
Yeah, Blkskmr, bring the kayak or the Wayfarer. It don't matter none! Just come!
-
Now it's time to thank you all for all your technical support. She is a much finer Honey than she would have been without all your assistance. Soon, I'll post a photo of my mizzen sheeting system, so stay tuned. But thanks, everyone, for the help.
-
 1
1
-
-
A couple of days later, a friend of mine and I went out on the same lake. The winds were fresher, and we had a good sail.
-
This is one of my wife and me sailing her for the first time. She ghosted along beautifully in the light air.
-
Here's a video of the first launch:
-
Steve W: I'm not a beekeeper, but I do like to play with words. The (non-plywood) materials are all locally grown, and the boat's a honey, so...
Alex: The water is too chilly to try the boarding ladder, at least to intentionally try the boarding ladder. I'm waiting a few months before I do that, hopefully. I think the oars are 8' long. I'll measure them later on, and get back to you.
-
Having a problem uploading videos. I'll attack that later. In the meantime, here are a few more photos. My photos won't rotate. They are upright in my file management system, but not here.


-
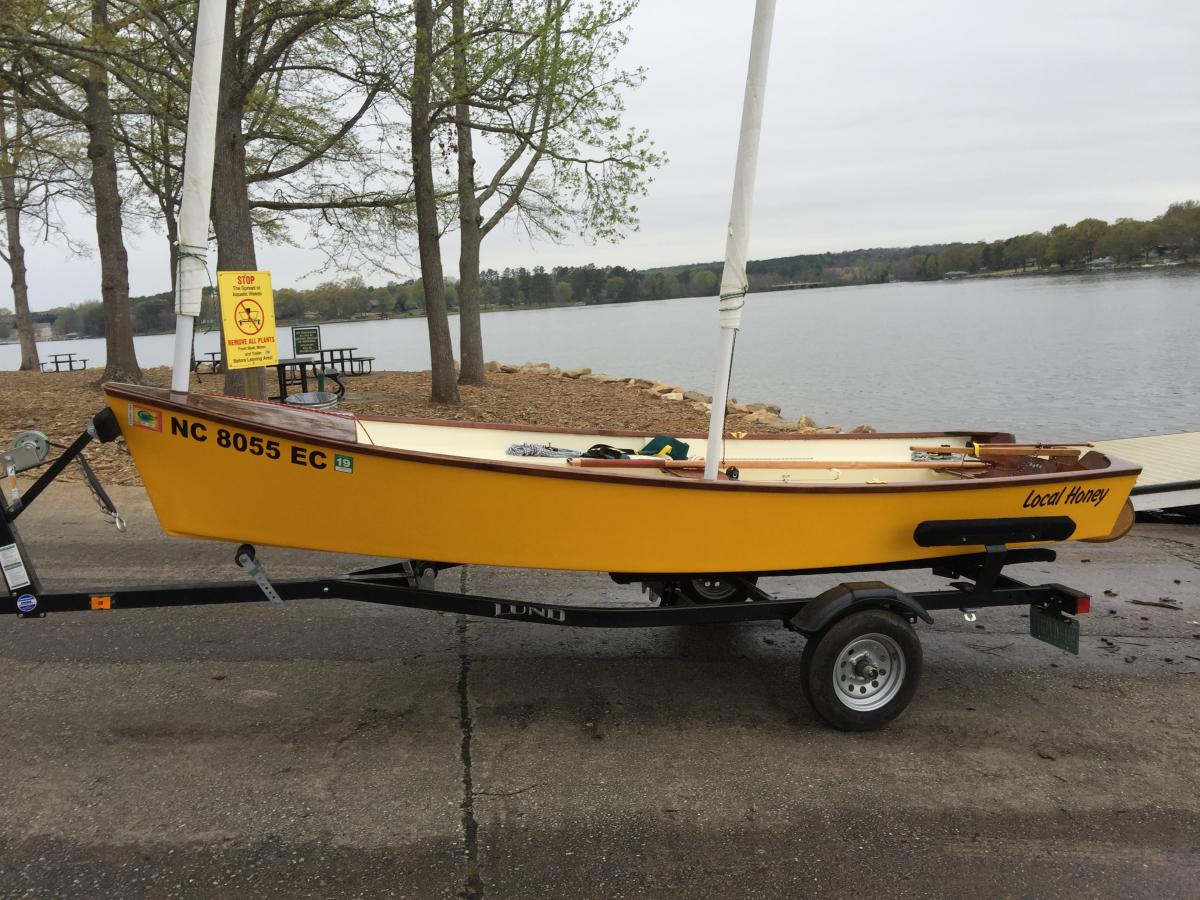
She finally got launched last Saturday. It was a light air day, which is perfect for learning my new boat. She ghosted along like a dream in practically no air. Launch photos and a few videos follow. The older gent in the launch photo is Don Rausch. He's my boatbuilding mentor, and the guy responsible for introducing me to B&B Yacht Designs.


-
Graham,
I love the lines of this boat! She turns my head every time I go outside. They are vaguely reminiscent of the rowboats I played in as a child. (My hand is on the oar.) But this one you've designed is far lighter, faster, and prettier. And she will sail, too! I can't wait to get her in the water!

-
Chick,
Why do you epoxy spars when you will also have to varnish them with a uv blocker. Not being immersed in water, won't the varnish keep them waterproof from rain, hail, etc?
Pete,
I like to lay down a coat or two of epoxy underneath all my brightwork. It is the equivalent of about four or five coats of varnish, filling in a lot of little nooks and crannies in the grain. It also bonds better to the wood than varnish. It's almost like cheating.
-
I'm almost ready for launch now. Looks like the hold-up is my bride, who is out of town for a few more days. In the meantime, here are some photos of my rig. This includes my mizzen sheeting set-up. What's the trick for getting photos rotated? It appears OK when I view it on my computer.


-
Thanks for posting this. I saw the demo at the Mess-about, and wished I had taken notes. This is much better.
-
I'm within a week of launching my BRS15. I'd really rather work at getting her wet, than go on a field trip. I'll call them for some of your questions. In a week or so, we can take Local Honey down there to check the place out, OK?
-
I often use the nylon straps that are used to strap kayaks to the vehicle. Not sure if it would work in your case. Sorry for the cock-eyed photo, but I think you get the idea.


-
What stuff?
-
Thanks, Paul. I used a kit for the oars, but the sprits were done from scratch. I bought the leather from Tandy-- a belly patch. I also bought a tool from them, to punch the holes. (See photo.) I highly recommend having one of those!
By way of an update of my build, the pine pollen bloom here has brought my varnishing efforts to a screeching halt. I was hoping for another coat or two on my deck. Guess that'll have to wait for 5 or 6 weeks.

-
What a heartbreak! Yes, let's plan on joining forces this October. Don't work too hard!
-
I got my leathers laced on today, besides another coat of Captain's. I think I'm starting to get the hang of the varnishing! (Famous last words...)


Appalachian mess-about
in B & B Yachts Forum
Posted
How 'bout a fly-in messabout, Robert? I'll pick you up at the airport. (GSP) We'll be messin' about from 10:00-5:00, EDT on Saturday, and who knows what on Sunday. (Don't forget the time difference!)