Chick Ludwig
-
Posts
2,865 -
Joined
-
Last visited
-
Days Won
127
Content Type
Profiles
Forums
Events
Gallery
Everything posted by Chick Ludwig
-
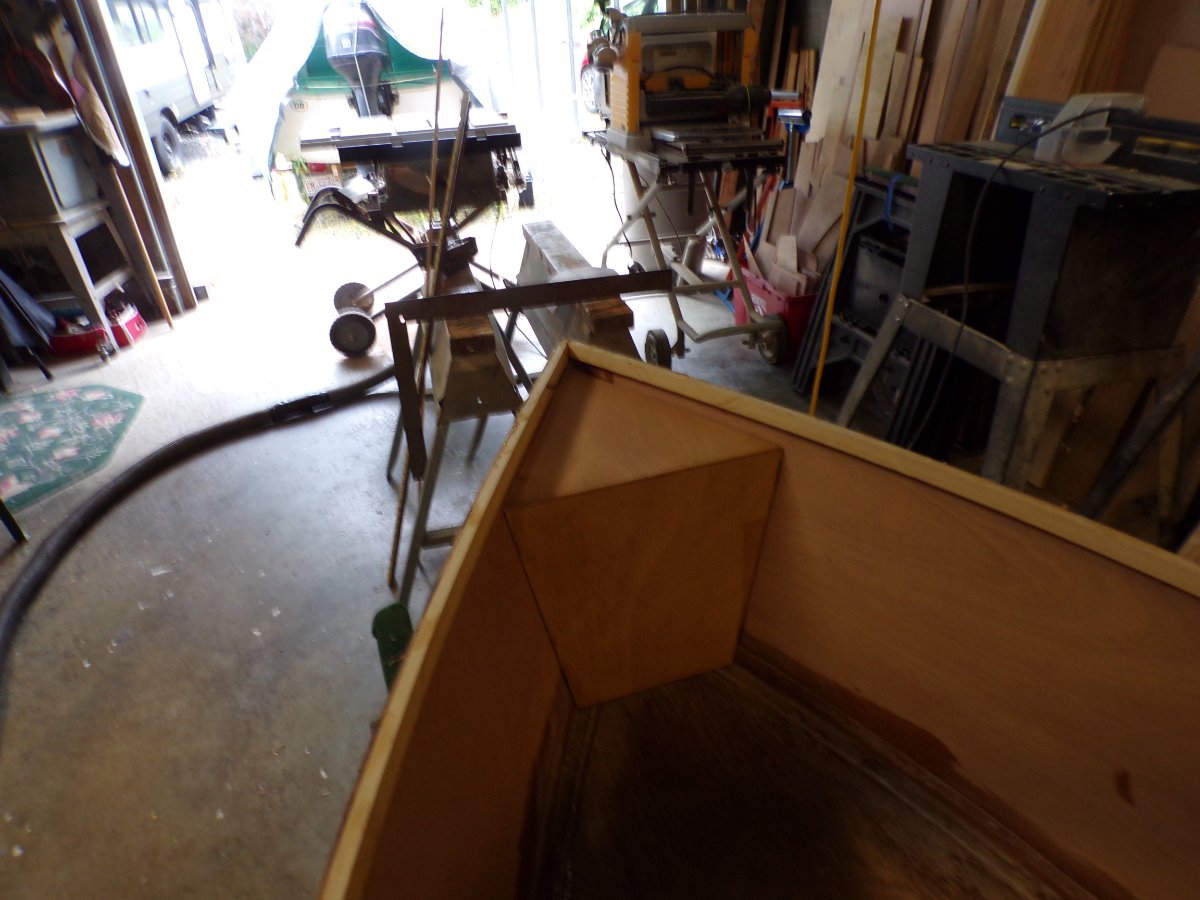
 Be sure to leave an opening at either end for air flow to prevent condensation from forming in your boat.
 -
Post #11 (9-12-22) They're here! Plans are finally done! They are on my Chick's mini-boat Facebook page https://www.facebook.com/groups/456212336419980 I've had trouble getting them into a file, but tey are all on posts on the page, or you can order them as I've offered. See the page for details.
-
Aren't what y'all are calling transom knees actually the quarter knees? Transom knees are from the transom to the keel.
-
I'd LOVE it if you'd come visit! Bring some salt water with ya!
-
I've made a Facebook group page with all of the posts on building my mini-boat. I'm working on the drawings for the hull panels soon, and will make them available to you. The group name is - Chick's Mini-boat Here's the group page "address". https://www.facebook.com/groups/456212336419980/permalink/456307603077120/?notif_id=1662222035020564¬if_t=video_processed&ref=notif
-
Post #11 (8-29-2) FINALLY! The finished boat. Family health considerations have slowed everything down . It will be awhile before I can get this thing into the water. I'll post pictures when that day comes. Meanwhile, I'll be working on drawings for the plans.


-
"Different ships, different long slices." This is a quote from a famous yacht designer from the old days. Does anyone of y'all know who?
-
My sails had slides rather than being laced to the mast. I also had the long battens. Sails were kept in "sausage" sail bags. No big deal hooking on reefing lines. I only rigged them on the first reef point. Never had a reason to go to second reef. All lines including reefing lines went to the cockpit.
-
On Summer Breeze, I left the snotter attached and pulled it up tight to the mast, then a lashing around the clew end of the sprit firmly held them to the masts.
-
What is the area of your sail?
-
Update of hull 24 build
Chick Ludwig replied to Mark Rendelman hull 24's topic in B & B Yachts Forum
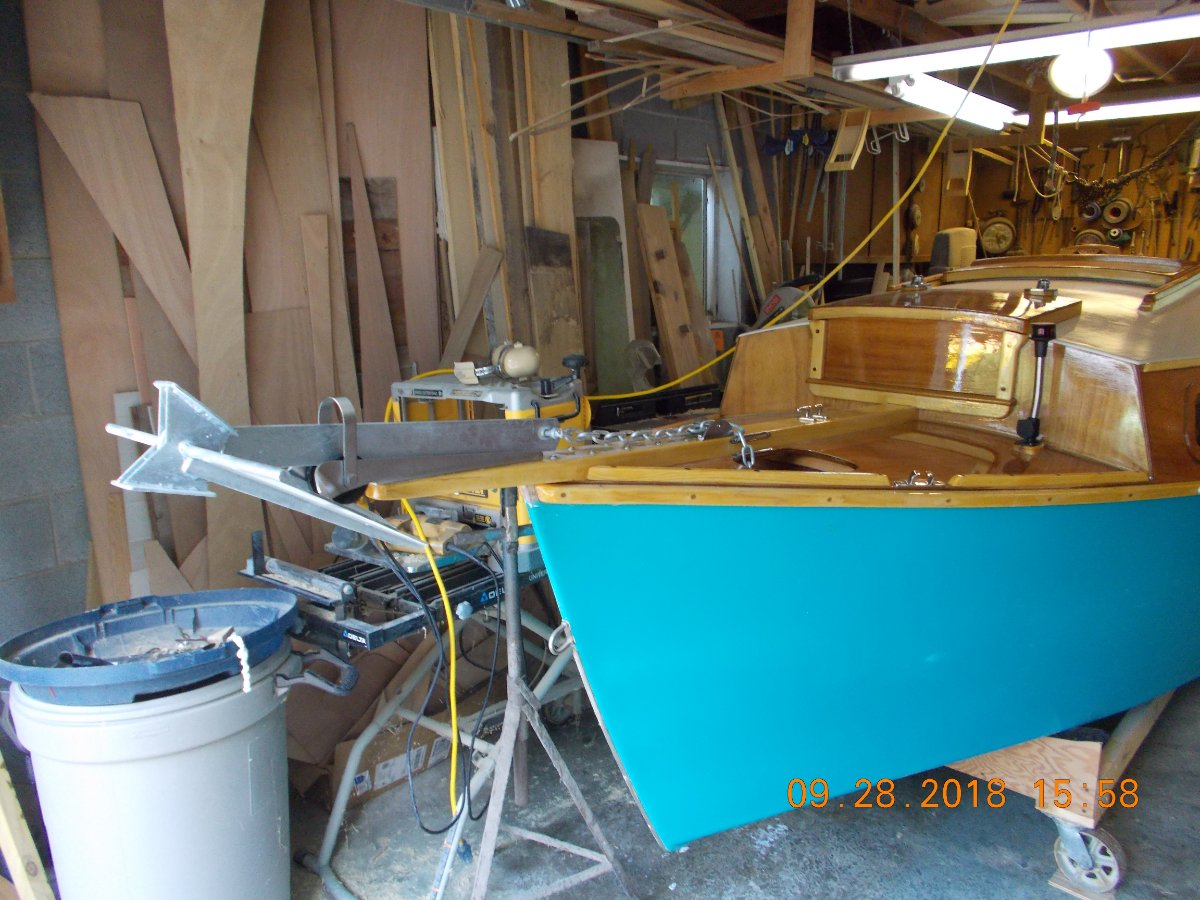
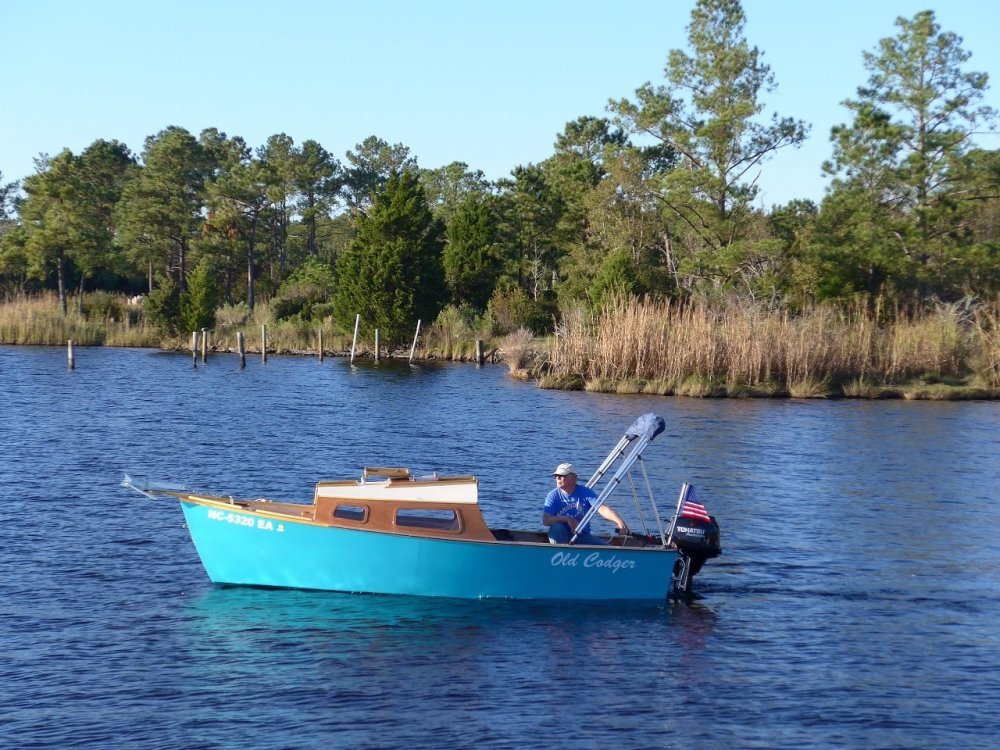
Here's my anchor on a bow sprit of Old Codger.
-
Mini-boat Post #10 (7-9-22) Here's the seat. Just a bass boat seat from Amazon, with “feet” attached. Pads keep from marring the varnish. It just sits in place---not attached.


-
Lookin' good. But, is that a potty lid? You forgot the bucket under it.
-
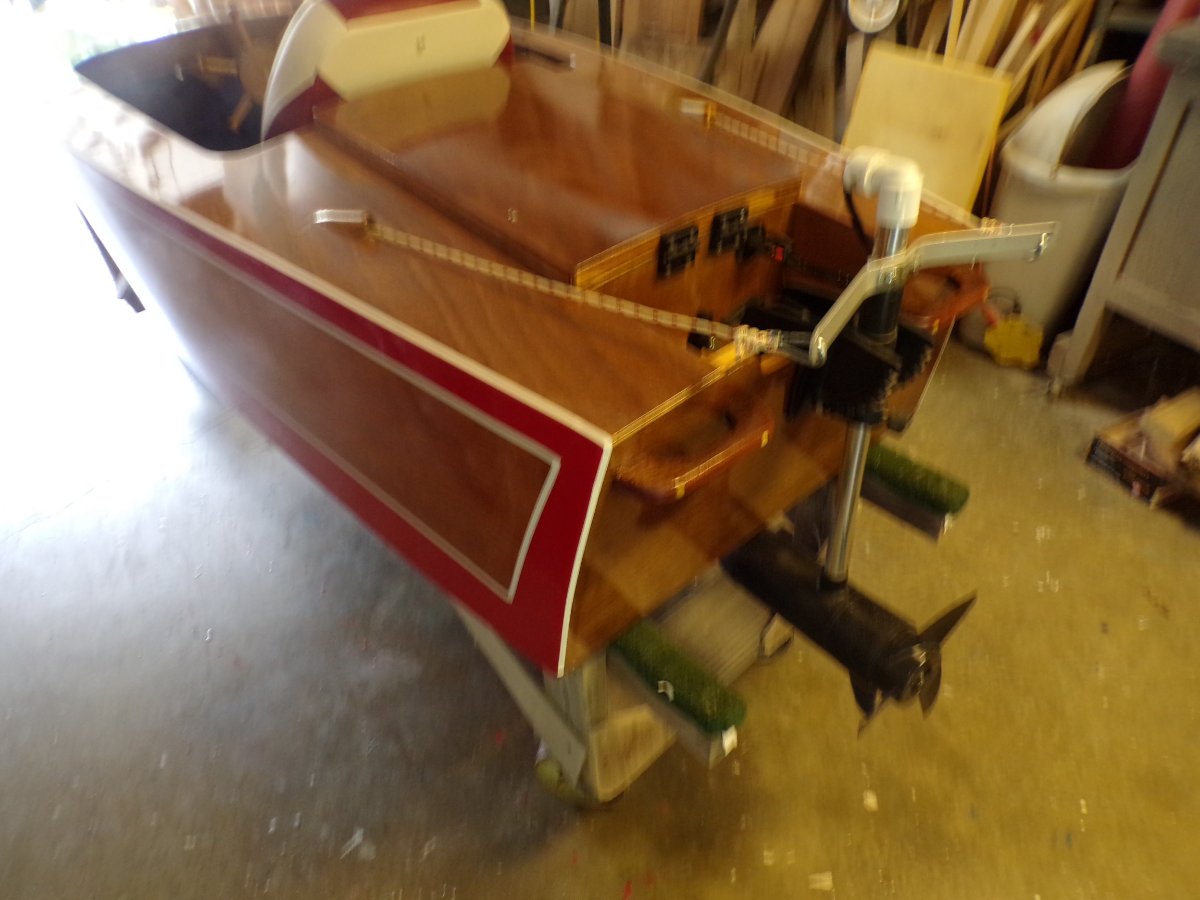
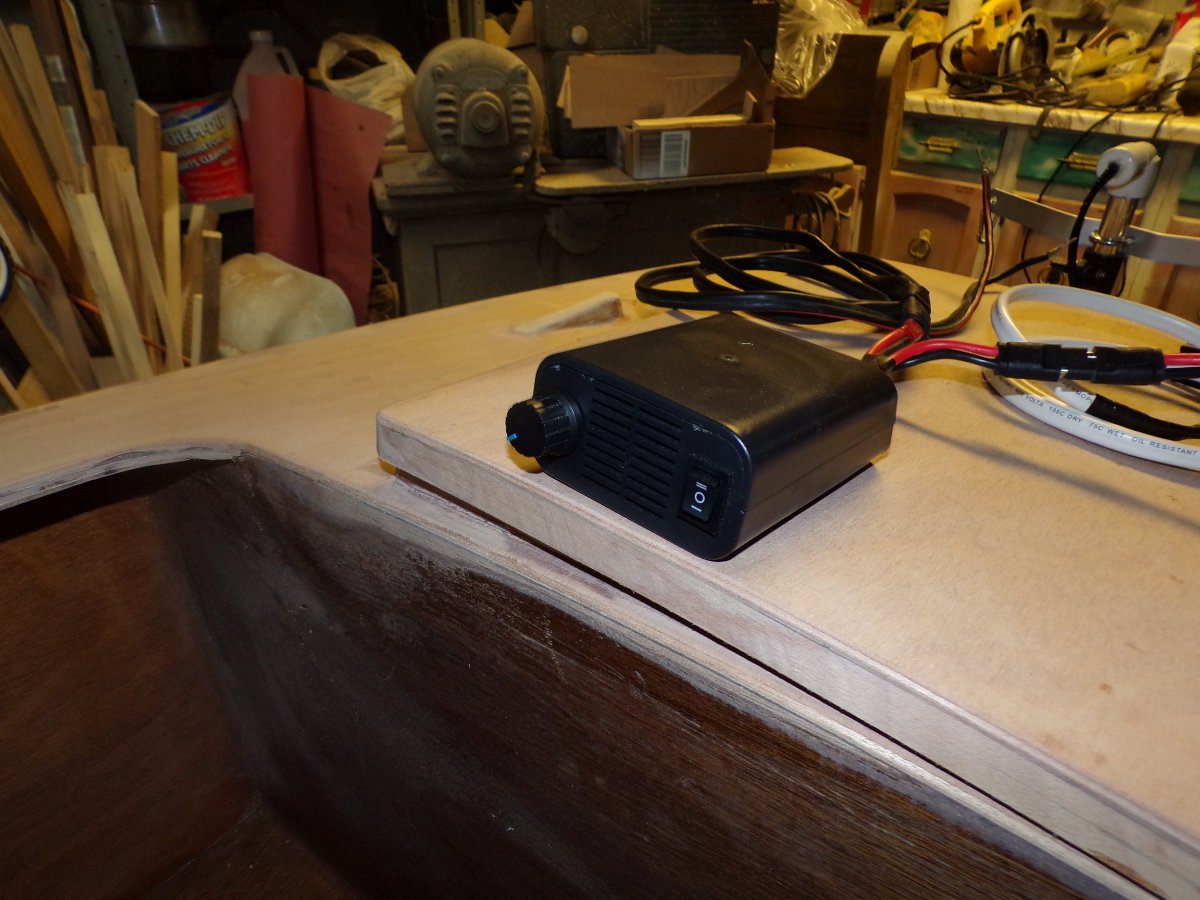
Mini-boat Post #9 (7-7-22) Just a batch of pictures of how the PWM is wired to the motor. I use quick connect plugs everywhere so I can remove everything easily. The wiring will run under the deck to where the PWC is attached in the cockpit. One set of wires is attached to the “power” side of the PWC and goes to the battery. The other set is from the motor terminals, and goes---guess what!!---to the motor. The motor plugs into a receptacle mounted in the motor well. All of the components come fro Amazon except the extra 10 ga. Duplex wire that I already had. That's the white wire coiled up. I used a ¾ slip elbow and cap on the top of the motor tube to exit the wires. I used hot melt glue to attach it. It is a loose fit. There are several PWC's listed on Amazon. Here's the one I use: ICQUANZX DC Motor Speed Controller, 60A DC10-55V Motor Governor High Power Control Board with Digital Display - 0-100% Adjustable.... I like it because it is in it's own case. The controls fit into holes already in the case except for the RPM counter. I just placed it in the case and don't use it. The plugs are: Miady 5-Pack 12" 10 Gauge 2 Pin Quick Disconnect Audiopipe Polarized Wire Harness, Heavy Duty SAE Connector..... I buy the 5 pack so I'll have more as I need them. You can buy fewer as needed. The motor plug is: Electop SAE Power Socket Sidewall Port, Weatherproof SAE Quick Connect … It comes in a two pack. That's all for now. Time to get on with epoxy coating, sanding, priming, sanding, painting, final assembly. I'll be back when I have more to show y'all. By-the-way. Still planning to get some drawings for ya, so you can build your own.


-
Mini-boat Post #8 (7-1-22) It's PICTURE DAY! First pic is of the steering cable coming though the fairleads. Next is of the boat so far. Then the hatch coaming, next two are of how the "doubler" is made to stiffen the edge of the cockpit. Then the hatch being assembled. Can't forget the bow handle! Steering attachment to the motor. Now it's time to modify the trolling motor for the remote PWM control unit. (Pulse width Modulation). First is how the wiring is on the handle of the motor after you remove the top of the control head of the trolling motor. These will be un-hooked. Last picture is showing how the shaft has been cut down. I used a tubing cutter. If you use a hack saw or saber saw, be careful to not hit the wires! The big wires, red/black and black are the power supply to the motor. They will be attached to the PWM motor terminals. The yellow and blue wires will be cut off and the ends stuffed down the tube. They are for the forward/reversing with and aren't needed because that will be done through the PWC. I'll show this all in the next post. Post #8 (7-1-22)


-
Well, there's not THAT much dust. But it sure isn't a purty, slick surface, either.
-
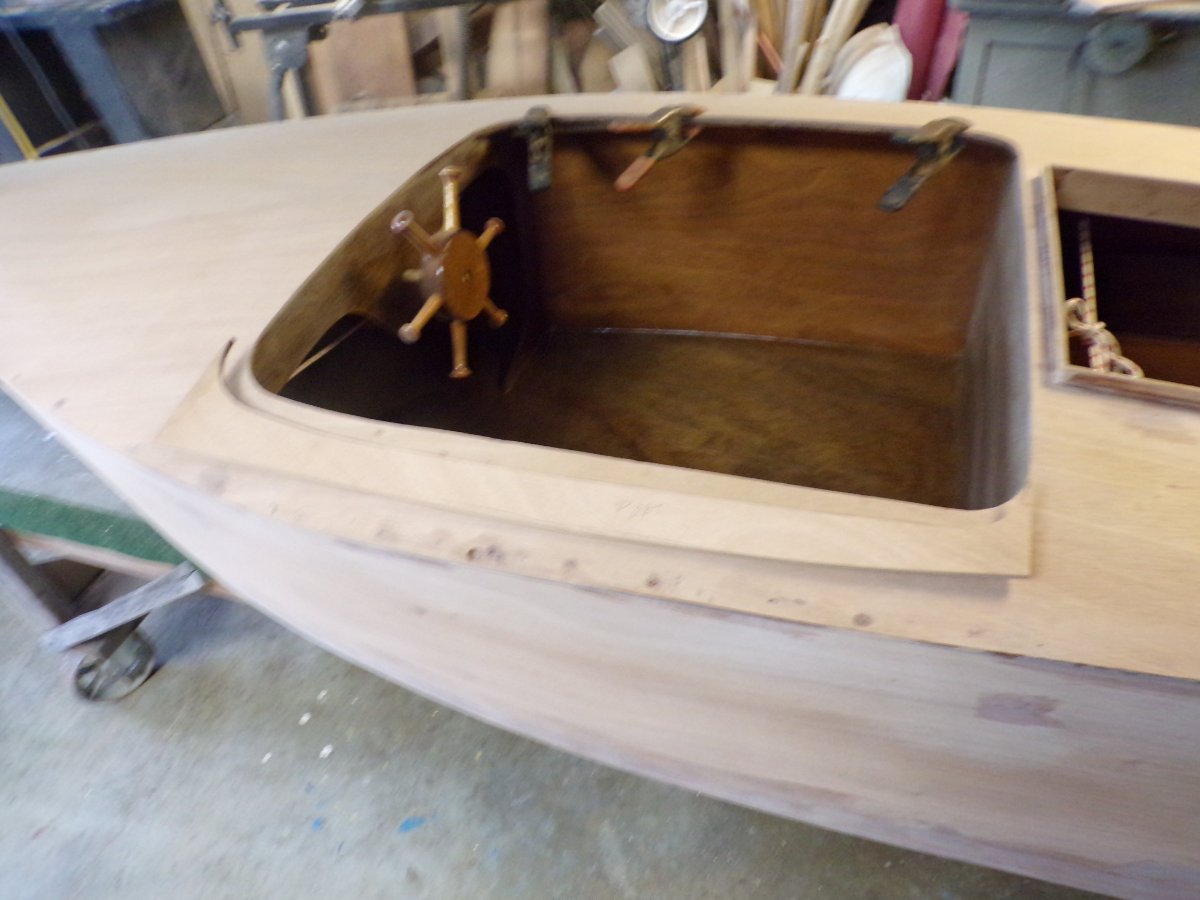
Mini-boat Post #7 (6-27-22) Lots going on to keep me from the mini-boat project, but here's an update. The interior has been varnished---BUT... I used Rustoleum varnish over properly cleaned and sanded epoxy, but it wouldn't dry completely. Some varnishes are nor compatible with epoxy. I usually use Pettit Captain's varnish which is, but didn't have any, none available locally, and expensive to order and ship. I “cheaped out”. Ya think and old guy would know better! It was still tacky after several days!All I could do was add another coat on top of the tacky one. This works pretty well, but still takes a long time to dry. But finally it is done. The two coats that took so long have plenty of dust settled on/in them. I just ignore it. Maybe later I'll go back and sand it all and add another coat. Looks good from a few feet away. I dunno. Moving right along. The deck has been installed except for “doubling” around the cockpit sides. I also built a raised coaming around the hatch area behind the cockpit. Next project is the hatch. Also fairleads to lead the steering cables through the deck have been made and installed. And stern lifting handles. I didn't have them on boat #1 and they are needed. That's it for now. See ya next time with more exciting adventures in the mini-boat mini-saga!


-
No. I traded it to Graham Byrnes of B&B several years ago.
-
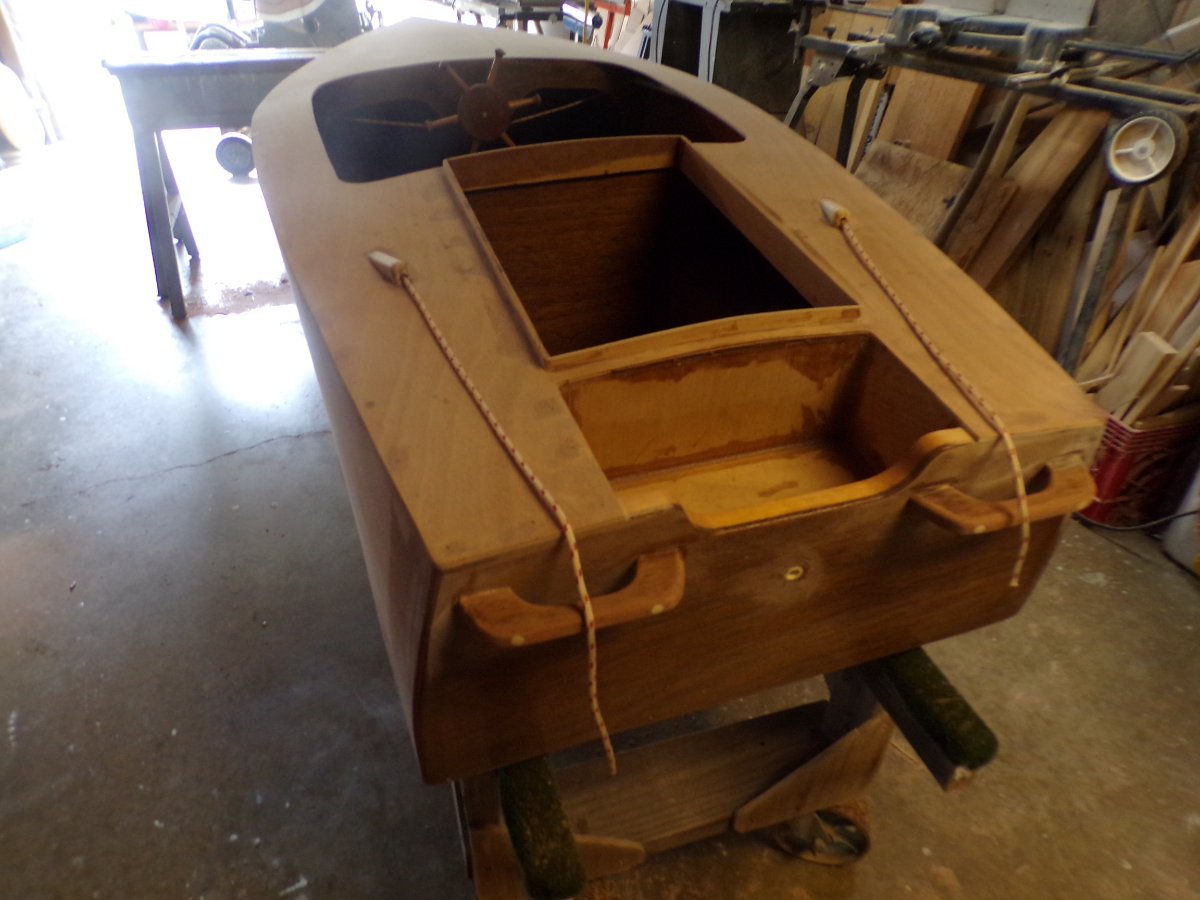
Mini-boat Post #6 (6-11-22) The steering drum, pulleys, and “guide tubes” are in place. The steering cables will be led through fairleads through the deck after the deck is installed. The deck is roughed out and sitting in place. The openings for the cockpit, hatch, and motor well will be cut to fit after the deck is bonded down. Not shown is the deck lifted back off and poxy coated on the backside, and the interior of the hull varnished.


-
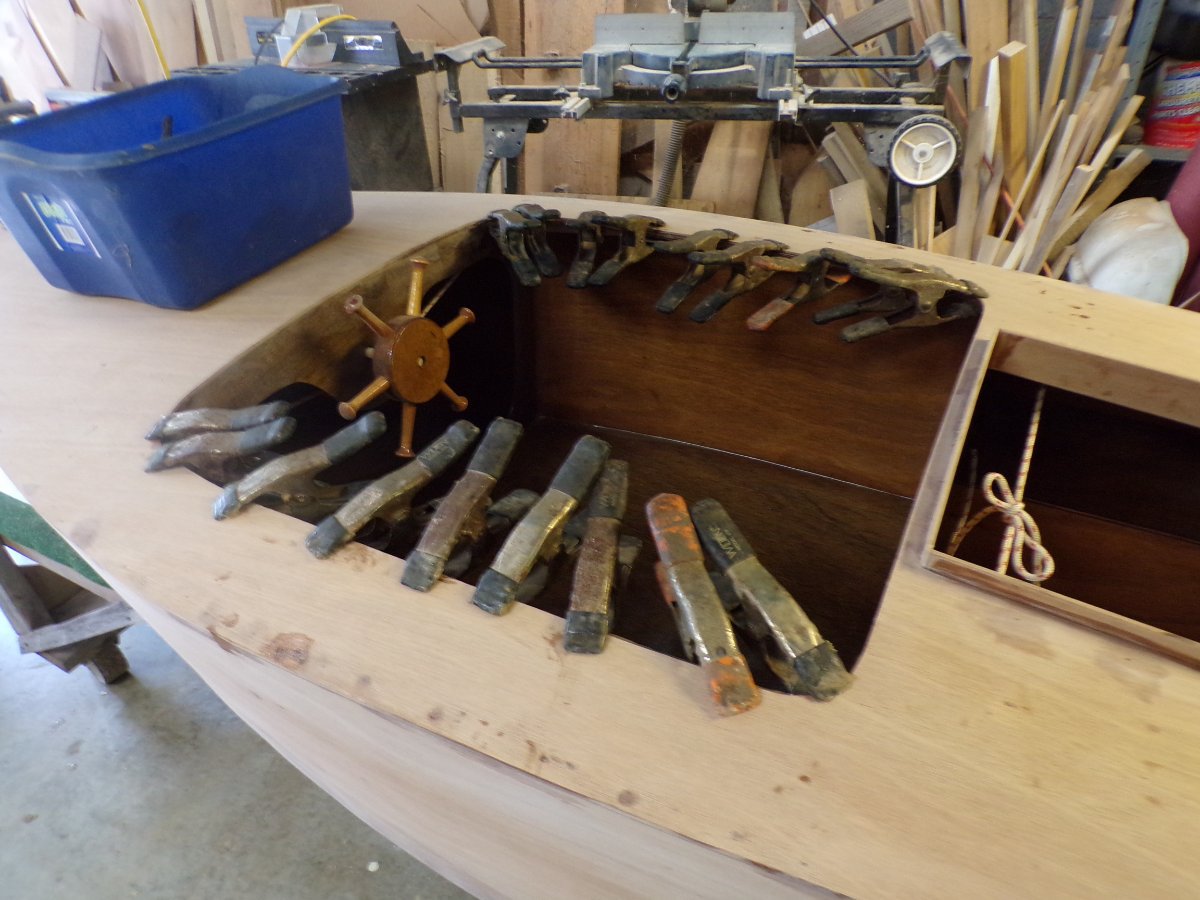
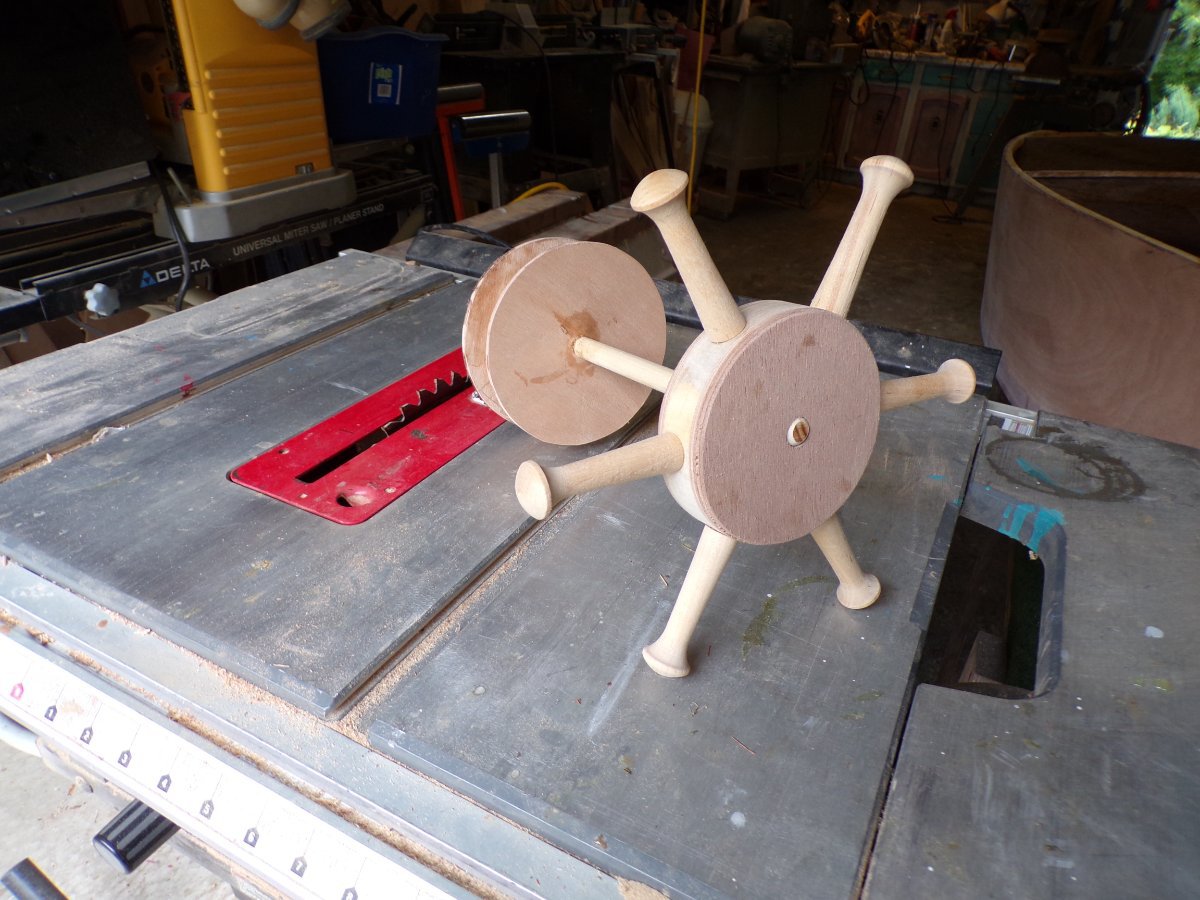
Mini-boat Post#4 (6-7-22) BACK AGAIN! But, not much has happened since last time. Two coats of poxy have been slopped on the inside of the hull. I even remembered to drill a drain hole. It goes through the center keel strip. The plug is a simple 3/8 inch “flip plug” from Lowe's. I told you I'd post pictures of the steering wheel and drum. They are on a ½ inch dowel. The next post should have them mounted. But first, I will sand the poxy and paint on a coat or two of varnish, so I may not be back for a few days. Gotta let the poxy cure good before sanding.


-
Mini-boat Post #4 (6-4-22) All of the outside “corners” have been glassed with 2 inch tape and then sanded to remove the ridges of the tape. The keels have been added. They are 3/4” wide and 1” deep. They worked well on boat #1 to help tracking and stiffen the 6mm bottom. The boat was flipped back upright and deck framing was added along with the motor well. I also made the steering drum and steering well, but you'll have to wait for the next post to see pictures of those.


-
Thanks. I checked but they say the same thing. "No longer available" from them either. If it was, it would be $400. I bought the used Craftsman sander. It needs $35 worth of new bearings---already ordered. I think my old sander had been used by Noah when he built the Ark.
-
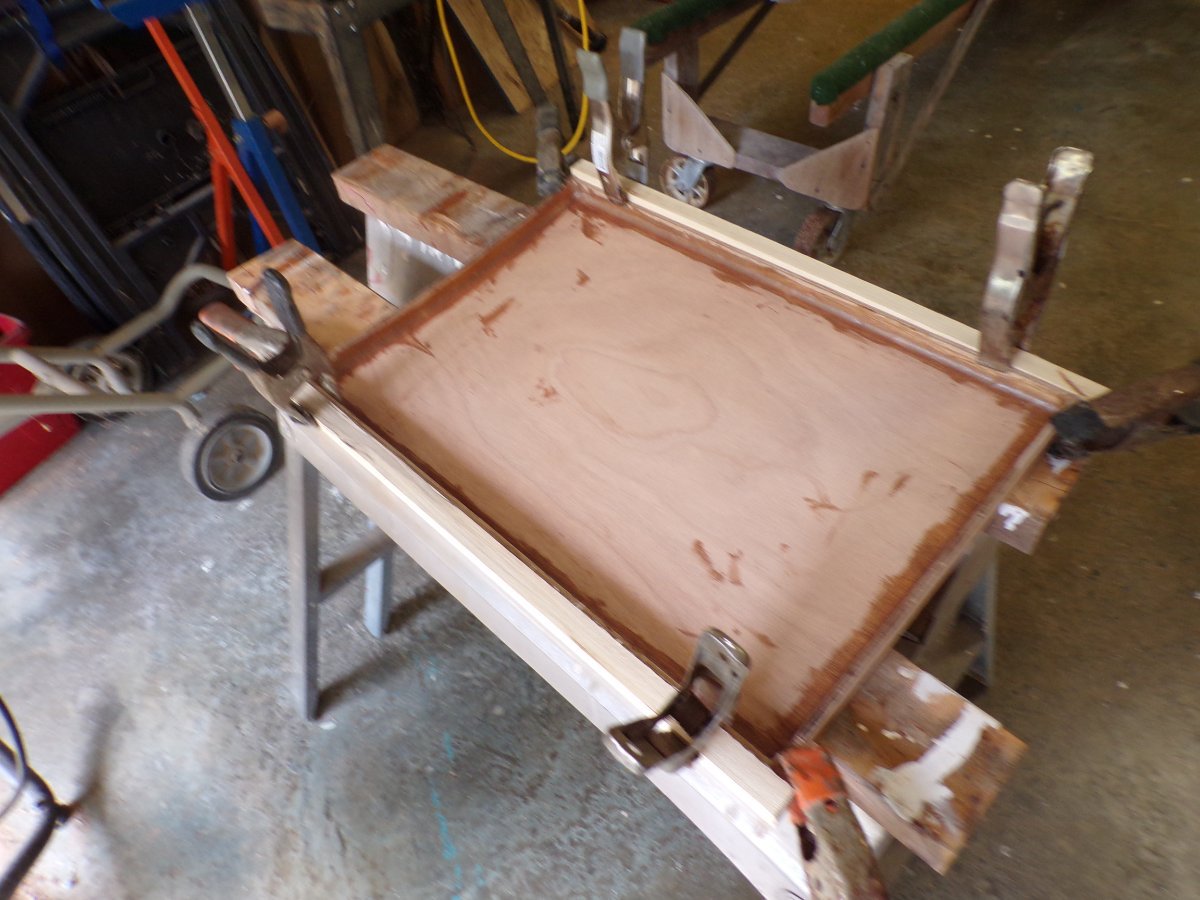
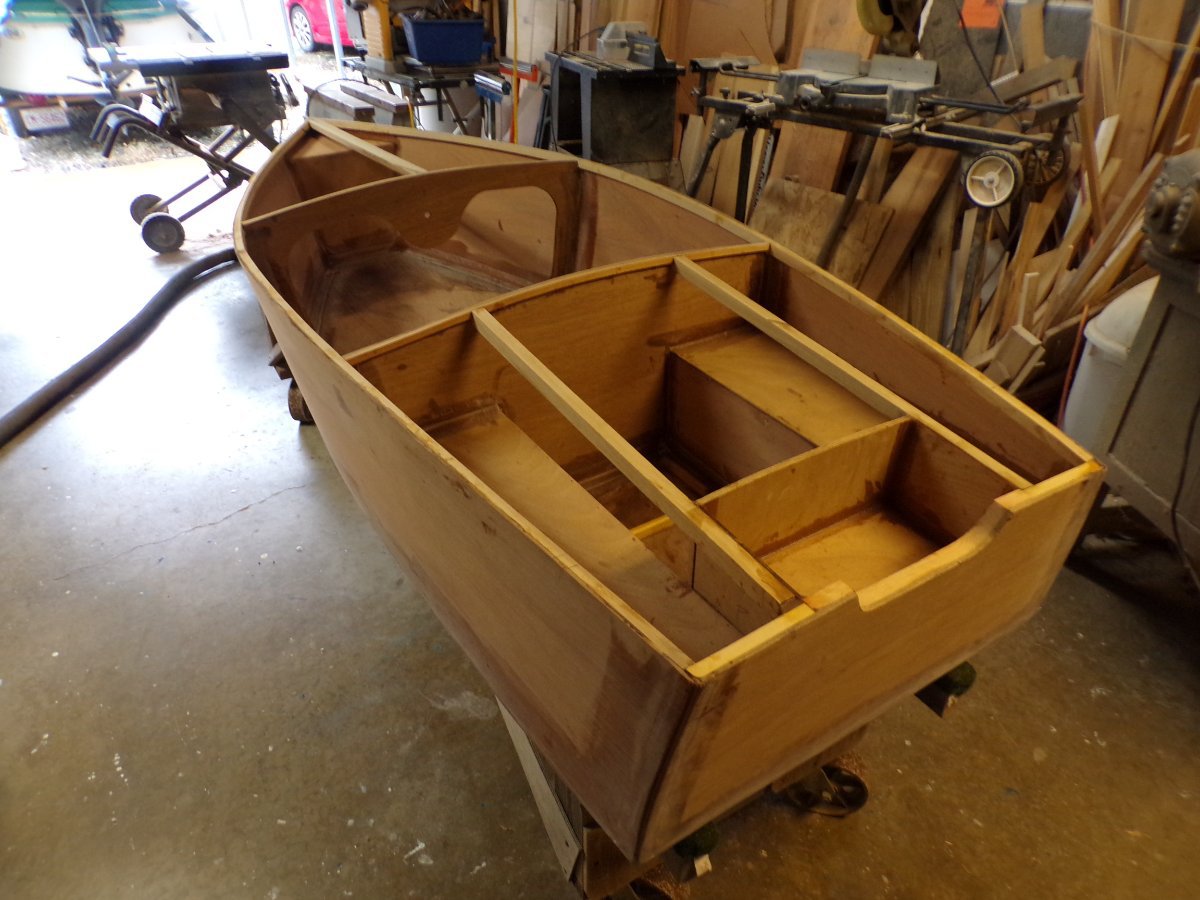
Mini-boat (#2 - after this post, I'll leave off the "#2") )Post #3 Today's main job was to make flotation boxes. Boat #1 didn't have them and could sink from the weight of the battery and motor. The pictures show them “tabbed” in place with a few dabs of hot-melt glue holding them until they can be poxy filleted. I need to poxy coat the insides first, They are only air tanks---no foam. While working on this step, the motor on my 6 inch belt sander burned up. Sparks and flames shot out! I called the part supplier for the sander. The motor is obsolete. They have one left for $400!!!! i found another sander on Craigslist for $130. Guess where I'm going this morning.


-
I bet y'all think I forgot about ya. Nope! Just haven't been able to work on the mini. Too much "life" going on. BUT---I finally have gotten a bit done! Added the 3/4" stiffening for the motor area of the transom, and the 1/2" x 3/4" sheer clamps. Also the little "fiddles" to keep the battery where it belongs. I'll be back soon with the next additions.


-
Awww, forget the "rubbing"! Just slap truck bed coating all over it!