Leaderboard


Popular Content
Showing content with the highest reputation since 04/18/2023 in all areas
-
Don, The missing hatch sides and back were in the original drawings. You definitely have a builder modification. The good news is that what is built looks like it is to plan and shouldn't require any alteration to bring it up to spec. I would add some sides and modify the back to clear all of those nuts. Then put a straight edge on the deck across the hatch to measure the gap above the coamings for the gasket and adjust if necessary. I think that you would be better off with a mizzen staysail. It will give you the most bang for the buck. It is mostly in the cockpit and easier to take down if conditions suddenly get ugly.5 points
-
Amos, which takes longer, with or without help?4 points
-
Just in case anyone needs another opinion on silicone; it is pure EVIL!4 points
-
I have had good luck with the 36 brush boxes of brushes from Harbor Freight. After I unwrap the brush I fold the bristles over my shop vac (hose with vacuum on!) and vacuum the loose bristles out. Not for varnish but good for slocking epoxy.4 points
-
Graham in Oriental

 4 points
 -
We now have a website for Graham's Trip! www.sailingforparkinsons.org4 points
-
Heading to have the motor installed. It’s been an adventure, looking forward to see if it floats. Have enjoyed the comments, everyone has been so supportive. Thank you


 4 points
 -
A quick update for anyone interested. The paint job is done! Most hardware and wiring is finished. I'll take her for an outboard motor this weekend and then a test float will follow. This has been a much longer project than originally anticipated but also very fun and rewarding.


.jpg.3d25f02c988959c065ee10842d2fee29.jpg)
 3 points
 -
Since I made the last post, I went to the MASCF and then I trailered Skeena to Amos's place near the start of the Dismal Swamp Canal. We went in tandem to the Messabout and it was so much fun I'm hoping to repeat it this year with maybe a modification of the route. I had promised a few people I'd write up the 2023 experience, but I've had some things going on at work that have taken all my time. I will get to it. I have moved into a house with really no place for a workshop while my wife and I are working with an architect to design another house that will be built over the next year suitable to our retirement. I feel like I have another boat in me. But this means my ability to modify Skeena has been limited. This morning, while it was snowing, I attached cleats to the cabin top like I saw on Amos's Larissa. I also added a table below which is really going to be a nice addition. I'm getting close to retirement, but for now there are times when it will be necessary to work and laptops aren't that great in your lap. The table top uses this mechanism: https://www.amazon.com/gp/product/B09H7J9KQL/ref=ppx_yo_dt_b_search_asin_title?ie=UTF8&psc=1 I need to build a tabletop at a friends who has a shop, but I installed the mechanism and made a thick carboard temporary top and I think this is going to be a nice addition for day I'm stuck below. The neat part is it can be easily removed and stowed. One other thing I'm doing is adding a bigger outboard with reverse. The 2.5 Suzuki I have has plenty of power, but reverse would be so nice. Unfortunately my custom motor mount which works perfect with my 2.5 doesn't work with the Suzuki 6 I purchased. FTR, the 4 was the same weight/size so I went bigger. I'll be adding an extension to the current mount. If anyone with a setup like this posts a picture for R & D purposes, I'd be much obliged. Take Care, Steve3 points
-
This from the guy that cut a great big hole in someone else's boat last winter?3 points
-
Finished my oars and heading south to San Diego tomorrow. After lot’s of overthinking, I made them 9.5’ assembled. When the time came to cut them in “half” I decided to not make the cut in the middle of the length and cut closer to the handle end instead. This allowed me to make a nicer taper from the ferrule towards the blade. My brain wanted symmetry but I remembered an architect friend of mine telling me to break free from the “tyranny of symmetry” when I was designing a kitchen. Sometimes there is something to that concept. They have been epoxy coated and I will wait until I get to the warmer weather in San Diego to varnish them. Thanks for all of the input.


 3 points
 -
Nick- I built this one for rough use and was not super fussy about weight. It came out around 50lbs. My other race skis which are singles are around 32lbs. Some of the high end commercial skis are coming out at 18lbs! Don- I expected to roll and then tip but this product seemed to look better with just the foam roller. Your results may be different. Got a nice Fall paddle in yesterday.
 3 points
 -
That was me, Don. The boat is a Thistle design by Harry Bryan (https://www.harrybryan.com/collections/plans/products/thistle-12). It was in WoodenBoat Small Boats magazine in 2014 and I decided to try to build it. I stretched it to 14' and had a real learning experience (never built a glued lapstrake boat before). Photos below are Harry in his 12' boat and me in mine (I did not make the sail rig). It works -- not fast but easy to make it go. I tell folks it moves at mosey speed. Too windy to mess with it at Messabout.

 3 points
 -
I was at Farley Boat Works as a volunteer boatbuilder when this Core Sound 17 was built. The skill, attention to detail, and commitment to a high quality build were evident every day. The lead builder, Travis's father, has a background as a professional woodworker. This boat is a flagship example of a CS17.3 points
-
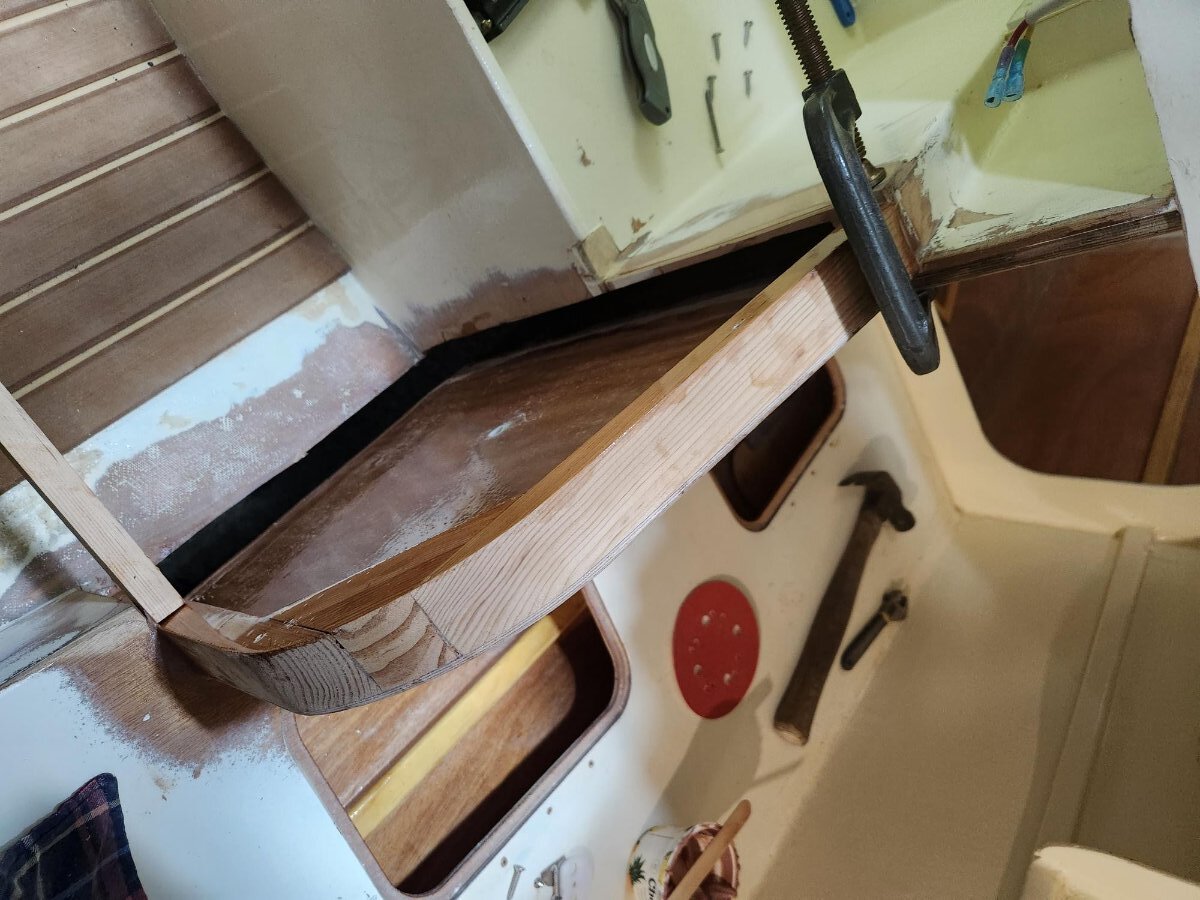
Thanks all for the feedback and tips! I made some good progress this long weekend! I glasses all the hull seams, installed the forward bulkhead, and keel batten (with loads of squeeze out.)
 3 points
 -
You can go either way with glass taping the inside keel seam. I think that it is strong enough without and that was the way that I designed it. There are a couple of points to consider. First, the boat is rather fragile at this point which means that you cannot hog down on the keel batten too hard to force it into place. It would be a lot stronger if the seam was taped. If the keel was fitted nicely and you don't go crazy with props wedges and a hammer, you should be good. there have been a lot built without tape. The second point is not be too frugal with thickened epoxy under the batten. I have seen a couple of older boats get some rot in the keel over time. There was insufficient squeeze-out and the boats were put away with water in the bilge and those voids being at the lowest point in the boat just stayed wet. I would plane or use a round over bit in a router on the top of the keel batten, at least 1/4" radius except where the trunk touches it and at the mizzen mast step. I would use that squeezed out epoxy to lay in the biggest fillet I could in that corner at the keel batten/ bottom junction so that it could be made smooth. The sealer coats of epoxy resin that you will coat the boat with will give you an excellent protective coating. Not to mention that it will look great, be easy to clean and hopefully have a long happy life.3 points
-
almost done


 3 points
 -
Monday never happenned and a week passed by. Yesterday morning I finally got up early before work and closed up the trunk. To keep pressure on the tape I took a piece of foam mat and spray glued it to some plywood. I wrapped the foam with a piece of duck tape. I then made a stick I jammed up the trunk behind it that forced the foam against the joint. I don't have very good pics, but I glued it in and I think Skeena could float right now. Tonight I'll tape the seams. I did decide that I'd open up the uphaul pully inspection port to make it easier to replace the pendant in the future before I glue in the cover. Things looking up.

 3 points
 -
In a few days time it will be two years since we moved on to our yacht full time and began using our S11N as our daily driver. I thought it might be useful to report back on real world experience with the boat. We've cruised from Scotland down to the Med, across the Atlantic, and now we're in the Caribbean. In those two years, we've only had around 100 nights in marinas, so the dinghy has had a lot of use. We do carry a spare dinghy, a tiny round-tail Avon inflatable, but have only used that a handful of times, e.g. in Cape Verde where it didn't seem worth assembling the Spindrift. Overall, it's been a really positive experience and we're delighted with the Spindrift. I must admit I was a little sceptical, thinking that everybody else would have a big RIB with a 15hp. Which they mostly do. But in practice it doesn't make much difference. They may get to shore five minutes faster than me, but then they're stuck with a dinghy that's too heavy to carry up the beach. Compared to a RIB, our carrying capacity is enormous. We can easily take six people plus cargo and still have loads of room to spare. The downsides are things I can live with. There is a bit of ongoing maintenance covering the inevitable scrapes and chips with epoxy and two pack paint. I generally use a stern anchor at the dinghy dock, a complication which inflatables rarely need. We are definitely slower than the RIBs, but faster than those with comparable sized engines. Average about 5.5kt loaded, with a 3hp, and another knot with just one person aboard. The ability to actually row is amazing. I would go as far as to say it makes the Spindrift safer than RIBs. Some of the centre console boats cannot physically be rowed at all, so if your single engine cuts out, you'd better hope there's somebody around to offer a tow. In hindsight I think the 10 would have suited us a little better. Still plenty big enough but a little easier to get on and off the deck. I've made a few modifications which I thought might be of interest: I used split PVC hose to fender the gunwales, then added 4" thick pool noodles below that. It looks scrappy but it does wonders for protection, and adds useful buoyancy and stability. I used eye, rather than wing, nuts and bolts at the nesting bulkhead. This gives plenty of places to tie things to, e.g. a midships line when lying across the stern of the yacht. I added bilge runners on the aft half of the hull, which stiffen the floor, provide protection when beaching, and gave me a good strong location for davit eyes. These are made from folding pad eyes with coach bolts fitted from underneath, through stainless backing plates. Much better to have the smooth domed head showing, rather than a nut. The forward davit eye I made differently. This is made using a u-bolt, and the exposed nuts on the underside of the keel were then buried in thickened epoxy, forming a protective bumper built up on top of the keel. The idea is that this will take groundings without exposing any wood. Finally, I added a lock for the oars. This can be used with a small padlock, or just to stow the oars when sailing to keep them out of the way and safe in case of capsize. It's an aluminium double hook design, and goes through a hole in the rowing seat, then through an aluminium angle bracket on the forward side of the nesting bulkhead. A bungee holds it down, allowing one-handed instant unlocking of the oars. Anyway I hope some of that is useful for anybody contemplating using a Spindrift as a daily tender.


 3 points
 -
Repairability is certainly a big advantage- and I'm hugely grateful to you for your help and advice at a time when most people were telling me to walk away. Incidentally, I've just been helping another cruiser attempt to repair his RIB. It's a Highfield, which are a top brand, made of Hypalon, which is the best available material, and has always been protected from UV by canvas chaps. It's only eight years old. Despite all of this, it is simply disintegrating at the seams. The repair did not work and I think the RIB is destined for scrap. My Spindrift cost about a fifth the price of that RIB and I expect it to last much, much longer...3 points
-
Its finally Spring in Utah and time to move this boat out of the shop and onto a trailer. It has been on a building jig with casters, so moving it about is easy and I have chain hoists in the shop. Unfortunately, hoisting it high enough to get it on a trailer makes it too tall for the overhead door. We pulled it out of the shop on planks and then tackled the problem of hoisting it outside. To make a long story a little shorter, I considered and rejected all kinds of ideas before settling on a contraption I thought I had invented. After sketching it up, I recognized my creation and realized someone had already invented the Gantry crane. We've all seen them in industrial settings. I built one for each end of the boat out of wood. They only had to be high and wide enough to get the trailer under the boat. The boat isn't nearly finished yet, but once on the trailer, I couldn't resist taking her on a field trip. We spent quite a bit of time working on the waterline painting and I have been anxious to see how she will sit on her lines. I suppose its cheating, but I read that Sam Devlin does a private "Builder's Launch" before delivering boats to clients. I called my sneaky little trip to the water a "Float Test". It turns out she floats just fine. Now, back to work...some electrical, trimwork, rubrails, etc..


 3 points
 -
My fitness is definitely improved getting in and out of Skeena. We are making progress. Taping starts tonight.

 3 points
 -
There are no ropes on boats.2 points
-
I am now in the phase of the build that really seems to be the slowest. I haven't had a lot of time to work on the dinghy, in the last few weeks, but when I have, a lot of my time has been spent sanding and fairing. I think I'm letting perfect be the enemy of progress now though, and honestly, this will be a working utility dinghy for us, it's not going to be a show boat. In any case, here's where things are as of today. I've added the bow-eye reinforcement, and drilled the hole for the painter. It is very slightly off-center, but that's ok. I used a block of cherry cut to fit the bow, epoxied it in place, and added 6 layers of glass tape tapering outward. I'll need to come back here later and add some thickened epoxy to clean up the tape lines/etc. For the rest of the interior, I spent a few days sanding everything thoroughly, and went around inspecting for defects. After a lot of consideration, I decided to use fairing compound to correct some of these. Again -- they wouldn't have been noticeable at any reasonable distance, but I couldn't help myself. Afterward I added one last coat of epoxy over everything. I think this is 3-4 coats in total, depending on the location, but I sanded pretty aggressively in the fairing process. I'm hoping this finish coat will only require an amount of sanding purely necessary to provide the mechanical adhesion for the paint. I also got most of the rigging hardware. This week I plan to paint if time/conditions allow. I should at least be able to get the primer on. Once the interior is painted, I'll separate the two halves and flip the boat over. I need to do a quick repair on one of the nesting bulkheads, and apply some epoxy to the strakes and keel, but otherwise the hull is ready for paint too.


 2 points
 -
Great shot of Carlita under full sail in the EC. Photographer unknown.
.jpg.aae525b7bb540101eda4fad842a3d2b4.jpg) 2 points
2 points -
When doing epoxy work in the summer (in RI), I would some times place the jugs of both parts in an ice water bath. I might have to wait a few minutes trying to mix them, till they thinned back out, but it would buy me a little time in the pot life.2 points
-
Absolutely agree Dave, silicone sealer is some terrible stuff. My wife had a Tripp design Columbia 26 that “someone” had put about 2 lbs of the stuff on the ports. I ended up using a wire wheel on a drill to remove it. Again I mention excellent luck with VHB on plexiglass/hull interface. Back to sprit haulage….2 points
-
I ended up with 4 coats of graphite epoxy on the bottom of the Duckworks Scout I built last summer. (Sorry all, non-B&B product.) I was impressed with the way it held up to Door County Rocks and miscellaneous driveway scuffs. It certainly is better than scuffing through enamel and revealing primer or glass. I did some sanding with 320 between coats to get it smooth and glossy the way I wanted. I recommend it. But no studies.2 points
-
While leaving things bright would be pretty, this is going to be a working dinghy. So the easier maintenance, the better. We also replaced the (old, leaky) teak deck on our boat with paint, so I guess we're just savages. Here's the first coat of Perfection. Second will go on soon:
 2 points
 -
This is the way Peter McCrary did the top of his mast. As he points out it makes nesting the mast sections doable. I copied his idea and it works well. Here are a couple of photos. This pulley arrangement is an alternative to a cheek block at the head of the smallest mast section — which would prevent “nesting” of that section into the middle section of the mast assembly.2 points
-
I built birdsmouth masts for my Lapwing. They certainly add to the show boat effect, and it was very satisfying to complete them, but I would never use the word fun. Making the tapered staves and gluing all 8 of them together at the same time can only be described as tedious. Making them round was extremely satisfying. I find the word "fun" does not apply here.2 points
-
Here's what I have now. (Instead of the full mizzen mast, I just had a piece of mast tubing stuck in for the canvas crew to work with.) In use, I'll run the mizzen sail up above this unit and tie the sail and sprit up with the halyard. Same for the main. This rear "tent" ties into the dodger I already have. The back end hangs down to the bottom and lands on the seats with no tie downs, enough to run rain down and off. It's stiff enough that I don't foresee any wind problems. The sides are snapped in. There are screens in the back, with canvas covers over, and the back flaps also roll up nicely for an open rear if desired. As I mentioned earlier, I gave up trying to keep the full cockpit dry. This gives me enough room to sleep and cook (if needed) on the platform made of the boards I put across the front footwells. Yes, there will be rainwater on the boat bottom below, but I will bail and pump it out when the time comes. Works for me, I guess. Harken Canvas did the work.
 2 points
 -
Back in mid-October, I made a quick trip down to Florida, to snag a deal on a sound but older Core Sound 17 mk1. I know that I fell in love with Avocet last winter, but I am still a daysailer at heart. This boat was professionally built and garage kept, but needs a little work. The original paint job is holding up on the exterior, but the interior has beed painted over, and is peeling. Several systems need an update, such as reefing. I hope to sail her in Florida for a few weeks this winter, but the paint job will have to wait until the trimaran is out of here. I plan to make upgrades to the boat over the next year or so. Throughout the process, I’ll have questions for y’all, so stay tuned. In the meantime, here are a few photos of my new/old boat. I’m going to name her “Windependent”. I took this in FL, the day I brought her home. The remaining photos are off the Marketplace add. I’ll take and post a few photos this weekend.


 2 points
 -
Well its been a while and I have neglected posting any finish work shots, since the work is fairly boring in color. And pictures from phones are way to large and I don't know how to transfer them to here, which also are huge. But i have reached the point that I think I am within a week of finally getting the final coat of topcoat in it. Life has a way of altering the best laid plans. Fairing was not as easy as it used to be. Its been a while since I used a gorilla board to sand and fair and had really forgot about how much fun it was and excersize I got when getting up close and personal with the real warmth that wood gives you. . But the summer was a bit humid and gummy on the surface, which slowed the process too. So anyway, upon finishing a bit more high build primer in areas and sanding, then topcoat, she will see sunshine and the inside will see sunlight too after the flip.2 points
-
Just finished a new double strip surfski. Interestingly the Swedish designer calls it a Spindrift 2. I have built a version of his Spindrift single and of course Graham’s Spindrift dinghy. I am on quite a Spindrift roll. Which brings me to the other part of this topic. I have been using TotalBoat Halcyon Waterbourne varnish for a couple of years. Incredibly easy to apply and has proven to be durable. Not as much gloss as traditional varnish but for me the ease of application is worth the tradeoff. I have put 5 coats on Rosie’s rails in one day. I just completed the new surfski and decided to try rolling and tipping the Halcyon on the hull and deck. I used foam ‘hot dog’ rollers and soon realized the finish was better without tipping. The Roller left a faint orange peel but acceptable. I was able to do 4 coats in one day and am calling it done for now. I did take out for it’s first spin before varnish. If the weather is good Luanne and I will do a longer paddle in it tomorrow. Nothing quite as much fun as messing about in a boat you just built. Ken


 2 points
 -
Hi, I'm David Jones owner of this Seaclipper 16. I live right next to a lake in Dallas TX in a Senior Living Center. Daily, I look out my window and see sailors in their boats enjoying the winds. As a sailor myself, in years gone by, I itched to be on the lake too. I wanted a trimaran for it's stability and quickness on a puff of wind, but no commercial entity caught my eye. So, why not build one. Don Silsbe was one of the people who answered my ad for a builder. He showed me builds of several of the boats he has built....needless to say, I was impressed! We corresponded back and forth over hundreds of emails and settled on this design as something he could build over the winter. My son-in-law also lives in NC and will bring the finished boat to me in Dallas. We have a contract for this project and the decision making on construction details and how the money is spent is all laid out. I feel very fortunate to have found Don to build this dream of mine, and as this will satisfy his "need to build" it is a win for both of us.2 points
-
Harbor Freight boxes of 36 worked well for me (good brushes were used for paint and varnish.) Once in a while I taped two brushes together by the handles for a “heftier” brush when working with epoxy. They cleaned up well in acetone for reuse. (I usually had three 4” covered jars; the first jar was discarded when the acetone got too “thick” and I’d start a new third jar with fresh acetone.) I could use the “disposable” brushes for some repeated use before discarding. Good ideas on using a vacuum and trimming the bristles. Yes, I have some bristles permanently in the epoxy of my boat.2 points
-
2 points
-
Looking good and bringing back memories. I did my tape like yours. I did slide my tape just a bit to reinforce the bolt holes, FWIW. I think that first pic is at the stern. I knife can clean that joint up quickly. You aren't getting any strength out of that gap. After you add your fill coats you can fair it if you are going to paint it. "Don't let perfection be the enemy of good". In the end, after you've used her, none of this will matter as long as she's solid. Take Care, Steve2 points
-
If you have specific questions, take photos, and post them. There is no such thing as a stupid question on this forum. This rig is very familiar to most of us on this forum. Your biggest problem will be which person’s advice to choose!2 points
-
I thought I would like to assure Graham, Alan and all CS sailors that the masthead float works as intended. That is, with 'Moby Turtle' the streamlined turtle ball in place atop the mizzen mast of my CS17 yesterday, there was no turtling, just a capsize. The masts lay flat on the surface. This was not planned, unfortunately, but I'm not up to relating the details yet. Nothing injured but my ego.2 points
-
Well I think you can do it easily. Dont listen to those guys. He said he had ppl who could get him if he comes up short so not really anything to lose trying. Also the 20 is faster than the 17. 30 miles is only 6hrs at 5kts. In any fresh breeze you'll be doing 6-7kts and could easily make the miles. You will have to cross your fingers for some northerly winds however. And plan on storms. There's always storm's in the bay. Shoot I'd do it.2 points
-
Yeah, this. I would make sure you have sanded the inside of the frames where the bags go at least, if not all of them.2 points
-
The resin on the transom yielded to the gentle persuasion of 80 grit, but it was astonishingly hard. Still it sanded off and now with some stain in place it will probably look OK when varnished. I guess also with the white paint going over onto the edge of the planks, a rudder and other things going on to distract the eye from small blemishes, it will look fine. Suddenly I am at the point where the list of tasks is becoming manageable; Carlin supports tomorrow, then carlins can go in, hatch covers, decks, then sanding for a few weeks... Then tipped over for final coats of hull paint, gunwales, rubbing strips, a rebuild of the rudder stock, oh then.... actually still quite a list...


 2 points
 -
He finally got a chance to take it out. Finished a bit late last yr and was too cold for him. He really liked it. He is 4 so still a bit small for it. He was learning how to paddle. Calling each stroke, weft, wight, weft, wight.

 2 points
 -
I added coaming supports to my Ravenswood after I completed it and found that the plywood coaming flexed more than I liked when getting in and out of the boat. Since I couldn't lash them in, I glued them to the gunwales and lower layer of coaming with epoxy (see pic below). If I was building another boat, I would install lashable ones as shown in Vardo photo above.
 2 points
 -
Checking the masts are plumb athwartship. I'd say that's as close as I am going to get. IMG_2848.MOV

 2 points
 -
Nope, never, impossible, this is sacrilege! The WRC looks great.2 points
-
Life and sometimes longevity is about mind over matter. For sure you have the ultimate attitude to manage your current issue. Making the most of what we have at each segment of our life should always be the goal of everyone too. You inspire that each and everyday. It was really nice to see you and catch up a bit over the weekend.2 points
-
Looks like a great route. I am looking forward to following your progress. What a worthy cause to raise funds for. It checks a lot of boxes, self empowerment, community support, education, and awareness. Fair winds and not too many bugs.2 points